Guide to Using RenderWow for 3ds Max Renderings
1 How to Install Shinewonder's 3ds Max Plugin
2 Simple Workflow for Using the (Shinewonder 3ds Max) Plugin
3 Detailed Function Description of the Shinewonder 3ds Max Plugin
4 Other miscellaneous features
5 After the upload is completed, you can perform the following operations in the client
Install the plugin
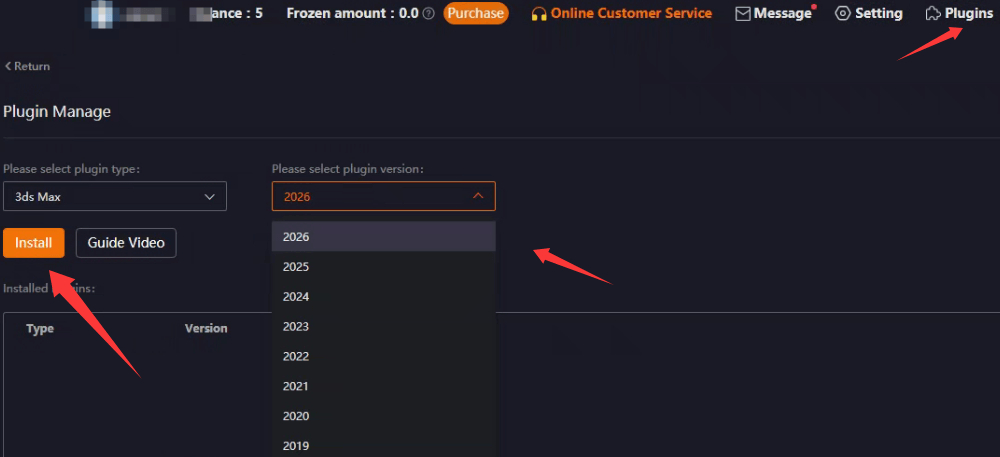
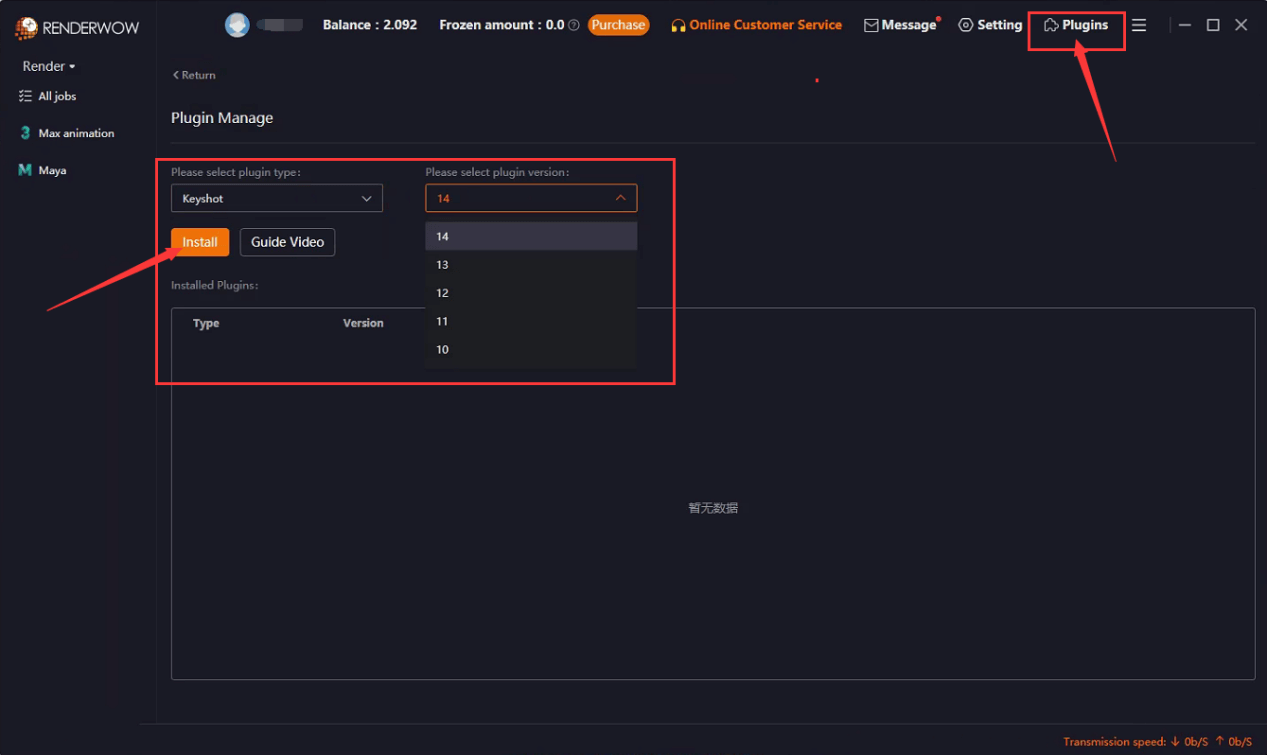
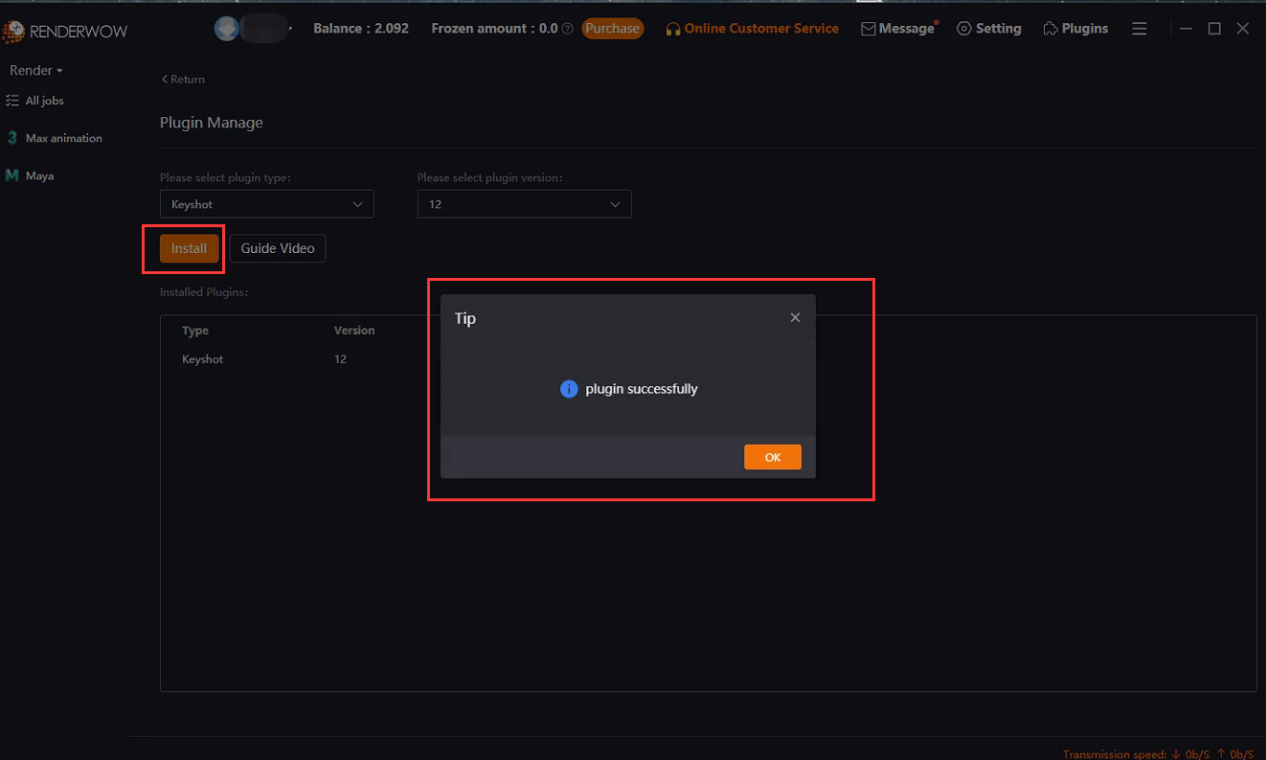
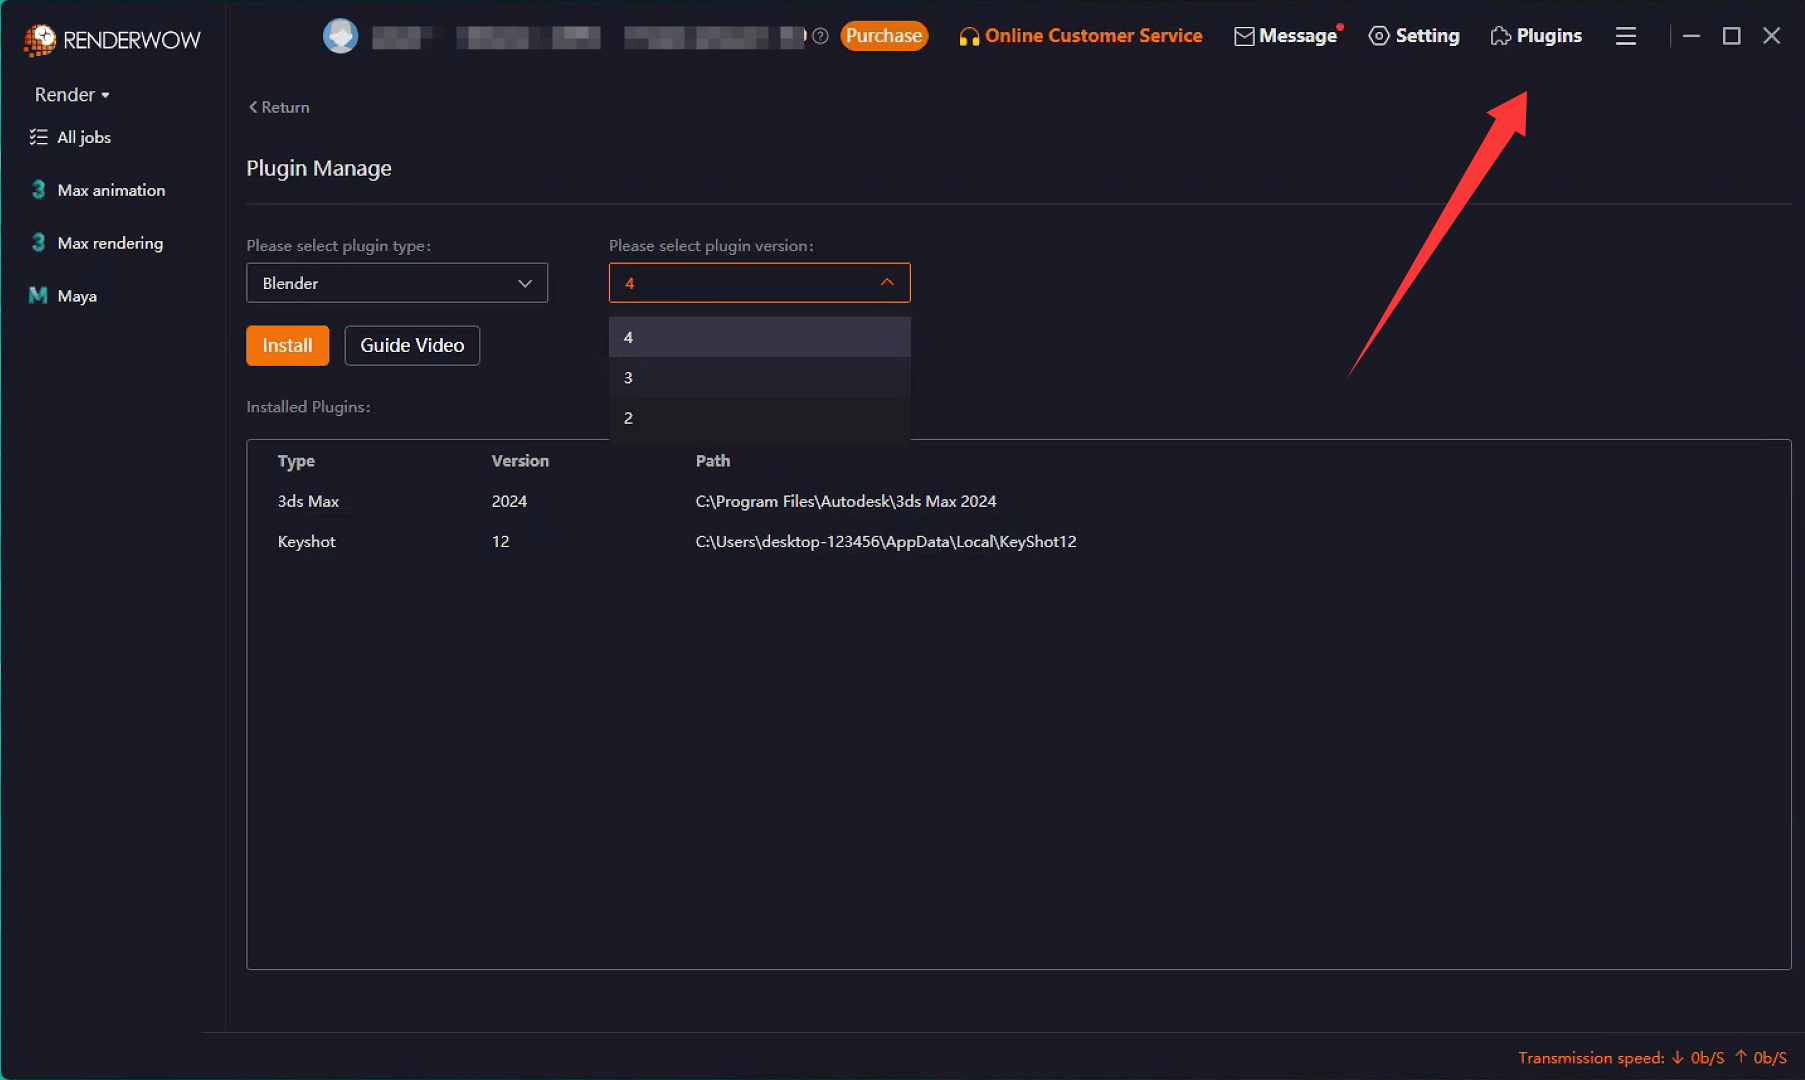
first, go to the plugin management page in the upper right corner.
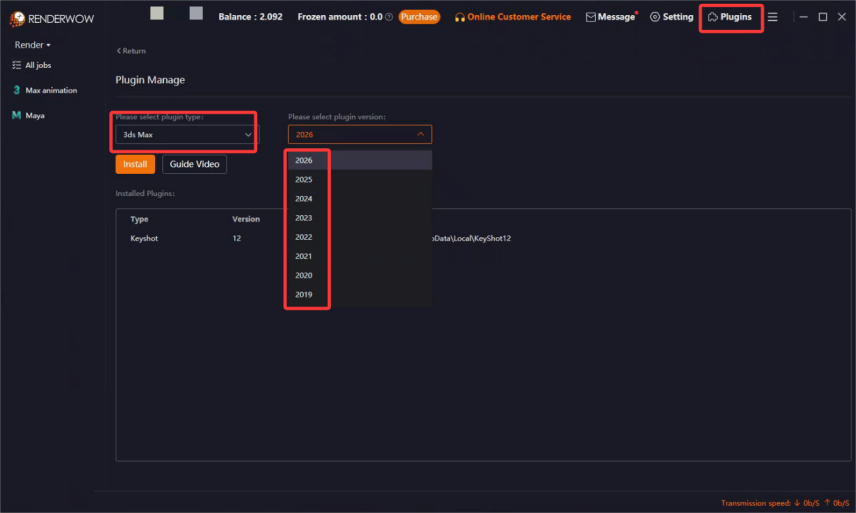
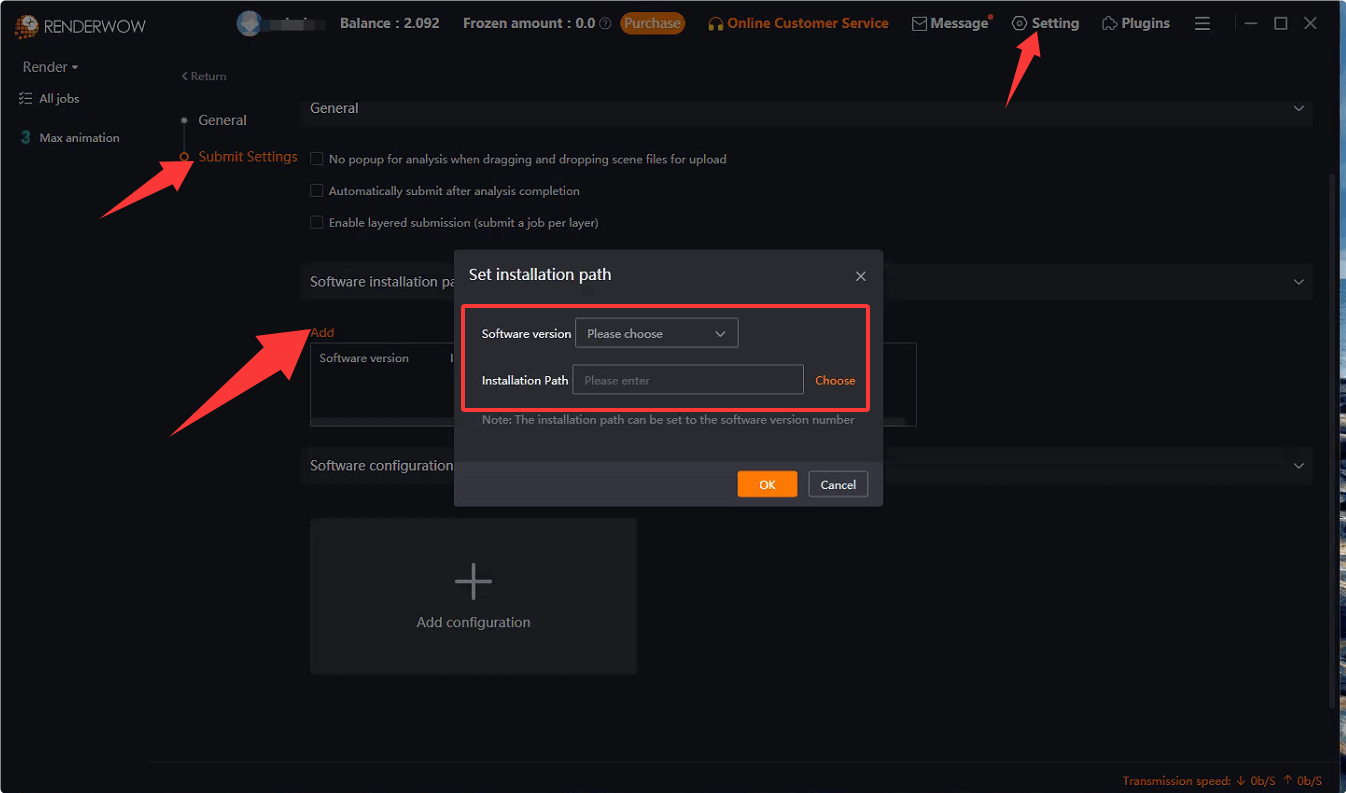
Select 3ds Max and your corresponding local Max version.
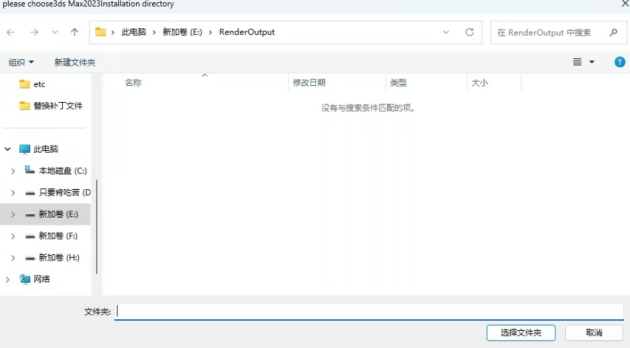
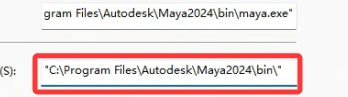
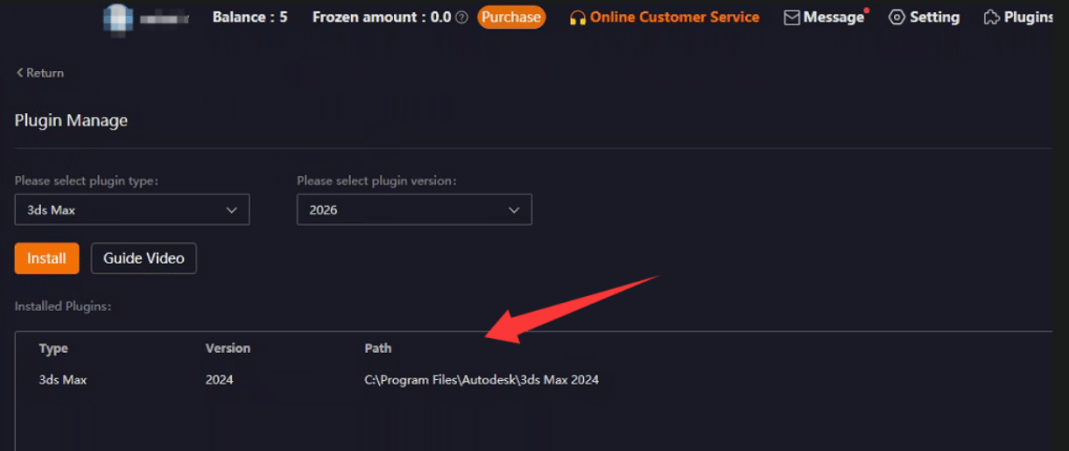
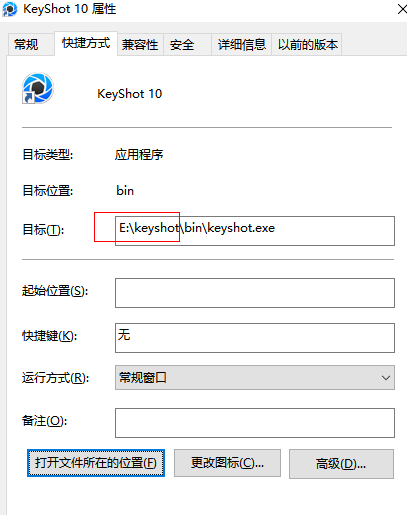
For the first installation, you need to specify the path for the plugin. The path should be the installation directory of 3ds Max. You can right-click on the 3ds Max icon and select "Properties" to check it.
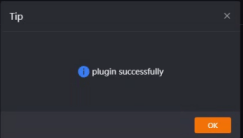
plugin successfully
If an error occurs during installation, you can choose to manually place the plugin into 3ds Max.

First, open the properties interface of client and click on the location where the file is located.Then find the plugin itself through the following path
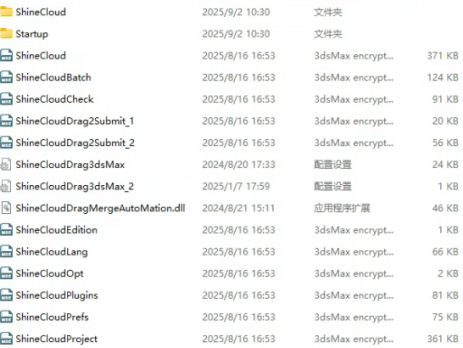
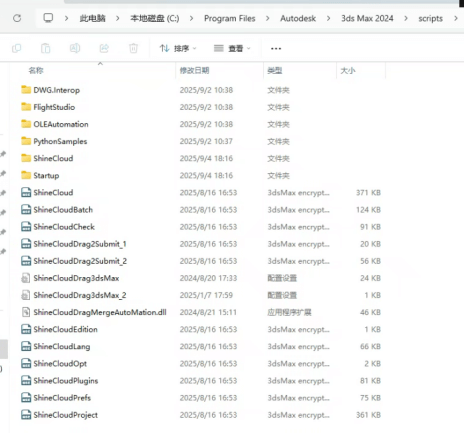
Copy these files and move them to the scripts directory of 3ds Max
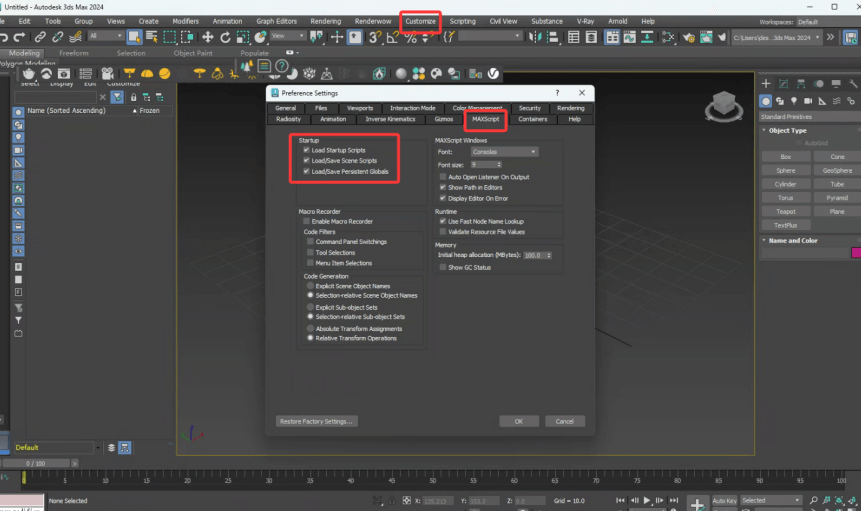
If the plugin option does not appear, go to the "Customize" menu in 3ds Max, click "Preferences", select "Plug-in Manager", and enable the three plug-in license options.
Simple Usage Method

After the installation is completed, the plugin directory will be displayed.
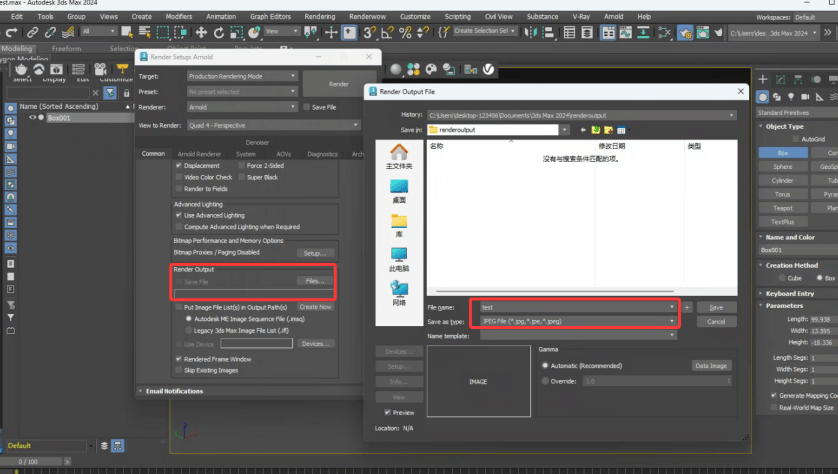
Next, you need to go to the rendering settings of the 3ds Max application itself, find the "Render Output" option, and customize your file format and save path
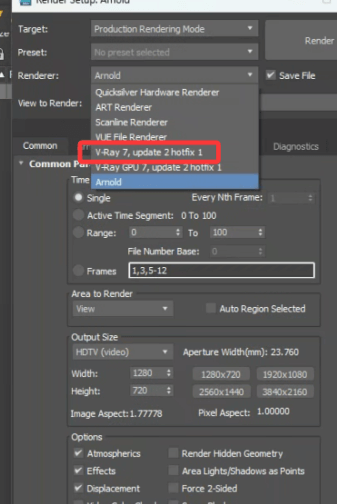
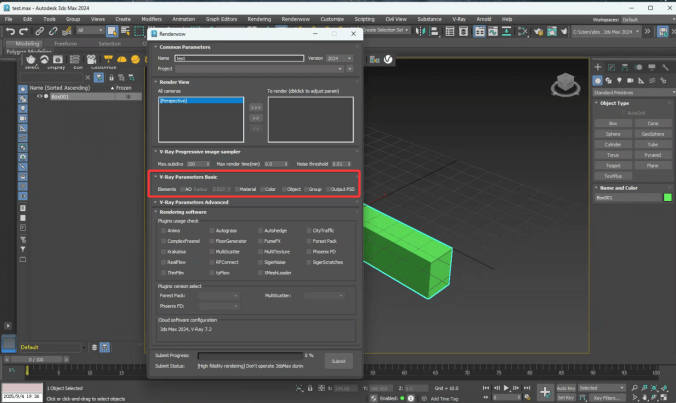
Select your renderer. Here, we'll use V-Ray as an example.
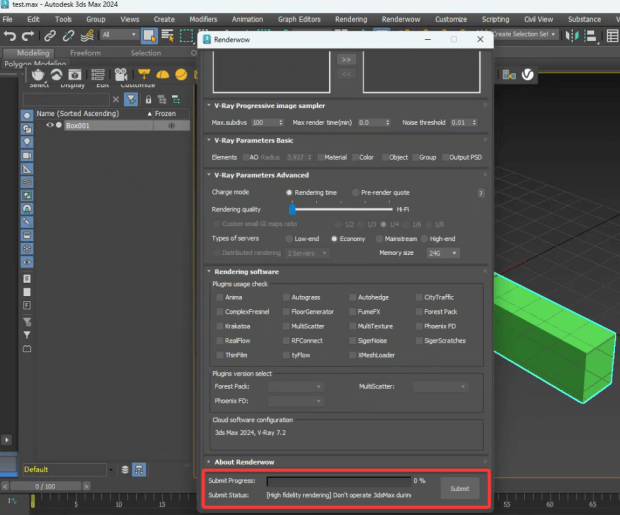
Move the camera view you need to render to the right, then click "Submit" to complete the process

Detailed Introduction to the Plugin's Functions
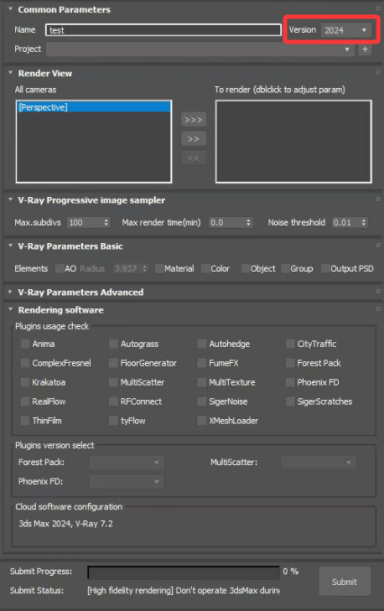
Here, you can modify the version of 3ds Max used when submitting tasks to the cloud. It allows submitting tasks with a version different from your local 3ds Max version
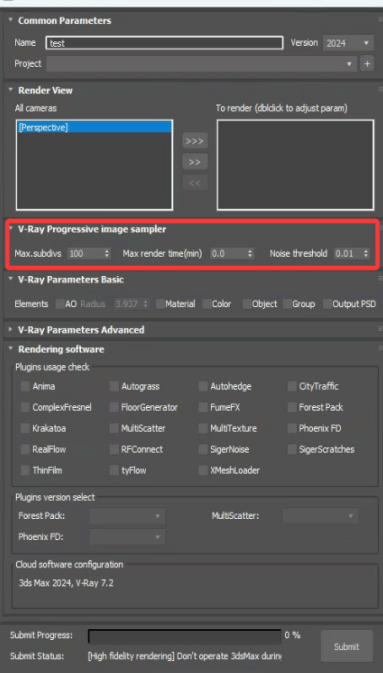
These three options can respectively set the number of denoising passes, denoising time, and denoising threshold. Note that if two options are set, the denoising process will be completed when the first standard is reached
Here you can set various channel files, such as AO maps, color channel maps (material options), and composite PSD files.
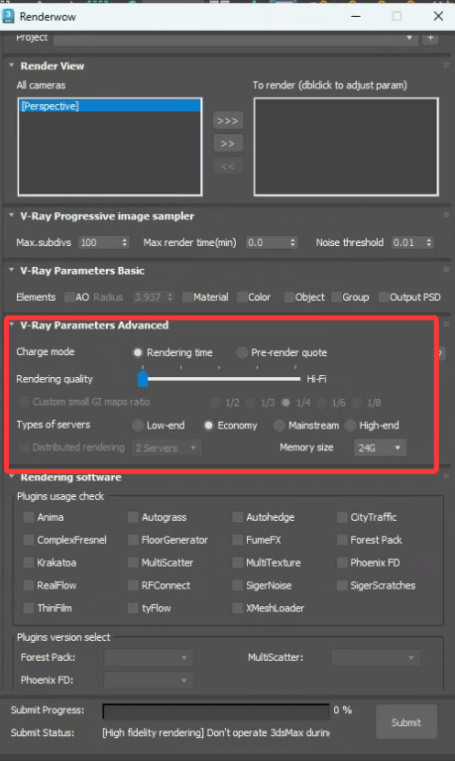
This section is for configuring the specifications of the cloud server used for rendering and setting whether file optimization is required.
There are two billing models: charging based on rendering time, or charging based on file resolution size — the latter is a fixed price.
Parameter-based Billing: Costs are calculated based on the resolution of the output image, with the pricing unit being per megapixel (Mpx) at a unit price of 0.5 RP per Mpx. For example, for a render with a resolution of 2000×2000, the total pixels are (2000×2000)/1,000,000 = 4 Mpx, so the rendering cost for this image is 4 Mpx × 0.5 RP = 2 RP.(Here is based on RMB, and the actual situation is converted according to the user's currency)

If billing is based on time, the cost will be determined by whether the user enables optimization and the different server configurations selected.
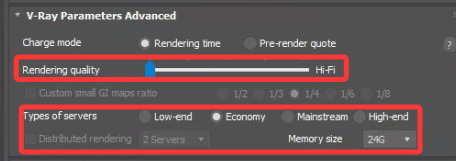
The default setting is High-Fidelity Mode. Sliding to the right will gradually reduce the rendering quality and lower the cost. It is recommended to use the default configuration here—High-Fidelity Mode renders strictly according to the parameter settings on the user's local 3ds Max.
The server options below are divided into four tiers, with the machine configurations increasing from left to right.
The default memory of the server's machine is 24GB, and users can manually increase the memory size.
Distributed rendering refers to multi-machine parallel rendering, which can achieve faster rendering speeds. To enable this function, you need to change 3ds Max's progressive rendering to tile-based rendering.
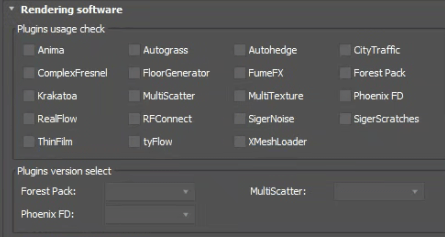
This is the plugin section. You can simply check the box next to any plugin you need to use. For the three plugins listed below, you are required to select a specific version.
Please do not perform any operations before the submission is completed
Client actions
Other miscellaneous features
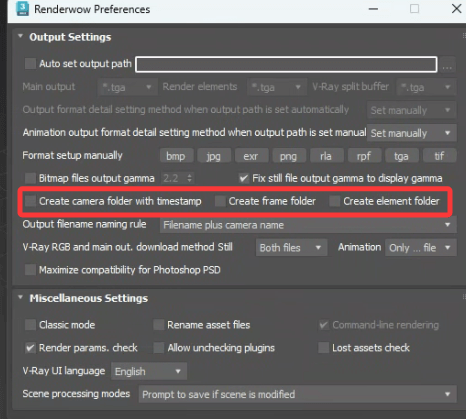
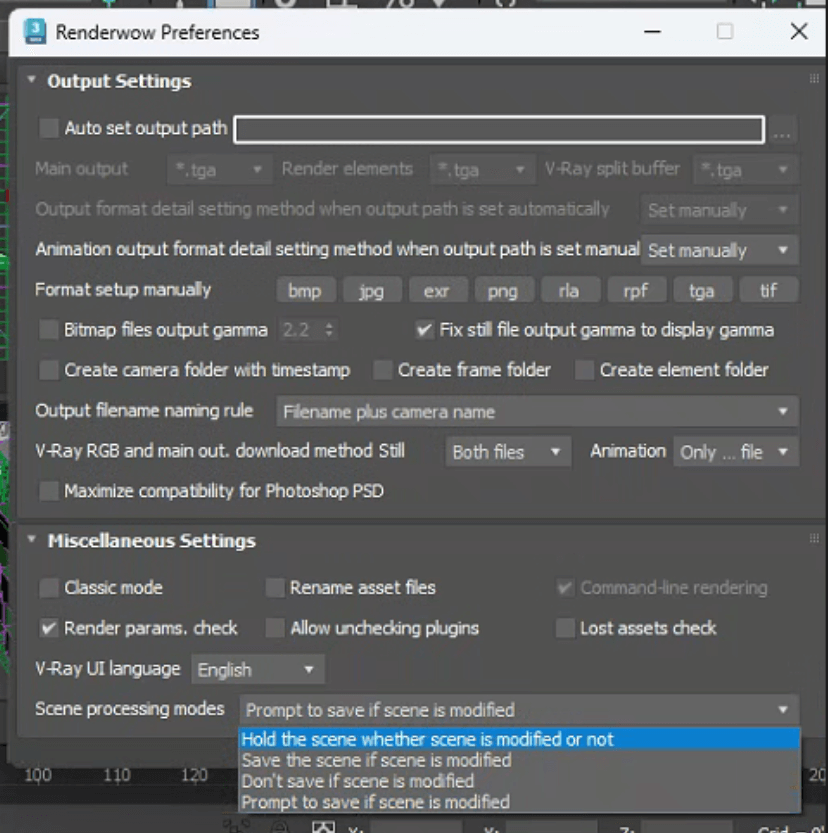
Here you can adjust whether the sequence frame task is saved in the form of subdirectories
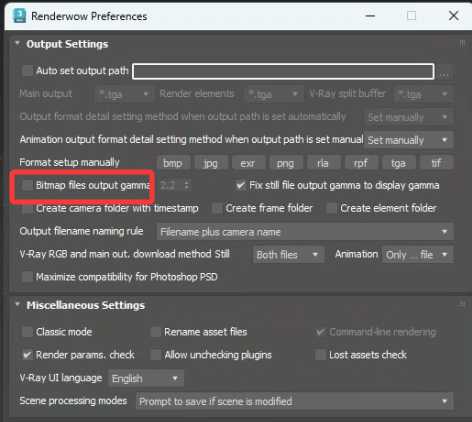
Checking this option will force the rendering results to be overwritten with a gamma value of 2.2.
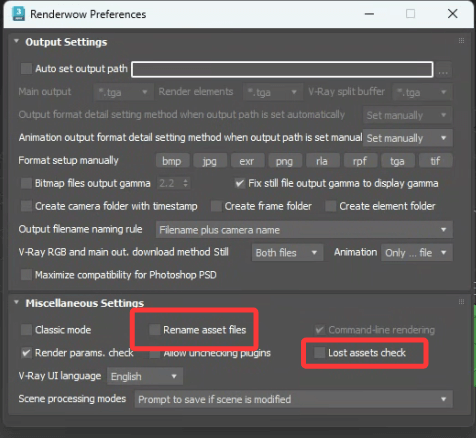
These two options are Rename Assets and Detect Missing Assets. Renaming assets can be combined with the archiving function to prevent texture loss. The detection function can further ensure the integrity of uploaded files.
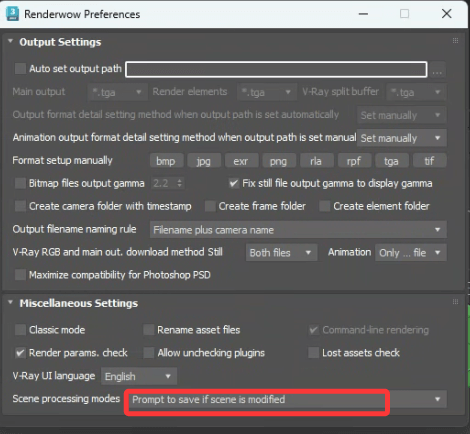
After uploading the task, the plugin will attempt to save the scene. If you do not need to save it, you can set it to cancel at this location.
3ds Max Animation job submission
1、renderwow download URL:https://www.renderwow.com/client/Renderwow_next_7.0.26.3.24401.exe
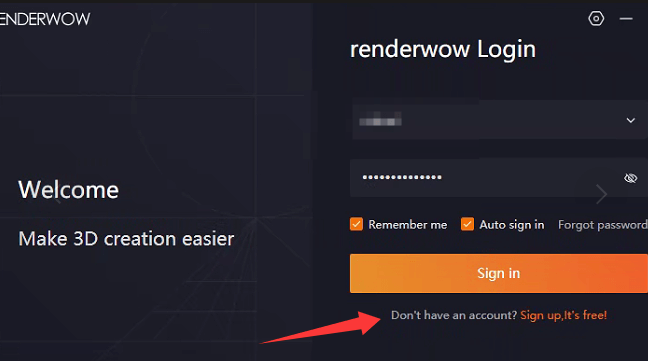
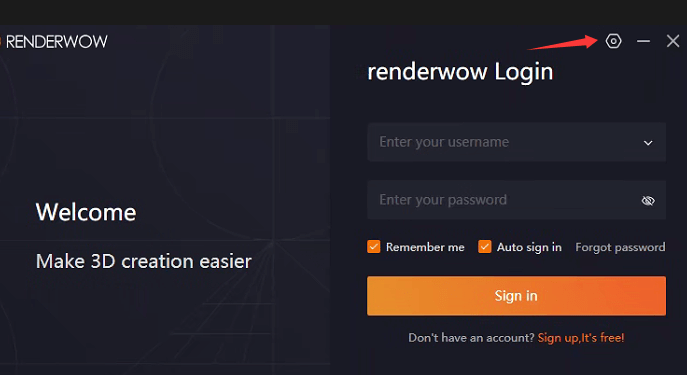
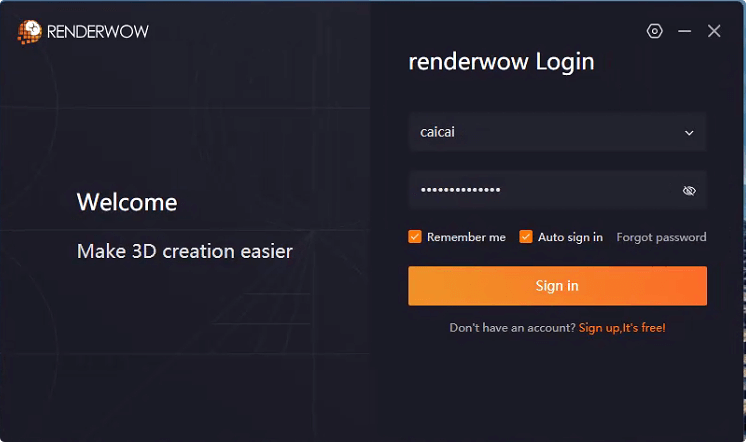
2、Register an account:On the login interface, you can click "sign
up" to directly jump to the registration page
2、Register an account:On the login interface, you can click "sign up" to directly jump to the registration page
Or open the registration website to :https://cloud.renderwow.com/login-auth-web/#/signIn
3、Input the registered account and password to log in and use
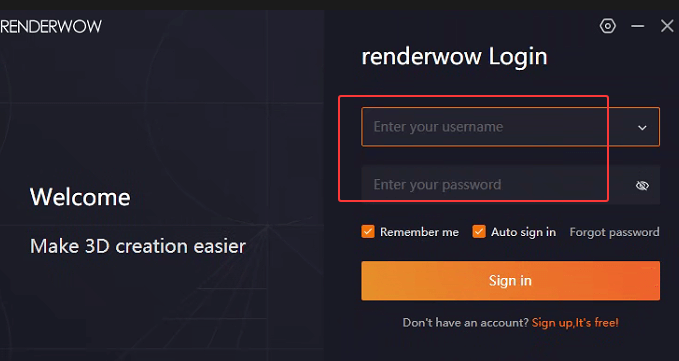
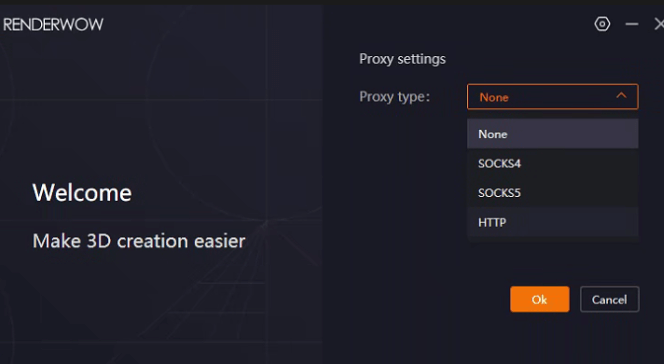
When the network connection is poor, you can click on the upper right corner of the login interface to enter and set up network acceleration
4、Install the plugin into 3Dsmax
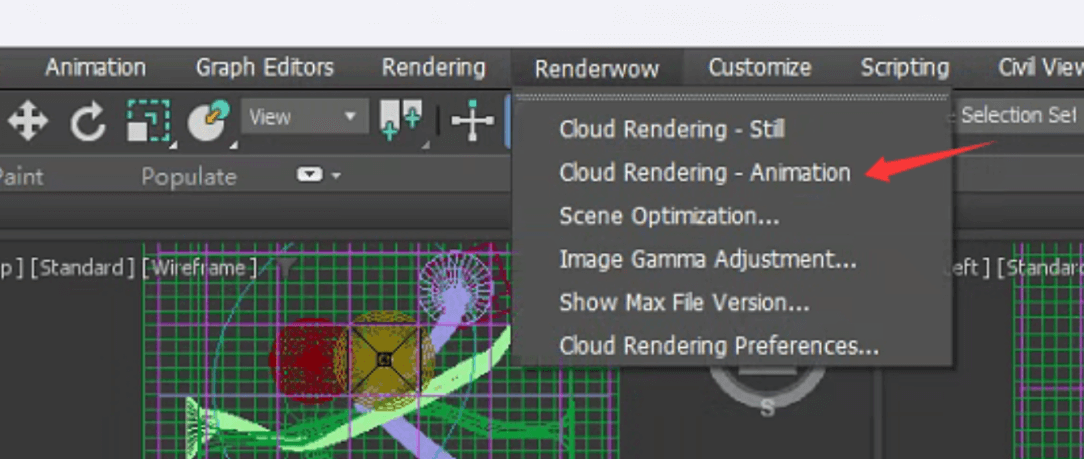
The menu bar in 3Dsmax appears: RenderWow
5、Submit rendering
①Preparation before rendering: Max scene parameters need to be set in advance, such as image storage output path, image resolution, lighting parameters, etc
②After setting and saving the required rendering parameters, you can click on RenderWow rendering-Animation to enter the submission panel
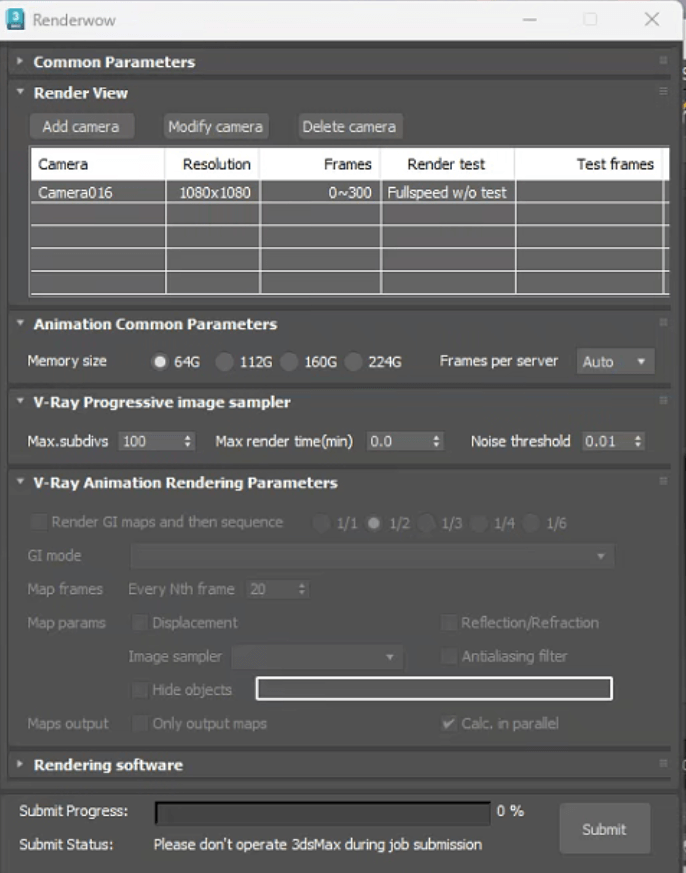
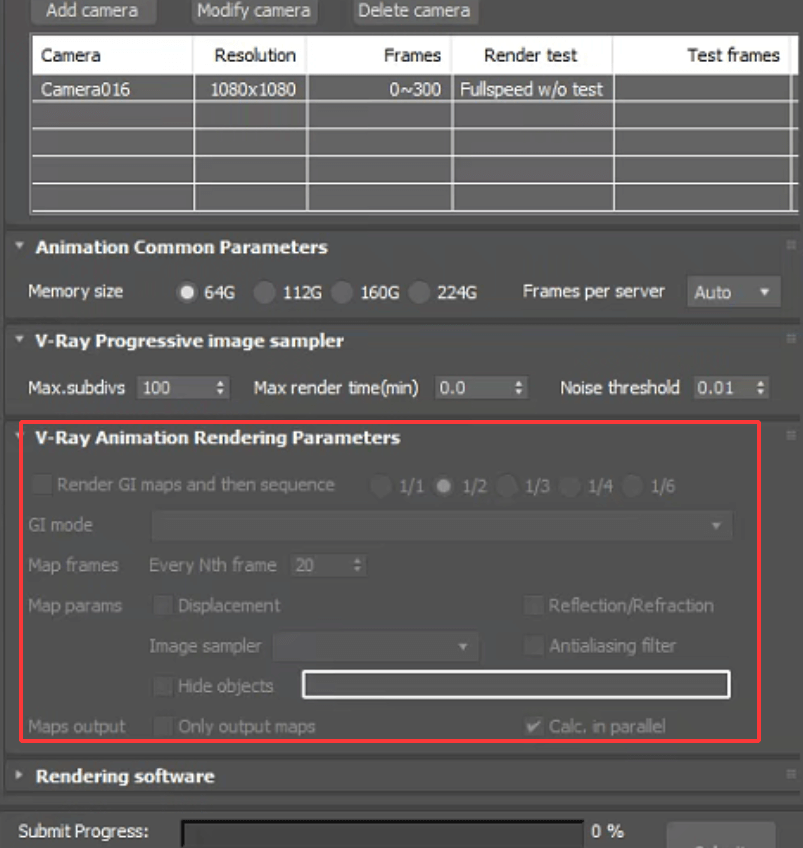
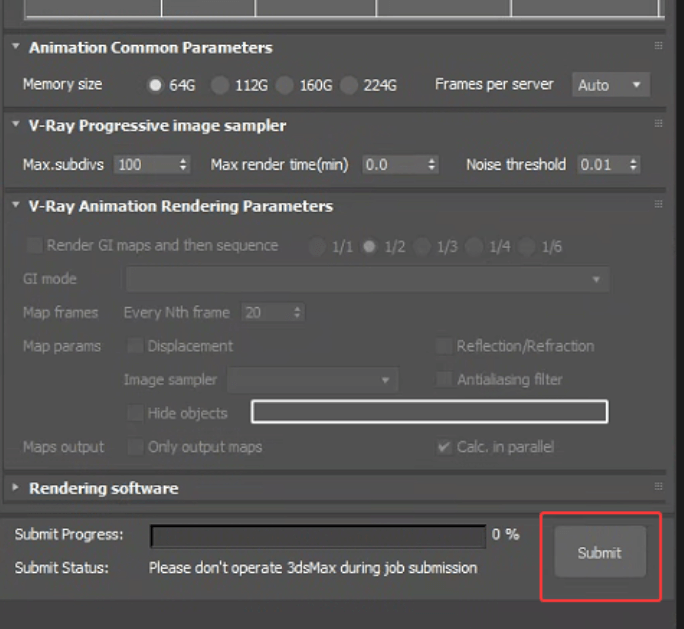
Submit interface function, set as needed, as shown in the figure:
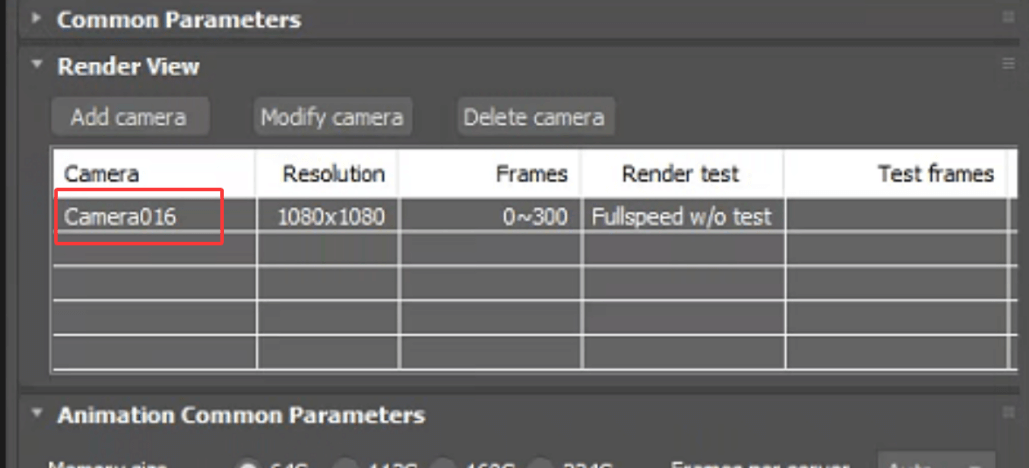
Double click to render the rendering lens:
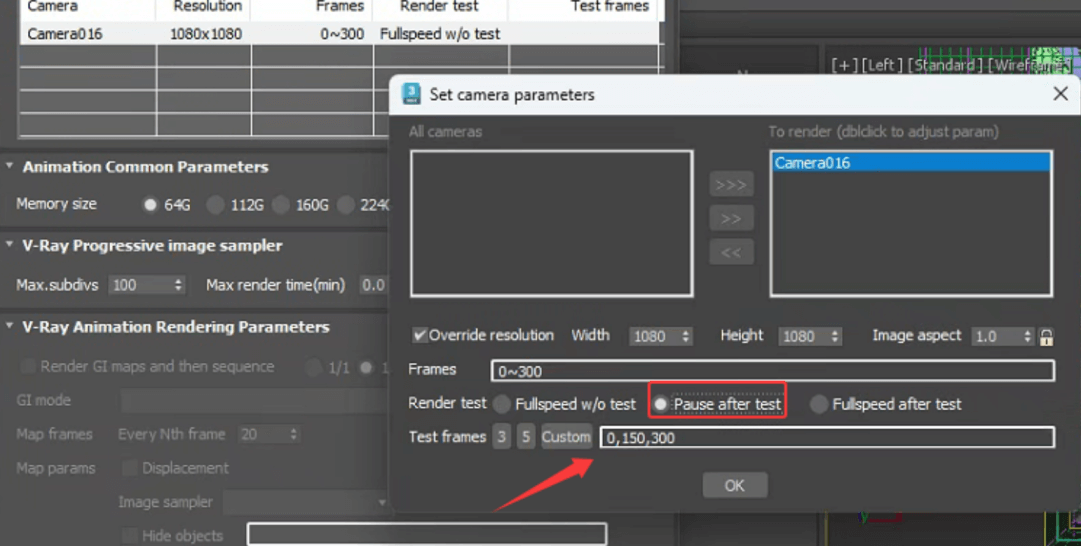
Rendering Test:
①fullspeed w/o test :Directly render all frames without testing
②pause after test :Set the test frame, and temporarily do not render other frames after rendering the test frame (for effect confirmation, if there are no problems, you can restore rendering by right clicking on the task operation in the RenderWow)
③fullspeed after test :Automatically add machine rendering to all frames after testing frame completion
test frames :
3 or 5 is the average of the beginning, middle, and end, and 3 or 5 frames are taken for testing,If average frame points are not required, you can customize and input the frames that need to be rendered first
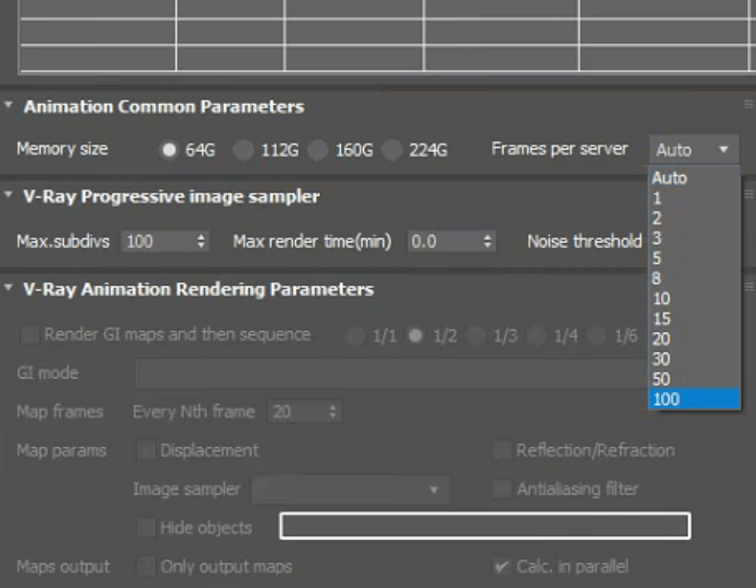
Number of frames rendered by each machine: You can customize the number of frames rendered by one machine, with values ranging from 1 to 100
Support the 'Automatically render small photons first and then render the final image' for animation photons, The photon mode will automatically recognize the photon mode in the' Rendering Settings' - 'GI' panel.
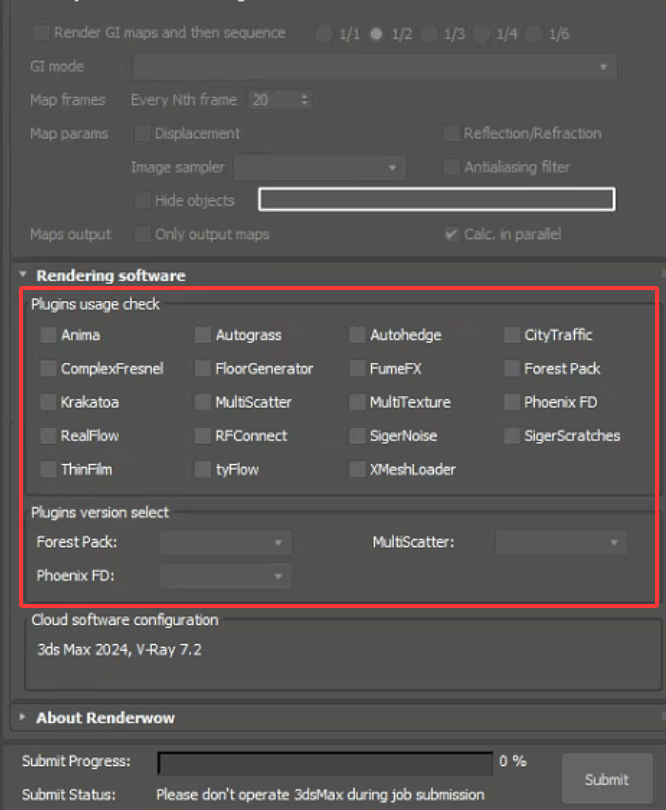
Rendering plugins usage check:
The plugin will automatically detect the plugins used in the current scene and select/remove plugin options as needed Forest、MultiScatter、PhoenixFD, If these three plugins are used, the correct version needs to be selected. If the required version is not available, please contact customer service for feedback.
If the supported plugin options are missing, please contact customer service for feedback.
RenderWow preferences:
6、Confirm submissionM
The required parameters have been determined and modified, and you can click submit for rendering
7、RenderWow usage
After successfully submitting the task, RenderWow will display the task for packaging and uploading, and then start rendering
Support checking the rendering progress of tasks at any time. Click on the lens you want to view, right-click to select "View Screenshot" to view rendering preview and progress

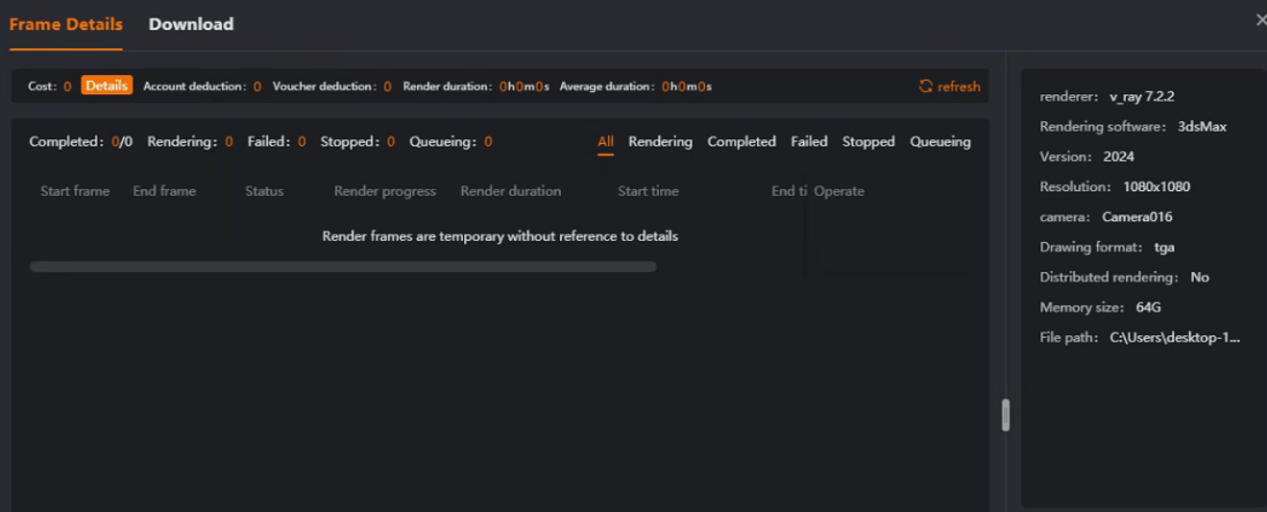
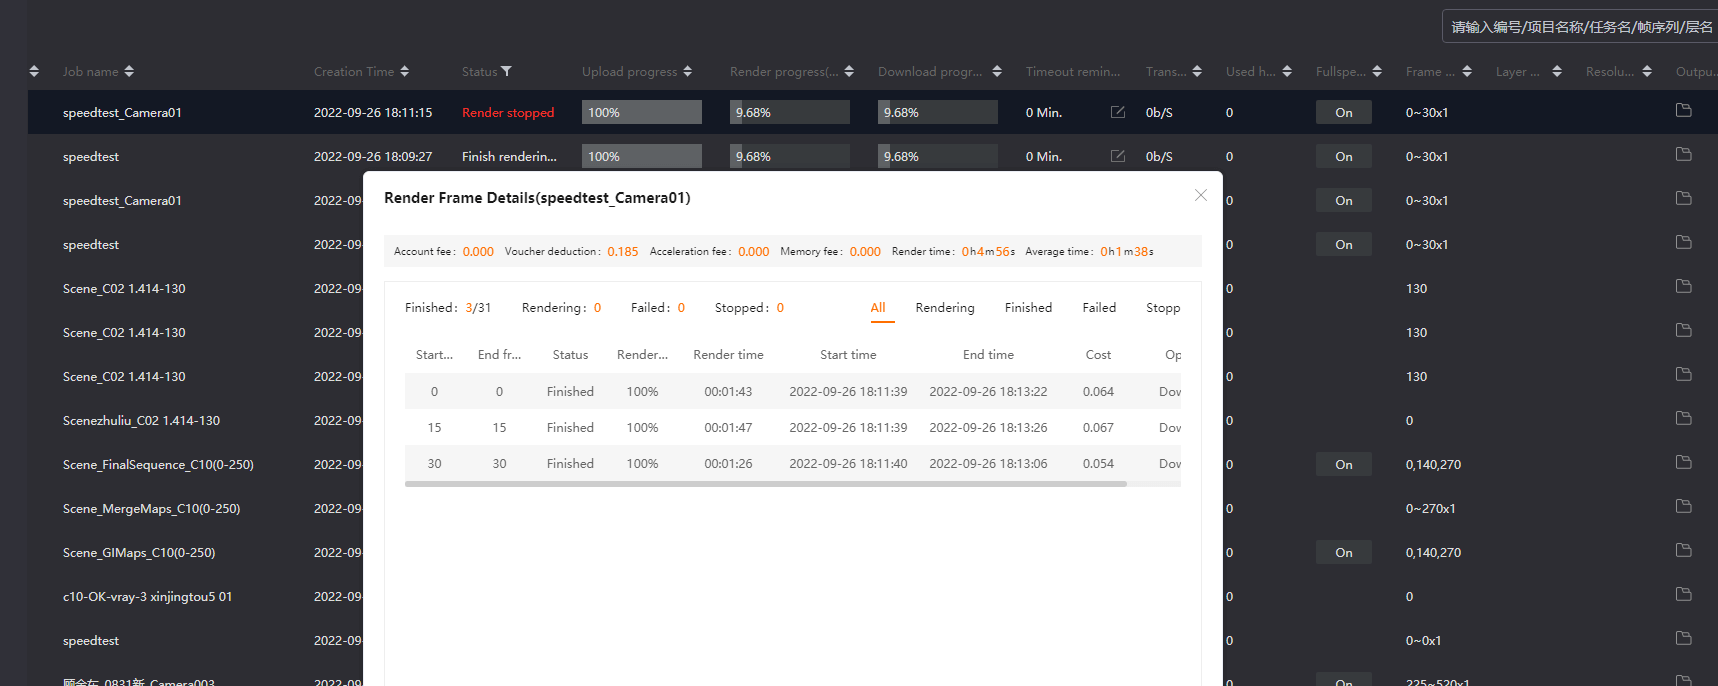
Double click the completed frame of the task to view frame details, including single frame time and cost, total rendering time and total cost of the task
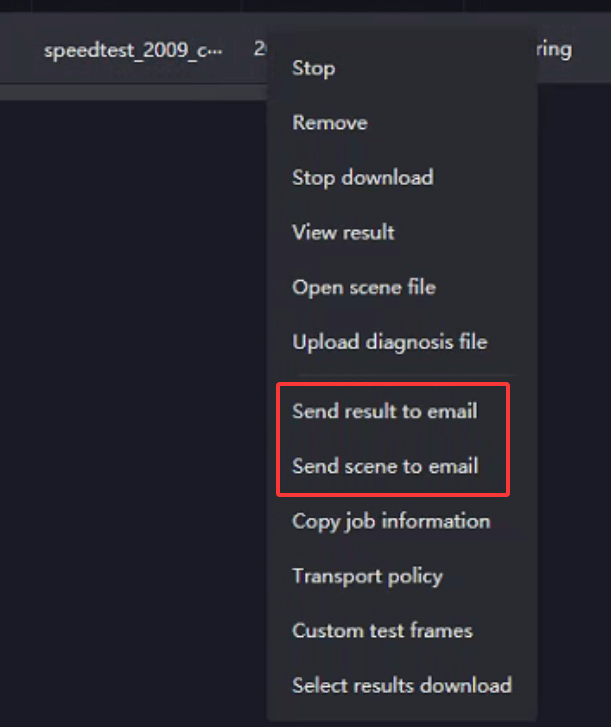
Support setting 'Send Results to Email', right-click on the task, and after the task is completed, a packaging link will be generated and sent to the set email
Keyshot
1. Please install the latest version of the RenderWow client on the RenderWow official website and register an account to log in to this software.
2. Install your local version of the keyshot plugin at the location where the plugin is installed on the client side (as shown in the figure).
3. Keyshot currently supports drag-and-drop submission. After setting the rendering parameters and saving them, you can directly drag them to the client for submission. You need to set the output path and output format
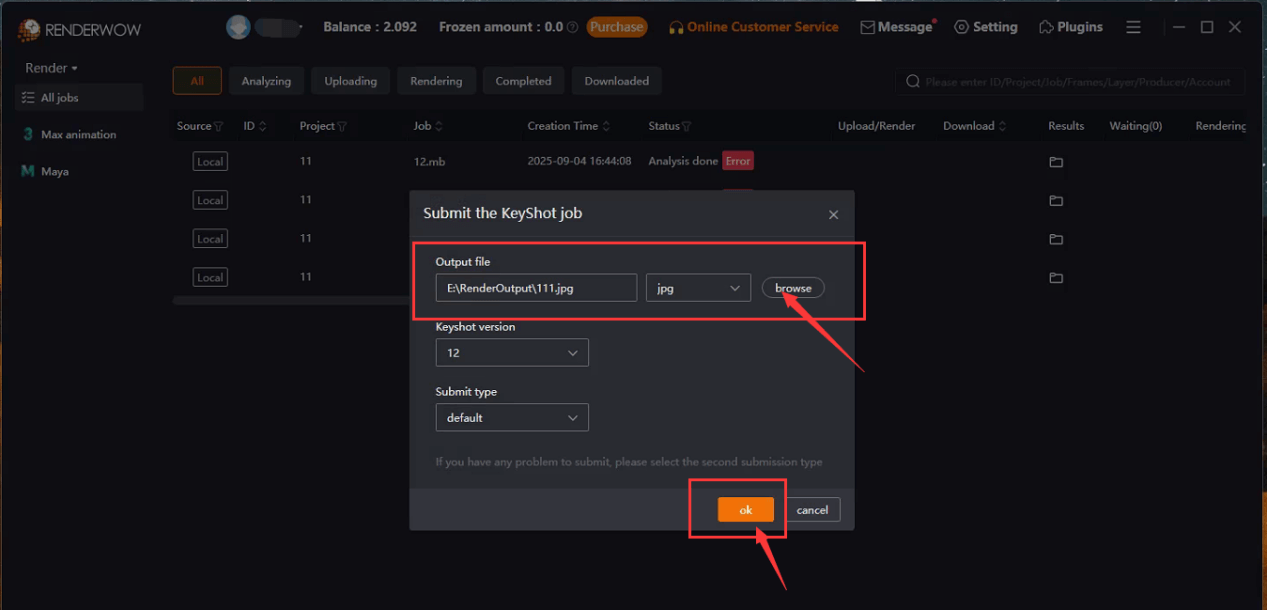
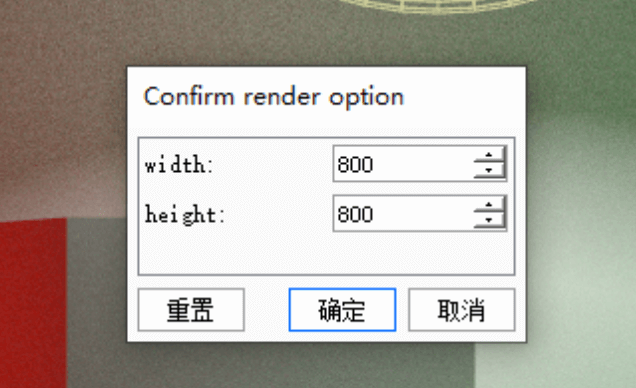
4. After clicking "Save", the plugin will automatically open keyshot and pop up a window confirming the resolution. You can set the required resolution by yourself
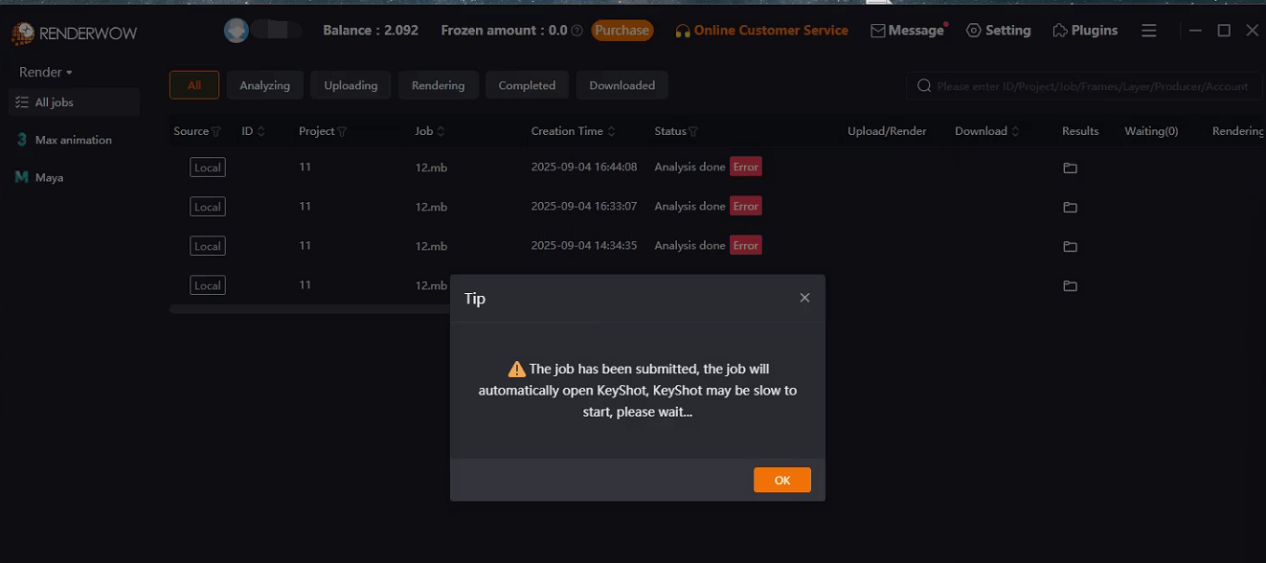
5. After determining the resolution, a task submission completion pop-up window will appear. Clicking "keyshot" will automatically close it, and the task can be seen on the client side

Cinema 4D Animation Task Guideline of RenderWow
Step 1: Account registration
Company Registered Address:
Registered address: https://cloud.renderwow.com/user-center/user/registion
Step 2: Install the client
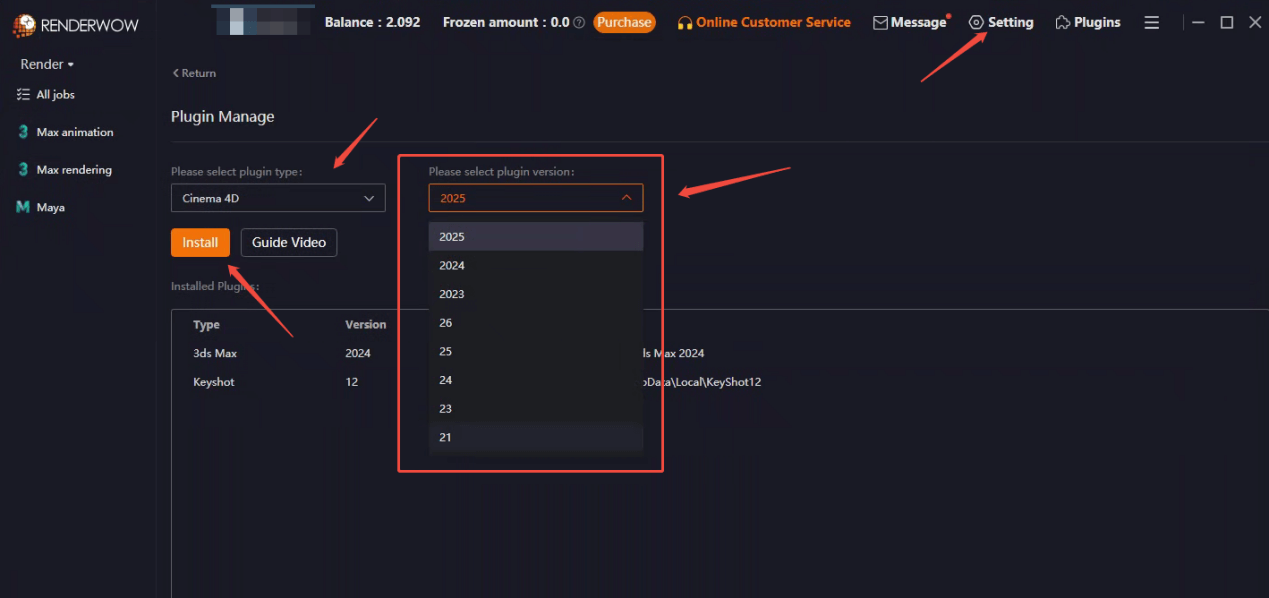
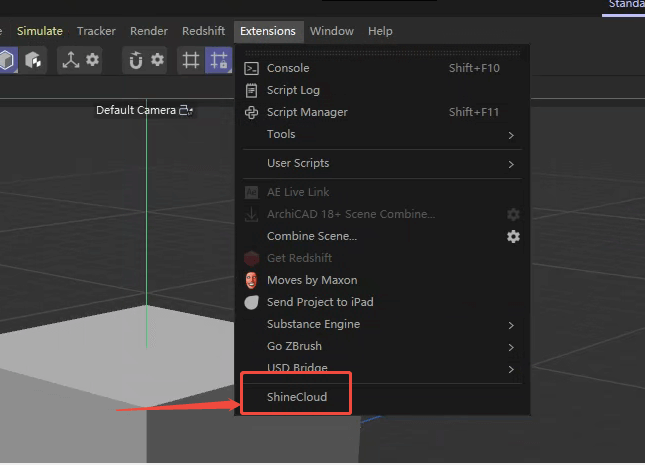
Step 3: Install the C4D plug-in
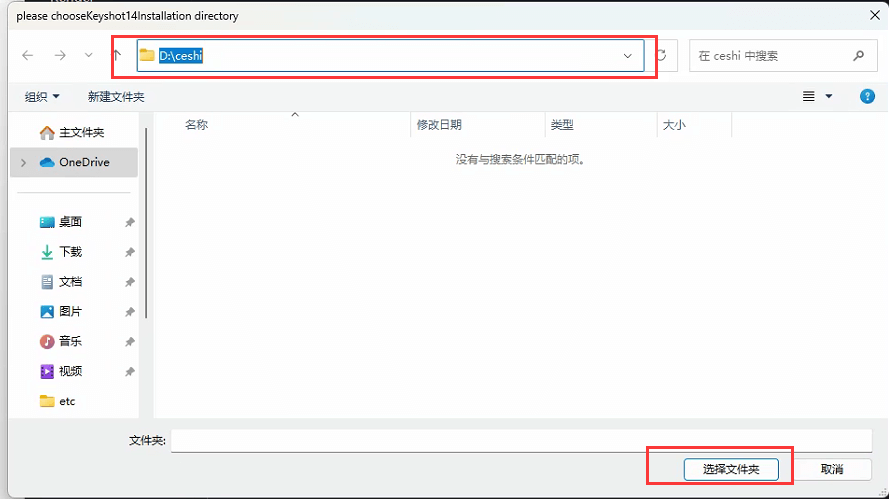
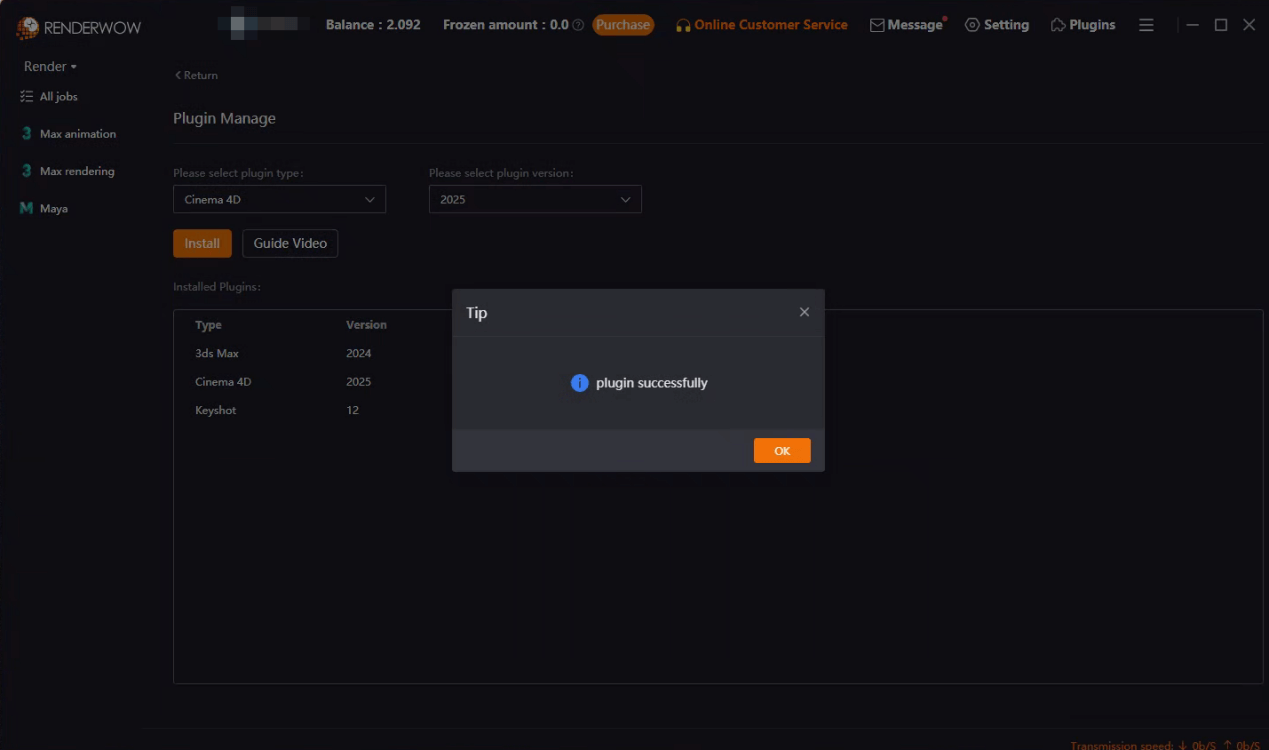
Select the required Cinema 4D version and click "Install" to select the root directory of Cinema 4D. After complete the selection, a message will be displayed indicating that the installation is successful
Step 4: Submit the Cinema 4D task
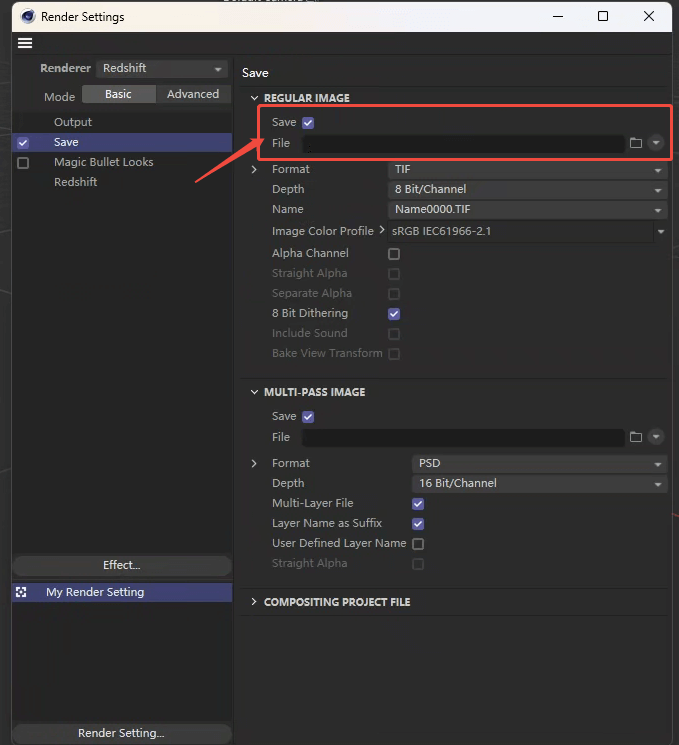
1.Open the Cinema 4D scene and set the parameters, set the output path, if use Multi-Pass, the channel also need to set the path.
2.Click on RenderWow to start submitting
3.In the configuration Pop-ups, set up Software and Plug-in. If the required plugin information is not found, you can provide feedback to customer service for addition. After the settings are completed, click "Job Submitted"
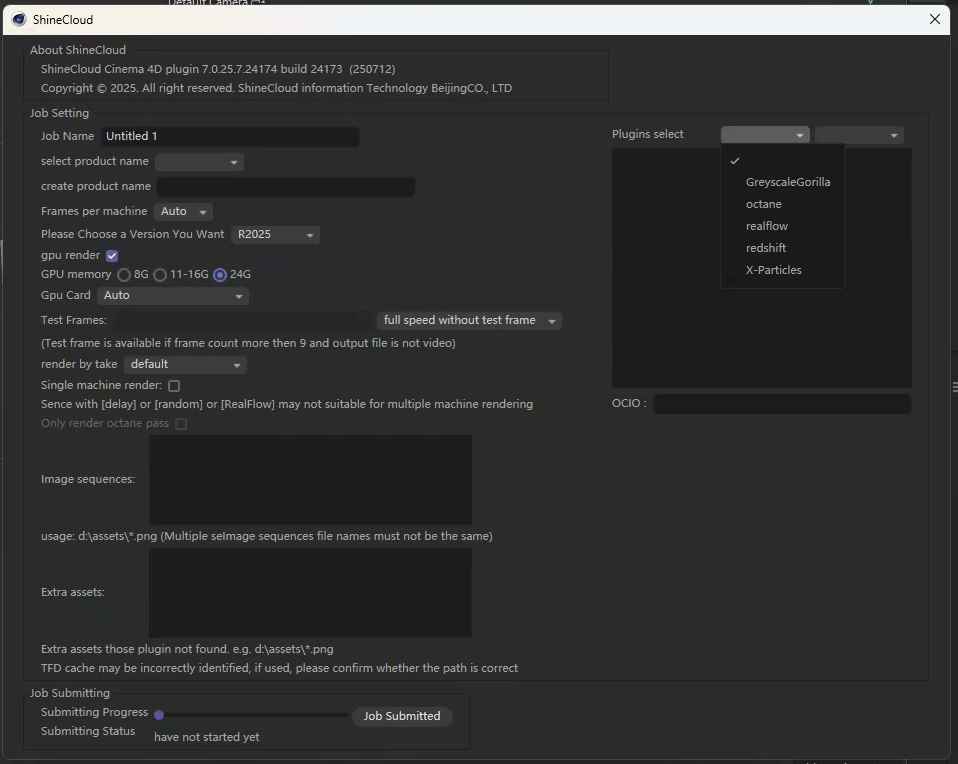
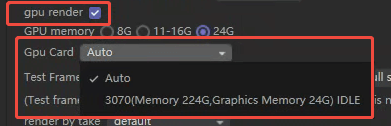
1)The default is CPU rendering, the GPU task needs to tick the "GPU render" and Graphics card model
2)We support test frame. After the test frame is completed, you can select an action to stop or go on render at full speed.
3)Special effects could select the "single machine render"
Step 5: Check rendering tasks
1.Log in to the client to check the progress of the task after completing the submission

2.Cinema 4D task currently only supports checking the effect after the rendering frame is completed (no preview during rendering).

3.Click Full Speed after completing a frame confirmation (Nodes will be added to the task after opening)

4. Starting full speed rendering can be in the client [add machine], the machine can set up up to 100, note that if you need more machines or reduce the machine need to contact customer service to deal with

5.Select the task and double-click to view the details of the rendered frame, including the single frame time and cost, the total rendering time and total cost of the task
Tutorial on Installing Blender Plugins
Note: You need to close Blender first before performing the operation.
Steps to Install Blender Plugins:
1. To confirm the installation path, open the directory where Blender is located.
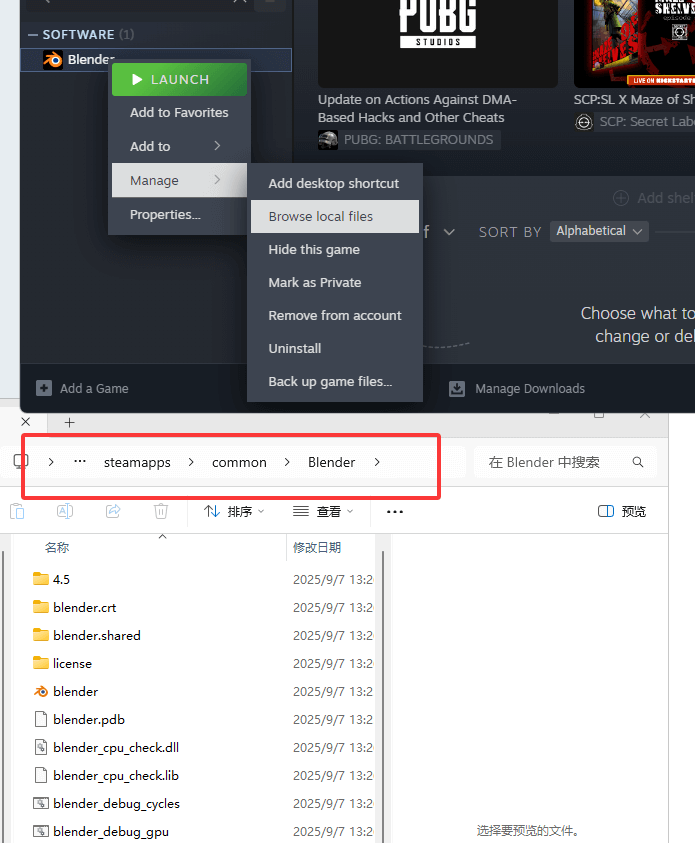
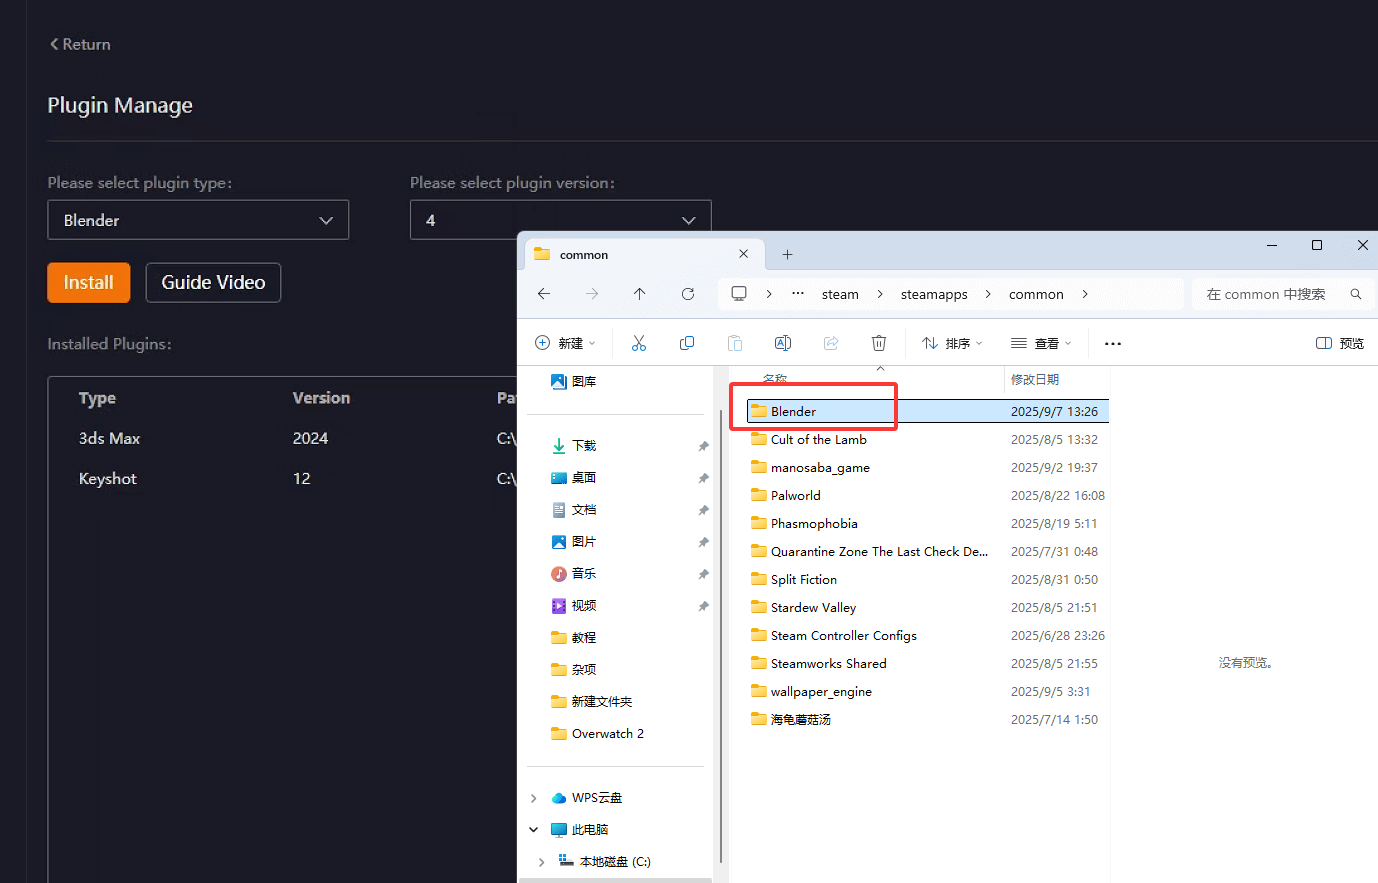
2.On the client, click on Plugins, select Blender and the corresponding version, then click Install.Refer to the file path opened in the first step and select the Blender folder.
3.Refer to the file path opened in the first step and select the Blender folder.
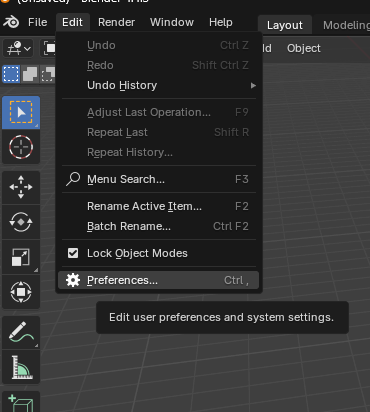
4.Go to the Edit menu , then select Preferences.
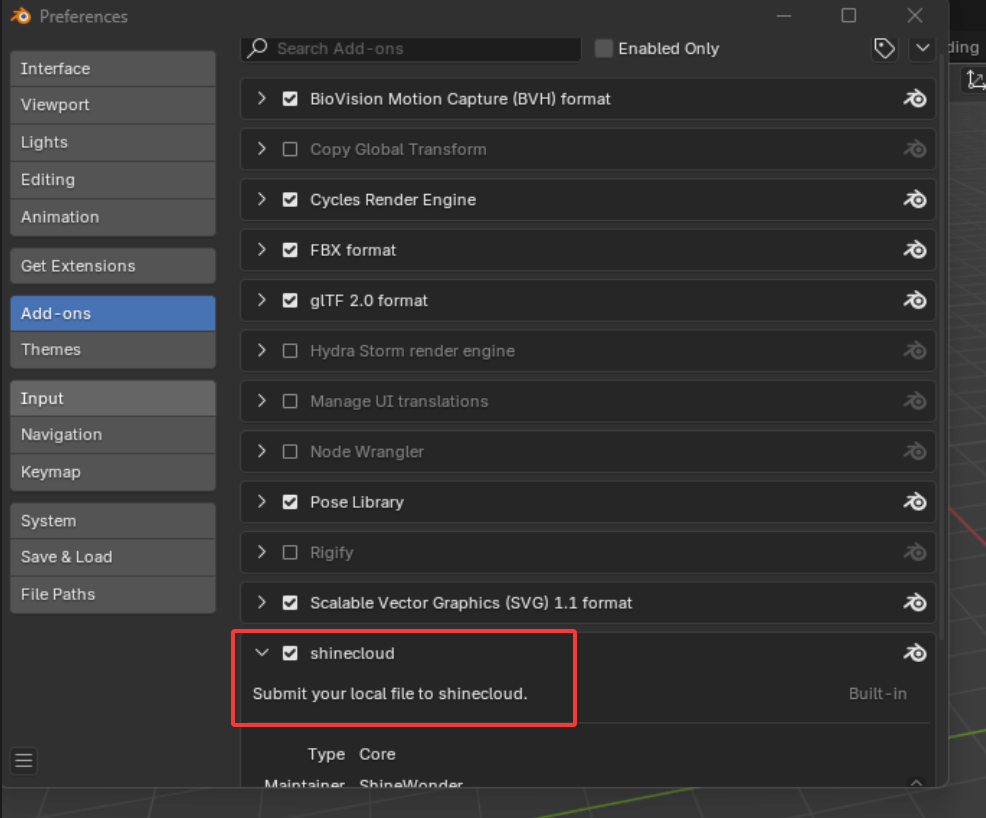
5. In Add-ons, find shinecloud and check the box.
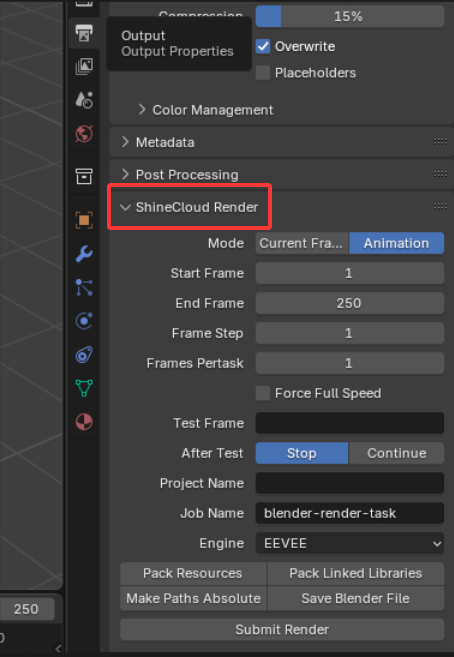
6. In the output at the lower right corner, you can see the RenderWow Render plugin.
Supplementary:
(1) Set the output path: subject to the render output path on the right side of Blender.
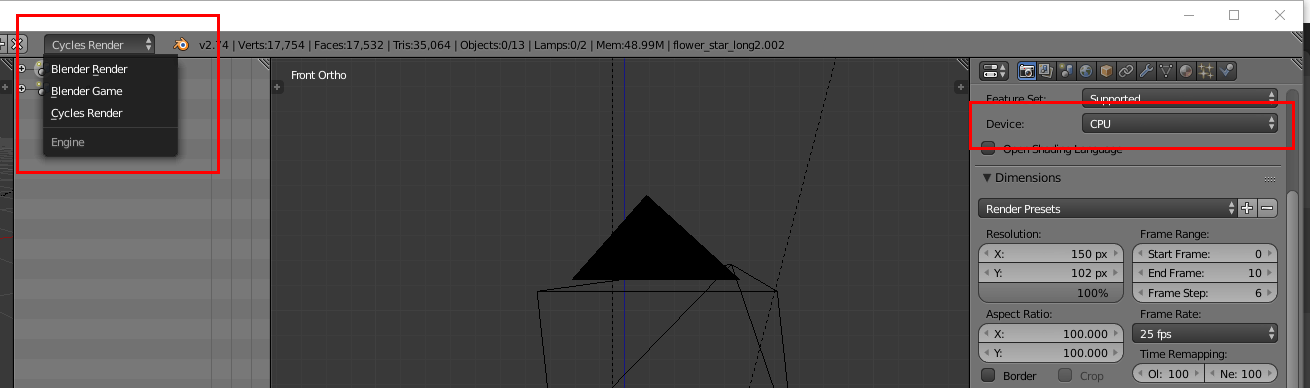
(2)For low-version Blender (e.g., 2.74):
- CPU renderers: Cycles-CPU
- GPU renderers: Cycles-GPU
- Blender Render and Blender Game renderers
Tasks submitted with Blender Render or Blender Game will fail to render. Currently, only the Cycles renderer can ensure successful rendering.
**Rendering mode:**
Selecting the Cycles-GPU renderer will automatically dispatch tasks to the corresponding GPU farm. If the dispatched farm has no machines with compatible graphics cards, it will switch to CPU machines for rendering, which can still succeed. (The Cycles renderer prioritizes CPU rendering, with GPU rendering as a supplement.)
(3)For high-version Blender (e.g., 2.80):
- CPU renderer: Cycles-CPU
- GPU renderers: Eevee, Workbench, Cycles-GPU
**Rendering modes:**
- Selecting Eevee or Workbench renderers will automatically dispatch tasks to the GPU farm, and rendering can only succeed with GPU machines.
- Selecting the Cycles-GPU mode follows the same logic as the Cycles-GPU mode in Blender 2.74.
Maya Animation rendering process
1. Install client program compressed package
2. Account and password login
3. Install plug-in
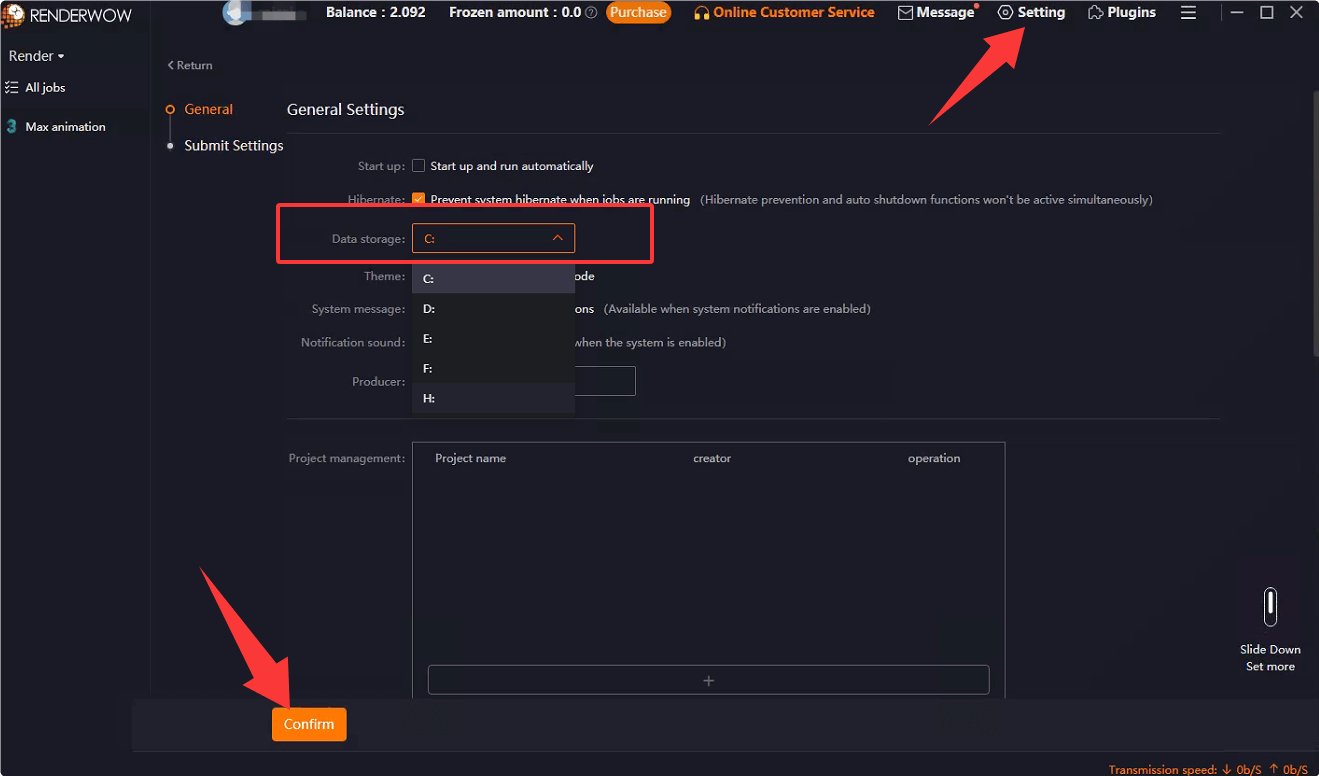
4. After successful login, set the data directory to an available drive letter, such as D drive, and click save
5. Set presets
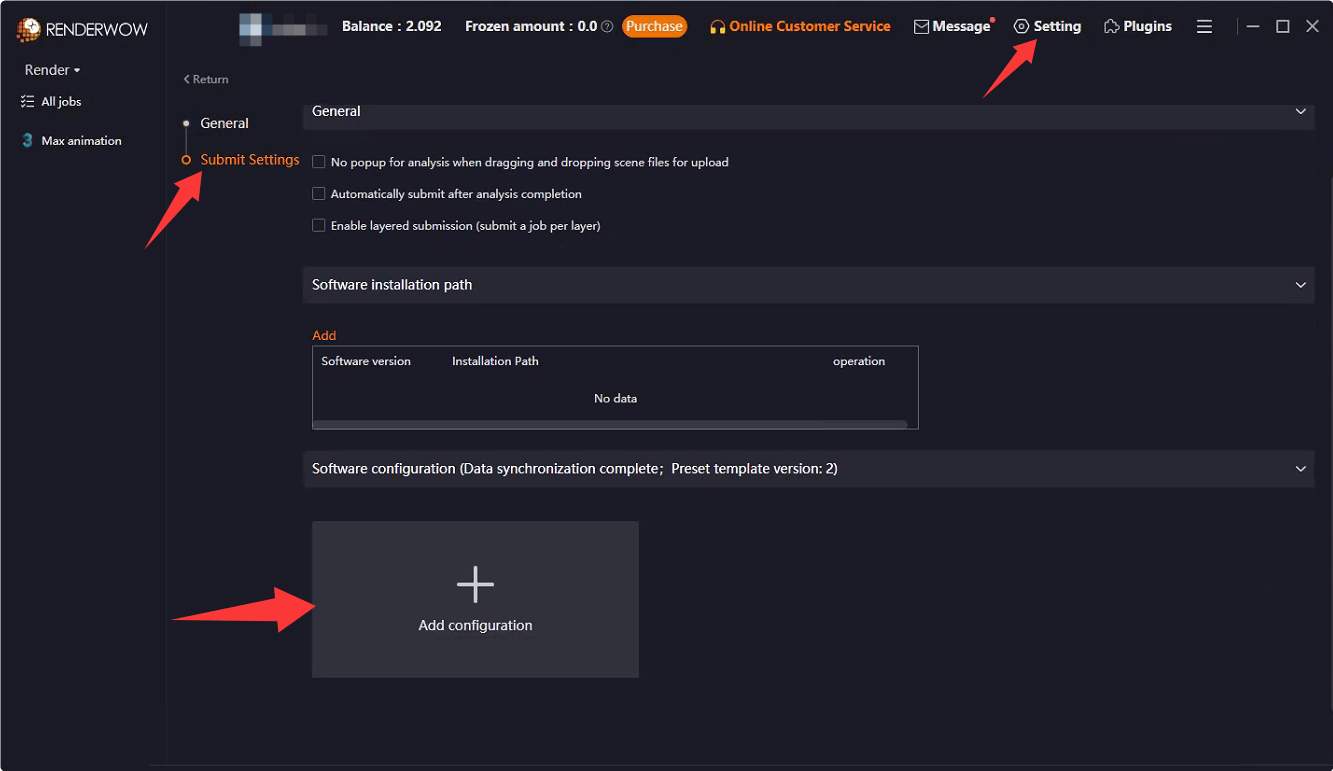
6. Submit Task
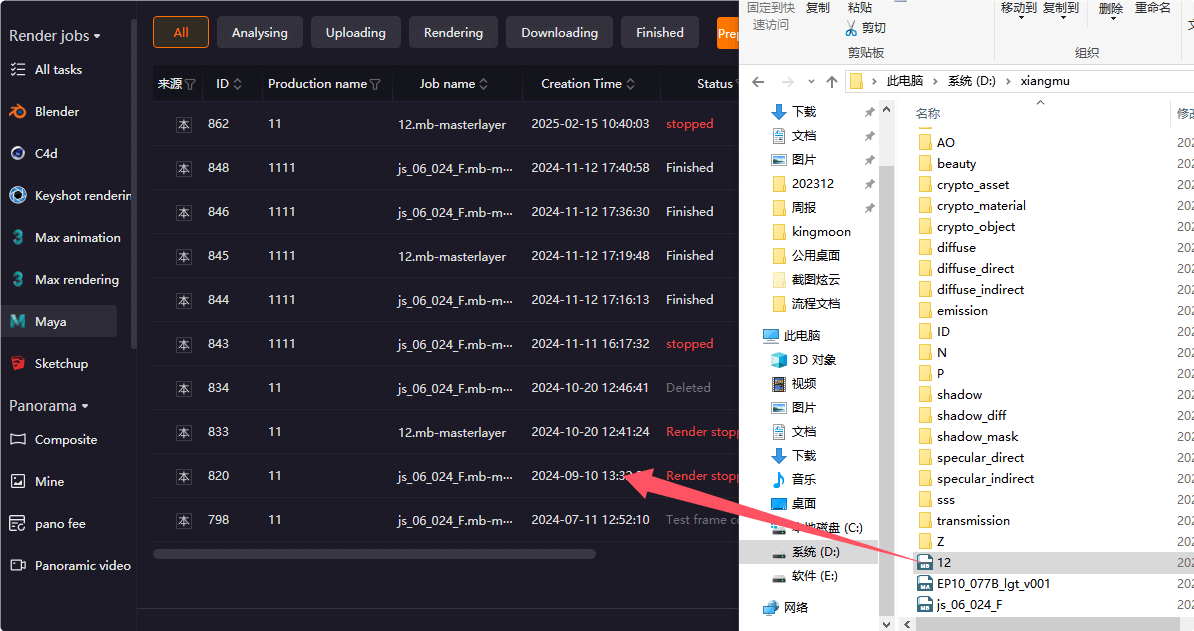
(1)After setting and saving the preset settings, you can submit the rendering by dragging the. ma or. mb project file to the client
(2)Select the preset that was previously set. If you need to change the preset, you can click [Edit] to modify it. If you don't need to modify it, click [Analyze] to start submitting the project analysis.
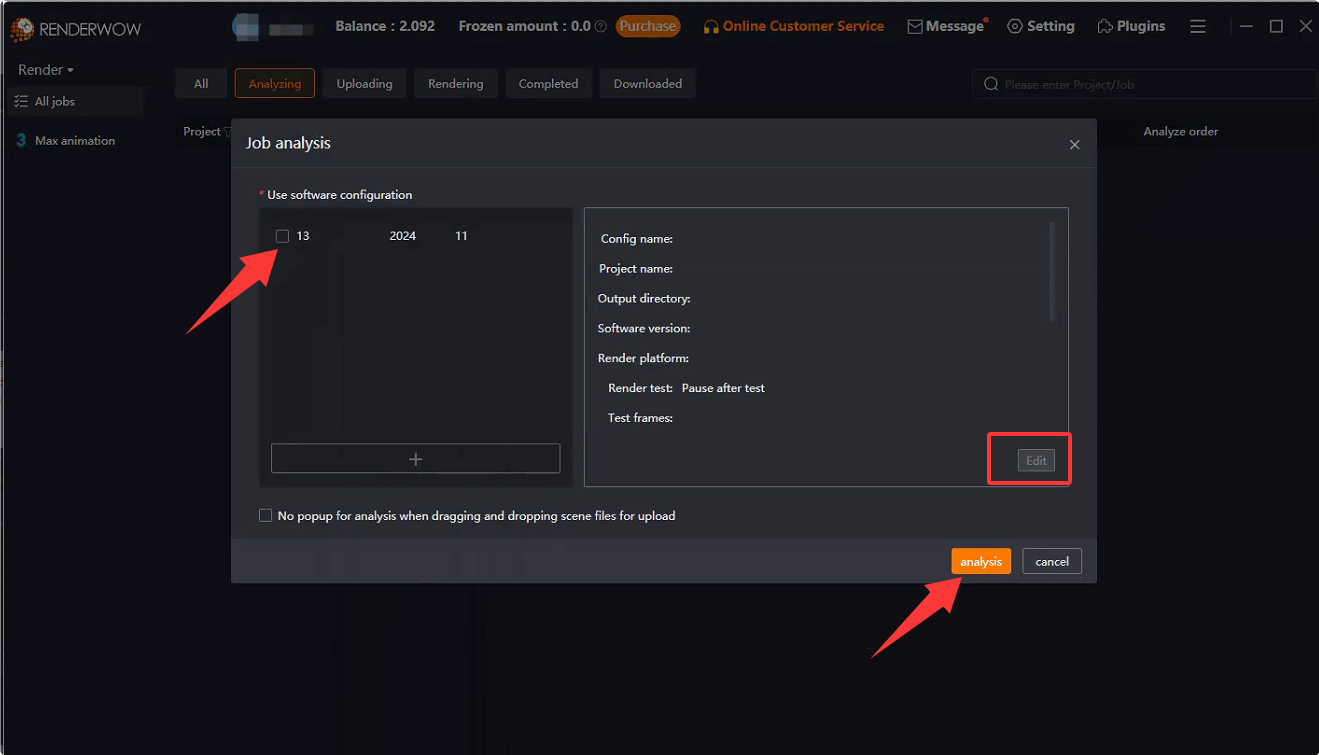
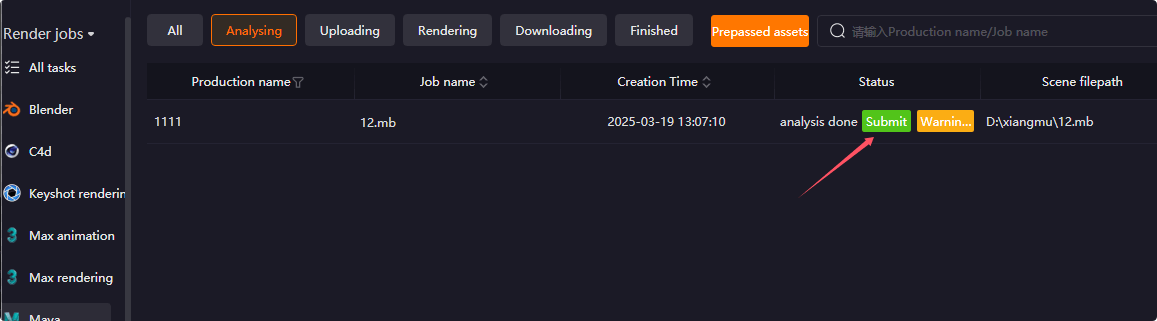
(3)After the analysis is completed, if there are any warnings or errors, click to view the warning/error information by yourself. If there is no impact, ignore clicking [Submit]
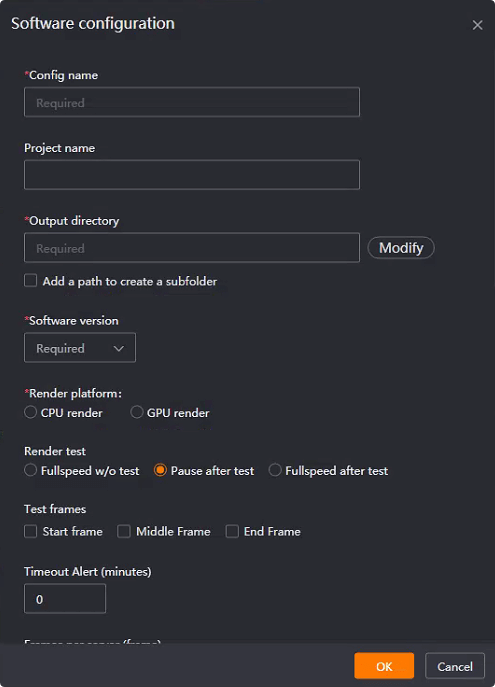
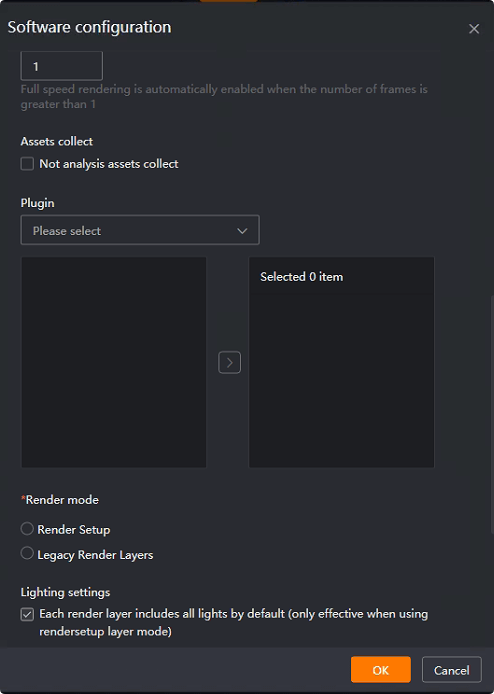
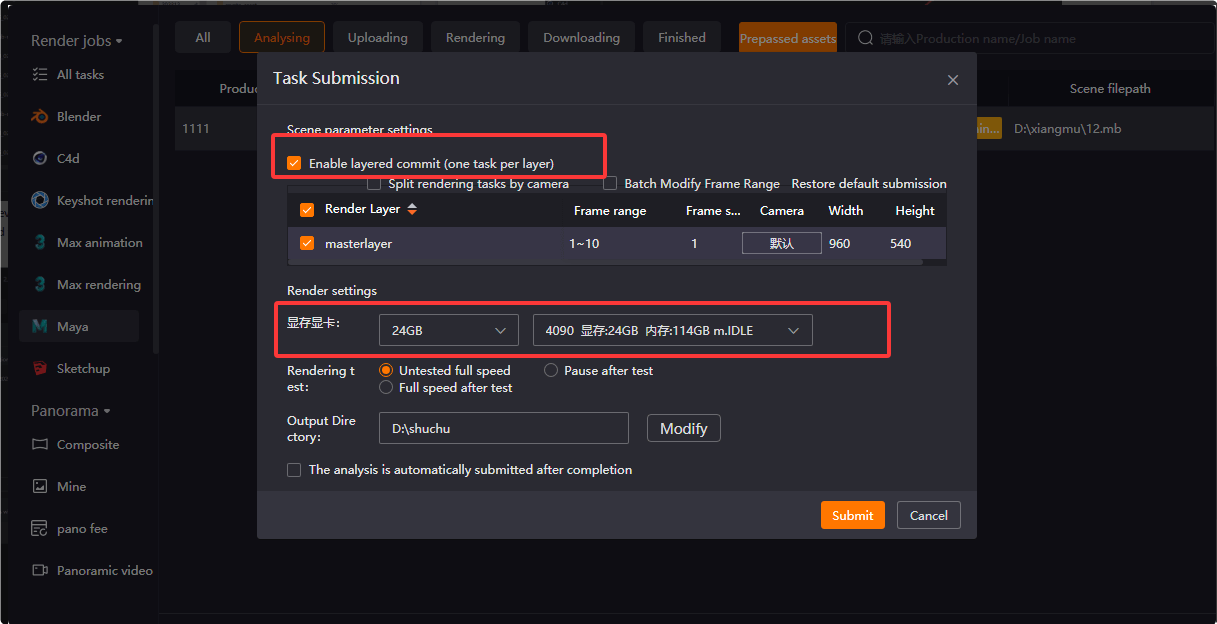
(4)Submit Settings
After successful submission, the task status can be viewed on the client side.
If the 'Enable Hierarchical Submission' option is selected, multiple tasks will appear on the client. The 'Task Name' corresponds to the layer name. If you do not need to expand it, click the small arrow on the left to merge/expand it. If the 'Project Name' option is added by default, the set name will be displayed

(5)After completing the rendering, wait for it to finish and it will automatically download to the pre-set image storage path
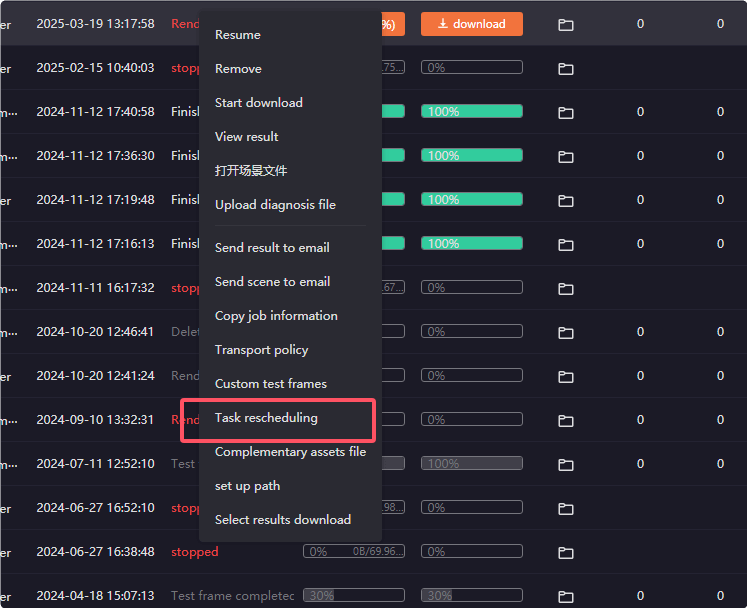
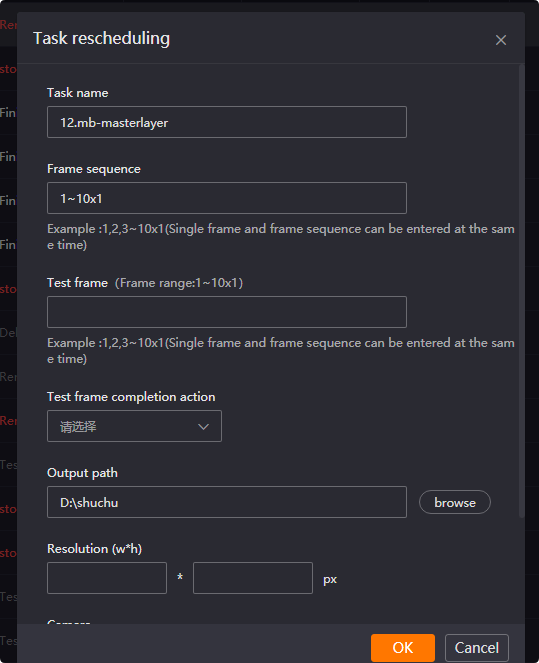
【Task Resurrected】function:The submitted engineering shots can be resubmitted by clicking on 'resubmit' and modifying some parameters to render again. The modifiable parameters are shown in the screenshot below: