


Renderwow
How to use the plug-in AfterBurn to create and render with3ds Max plug-in.
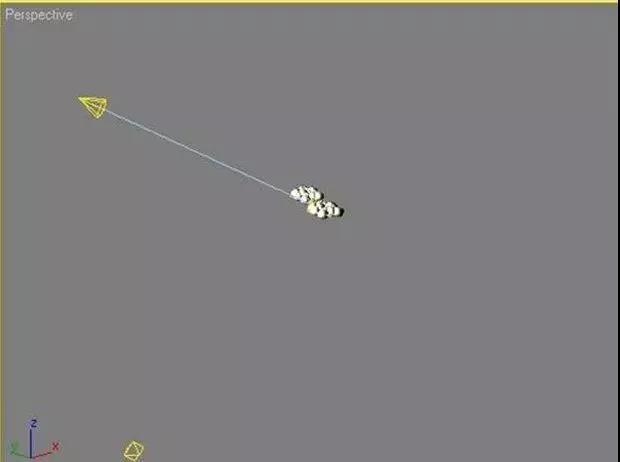
1.Open PF particle, create standard particle flow, 0 frame launch, 0 frame stop, number of 5 (for test rendering is sufficient).
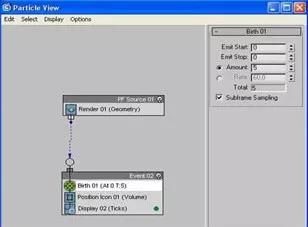
2.Select the launch source of PF particles, enter the "modify" panel, and change "length", "width" and "height" to "50", "40" and "40" (these parameters change the border size).
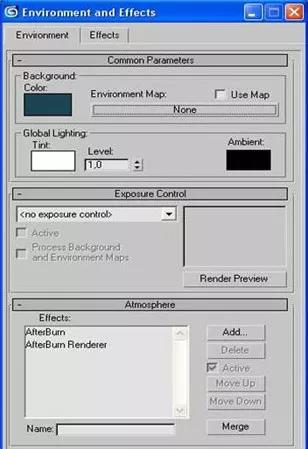
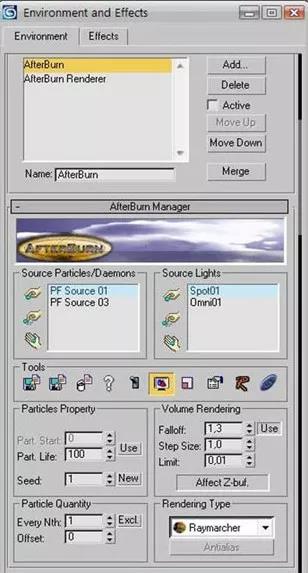
The next open window environment and effect, press the shortcut key 8, select dark blue for the background color, and add and select AfterBurn in the "atmosphere" setting bar.
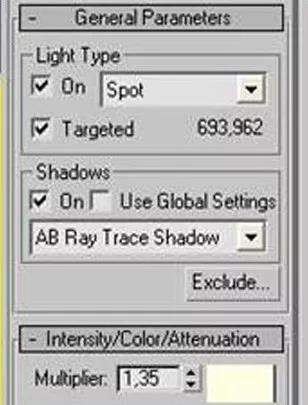
3.Now create target points: In general parameters, you can use the projection (the Shadow type is AB Ray Trace Shadow). Turn the light color to light yellow to simulate sunlight and increase the intensity of the photo.
4.Open the window environment and effects and the atmospheric effect to select AfterBurn. The particle can be viewed in the window according to the display in the window. Then pick up the light and select the target point you created earlier. Now the clouds are illuminated and cast in shadow. Step son in order to speed up the rendering process of change, a value of 1.5 (this parameter to control the volume effect of smoothness, to test rendering 1.5 will be enough), check the shadow, the shadow opacity to 0.8, it adds realism to the appearance of the cloud. For the environment color choose grey blue.
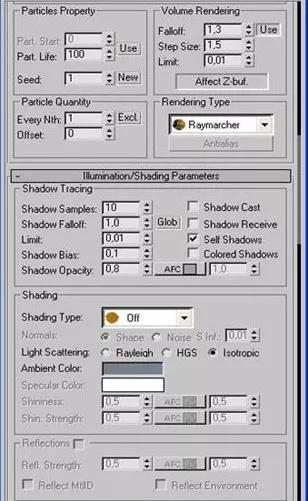
5. In the "color parameter" setting, the color of the cloud can be changed. The default setting is used here.
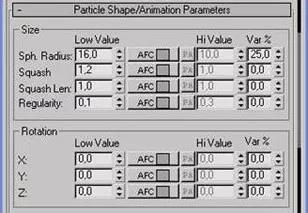
In the "particle shape/animation parameter" setting, change the sph. Radius to 16, change the Squash to 1.2 (this parameter reduces the number of particles) and reduce the frequency to 0.1. Change the Var to 25 (the size of the random particle of this parameter control).
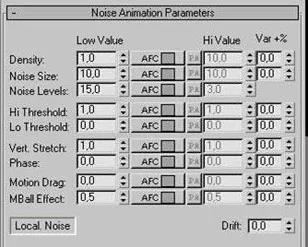
6.In the "noise shape parameter" setting bar, the noise wave type is changed to "smoke". Reduce the "density" to 1.0 in the "Noise Arimation Parameters" setting. Change the noise level and noise level to 10 and 15.
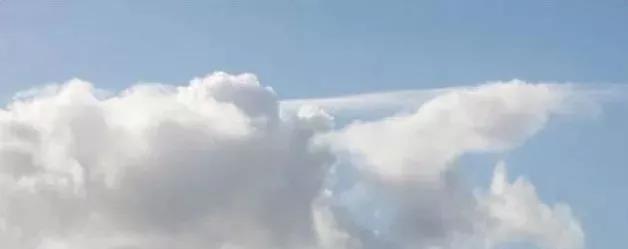
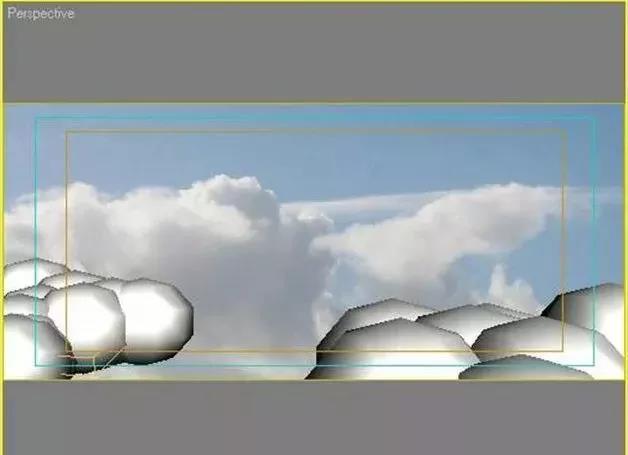
7. Open the environment and effect window, select the sky in the texture, and use the following pictures:
8. Duplicate the above cloud and change some Settings to increase the difference between the cloud and the cloud.
9. To simulate diffuse reflection, increase the intensity of Omni Light and turn its color into Light blue.
10. Same as the above steps, pick up the lighting and particle system. To get a nice smooth result, the Step Size value will increase to 1.
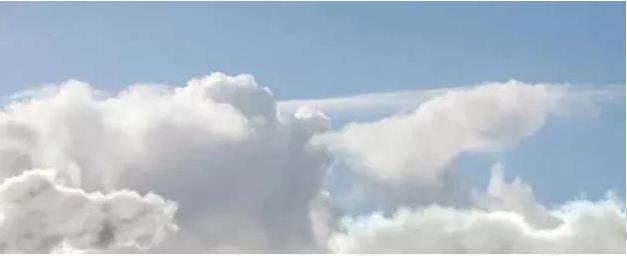
After completing the above steps, save the rendering, you can get the lifelike clouds.


