
 3ds Max
 Blender
 Keyshot
 Cinema4D
 SketchUp
 Rhino
Rhino Maya/Houdini/Clarisse/Katana/

How to Speed Up Texture Workflow in ZBrush
The case we are going to discuss today is a warrior carrying a sword of honor. This 3D artwork was primarily sculpted in ZBrush, a 3D graphic sculpting software, then modeled using 3ds Max and Modo, textured with Quixel for all armor and the sword, while skin textures were done in Mari. Marmoset was chosen for real‑time rendering to get instant feedback on the final image. Using Quixel and Marmoset together allows spending more time focusing on the artwork itself. Next, we will learn how to use Quixel to quickly and easily add textures to real‑time game characters, accelerating the texturing workflow.
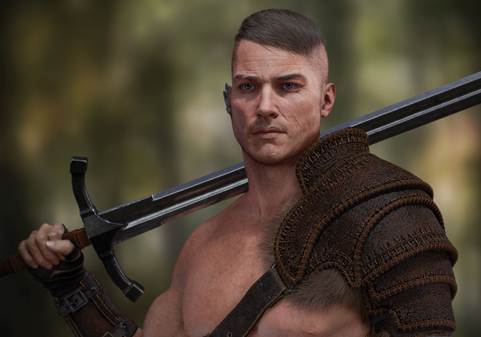
1. Start in ZBrush
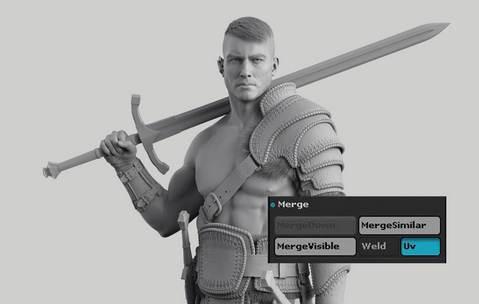
When sculpting the warrior, it may involve over 150 SubTools, so before adding textures to the character, you need to combine related parts to clean up the scene. It is best to reduce to 75 SubTools without losing subdivision details. To combine SubTools with the same number of subdivision levels, make sure to enable "Merge with UVs."
2. Separate SubTools
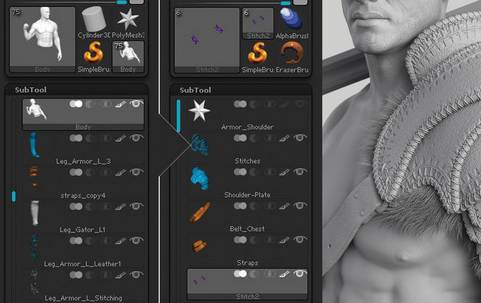
Once the main ZBrush scene becomes more manageable, you can separate SubTools by appending them to new ZBrush scenes (Tools), then group parts that belong to the exact same texture map together, such as each component of the armor, like pauldrons, waist armor, and bracers. As shown in the image above, the artist separated the pauldrons into 5 SubTools.
3. Export Maps
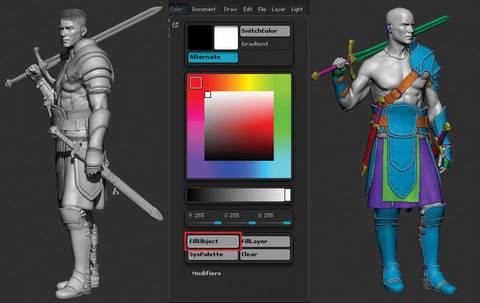
Before preparing for Quixel, you need to export a Material ID, a Tangent Normal, and an optional Object Space normal map. If the ZBrush model has a lot of detail, you can choose to create an Object Normal. To create a Material ID texture, you can use the Color Fill object in ZBrush, setting similar objects to the same color since they will share the same type of material in Quixel. For example, all armor parts are blue combined with an orange belt.
4. Export Settings
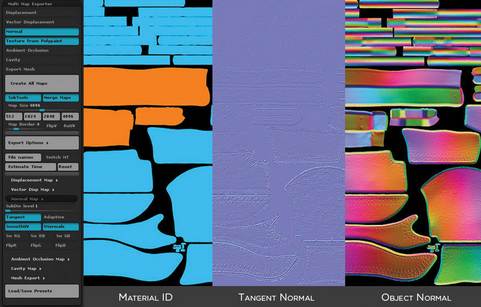
Using the Multi‑Map Exporter, confirm that the correct checkboxes and all required settings are checked. This is where separating parts by texture becomes important. Enable SubTools and Merge Maps in the export settings, which will export each visible SubTool map and combine them into a single texture map. You could also hide all SubTools except the pauldron SubTools, but this method would be too cumbersome when working with over 75 SubTools.
5. From Modo to Quixel
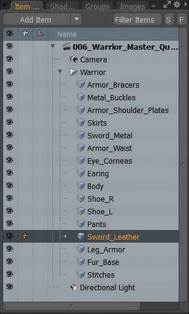
Using the FBX exporter in ZBrush, import all parts into Modo and continue combining parts. Combine as many parts as possible, since Material IDs will be used to apply different materials to different parts in Quixel. Reduce 75 SubTools to 16 mesh groups, as 16 mesh groups are manageable in Quixel on a faster computer. Fewer mesh groups are recommended, and export .obj files as separate groups.
6. Export UVs
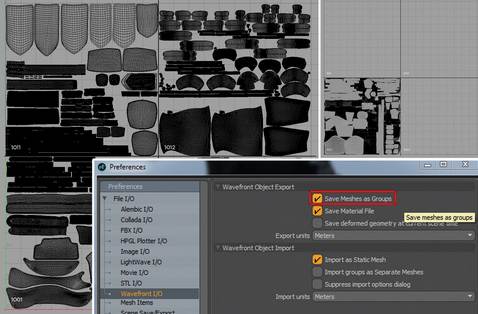
Quixel requires all UVs to be in the 0 to 1 range. If you are using Mari UDIMs, you need to create a temporary scene and ensure all UVs are in the 0 to 1 range. After exporting textures from Quixel, you can return to Mari to rename and import them, reusing the UDIM UVs. Before exporting the .obj file in Modo, you need to change the Modo preferences to Save Meshes as Groups, otherwise it will export each UV island as a separate group, generating hundreds of mesh groups in Quixel.
7. Import to Quixel
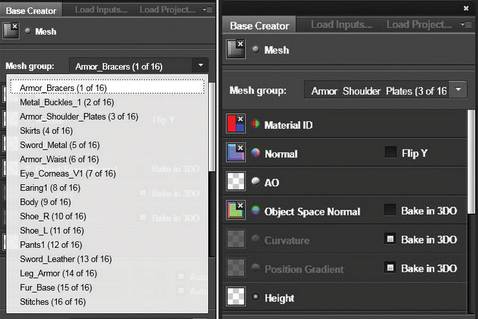
After exporting the mesh groups from Modo, you can see all 16 mesh groups listed. Note that some parts, such as the body, are for visual reference only and will not be textured. You can review all mesh groups, attach Material ID, Normal, and Object Normal maps. If you do not want to export Object Space Normal from ZBrush, you can achieve this by selecting Bake in 3DO and clicking Create. If you forgot to attach maps beforehand, you can return and add them after the project has started.
8. Add Materials
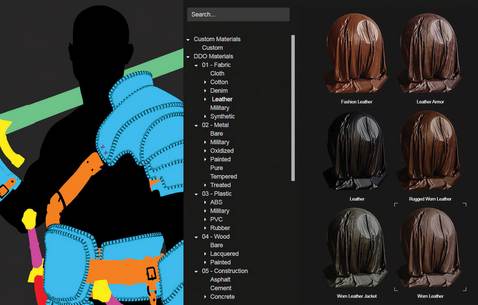
The power of Quixel lies in its preset PBR materials. You can use these materials to add layers to differentiate surface properties. This process of adding layers to presets and modifying them makes the material unique. Hold down the C key to view Material IDs. If you hold C+Shift and left‑click a color, Quixel will add a material to that mesh group color zone. You can also choose which color Material ID to use after creating the material.
9. Leather Armor
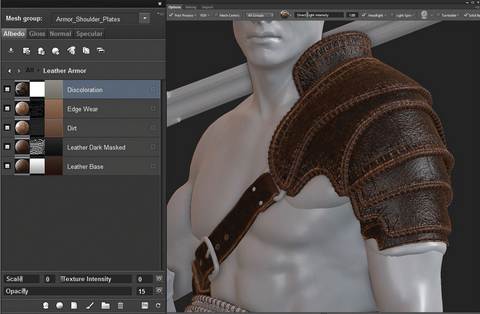
Select a base "Worn Leather" material preset, then add additional wear layers to the material. To create convincing leather, you can add dark value variations on the base leather. Next, create a new dirt layer, then select a texture map and cover the entire surface with it. Choosing a texture rather than a blank solid color gives the normal map variation and more realism. Then add wear layers to all edges, and cover the entire surface with a final layer to reflect subtle color variations.
10. Conceptualize Materials

Another way to use Quixel is to conceptualize new materials on the character. Quickly re‑topologizing materials in Quixel means you can non‑destructively try many different variations before finally deciding which approach to use. The image above shows some examples using preset materials, with the only modification being adjusting the texture size to fit the armor.
11. Save and Apply Materials
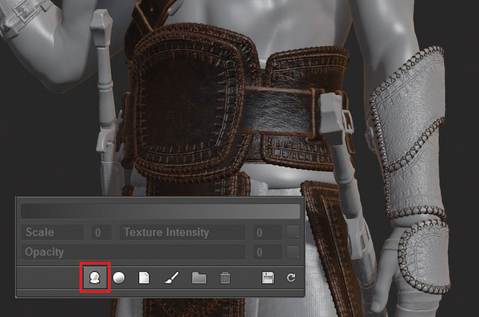
After creating the preliminary leather armor material, click the "Save Smart Material" icon to easily apply it to other armor parts. Once you save a custom smart material, you can quickly review the model and apply the material. The smart material will remember the color Material ID you used in the original material and correctly apply it to the new object.
12. Export Textures
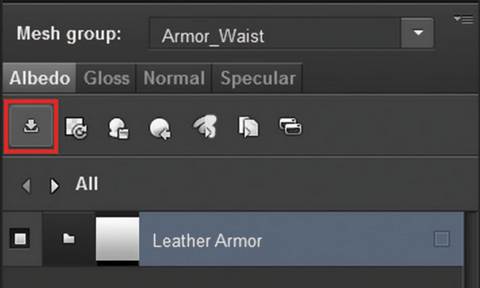
Exporting texture maps from Quixel is very simple ‑ just click the exporter! There are many preset export targets, so it is important to select the correct target for the render engine you will use. If you are not sure which target to choose, try the default option: Specular PBR. Since Marmoset is used for rendering, you can select the Toolbag 2 option, which will export textures and a Marmoset material, exporting a single material or all materials in the project.
13. Import to Marmoset
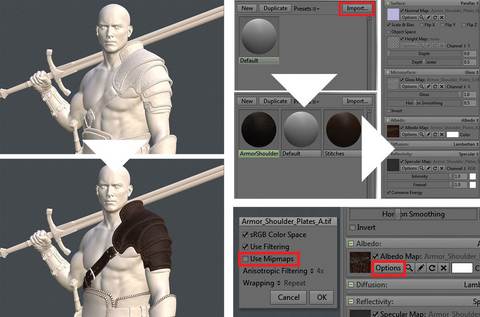
Click Import in the material checkbox to import the material into Marmoset, and select the imported .tbmat file. Once imported, you can drag and drop the material onto the mesh in the 3D viewer. The result is very close to the Quixel 3DO viewer, and may perfectly match the same HDR image. For higher resolution rendering in Marmoset, it is recommended to disable Use Mipmaps.