
 3ds Max
 Blender
 Keyshot
 Cinema4D
 SketchUp
 Rhino
Rhino Maya/Houdini/Clarisse/Katana/

Plugin Submission
3ds Max Plugin Submission Tutorial
Overview
Renderwow supports all versions of 3ds Max 2009–2027, compatible with built-in renderer, V-Ray, Corona, FStorm, Redshift, Octane, and commonly used plug-ins.
Submission Preparation
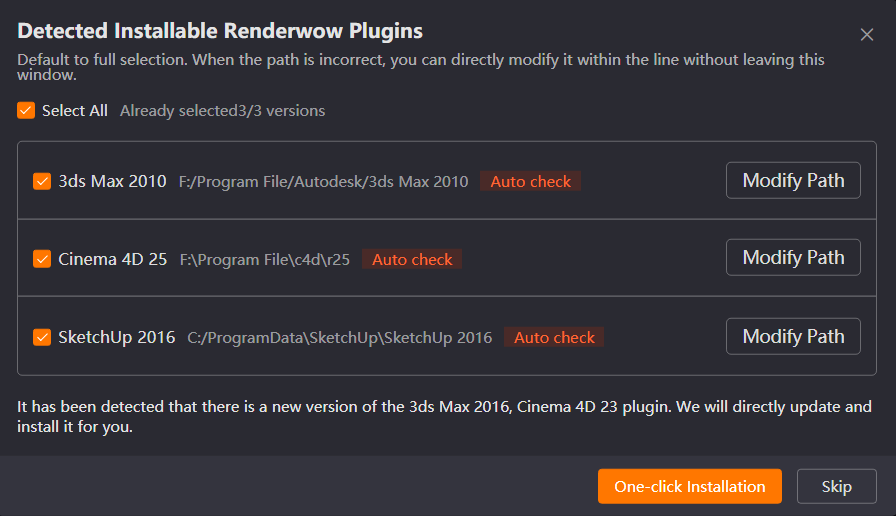
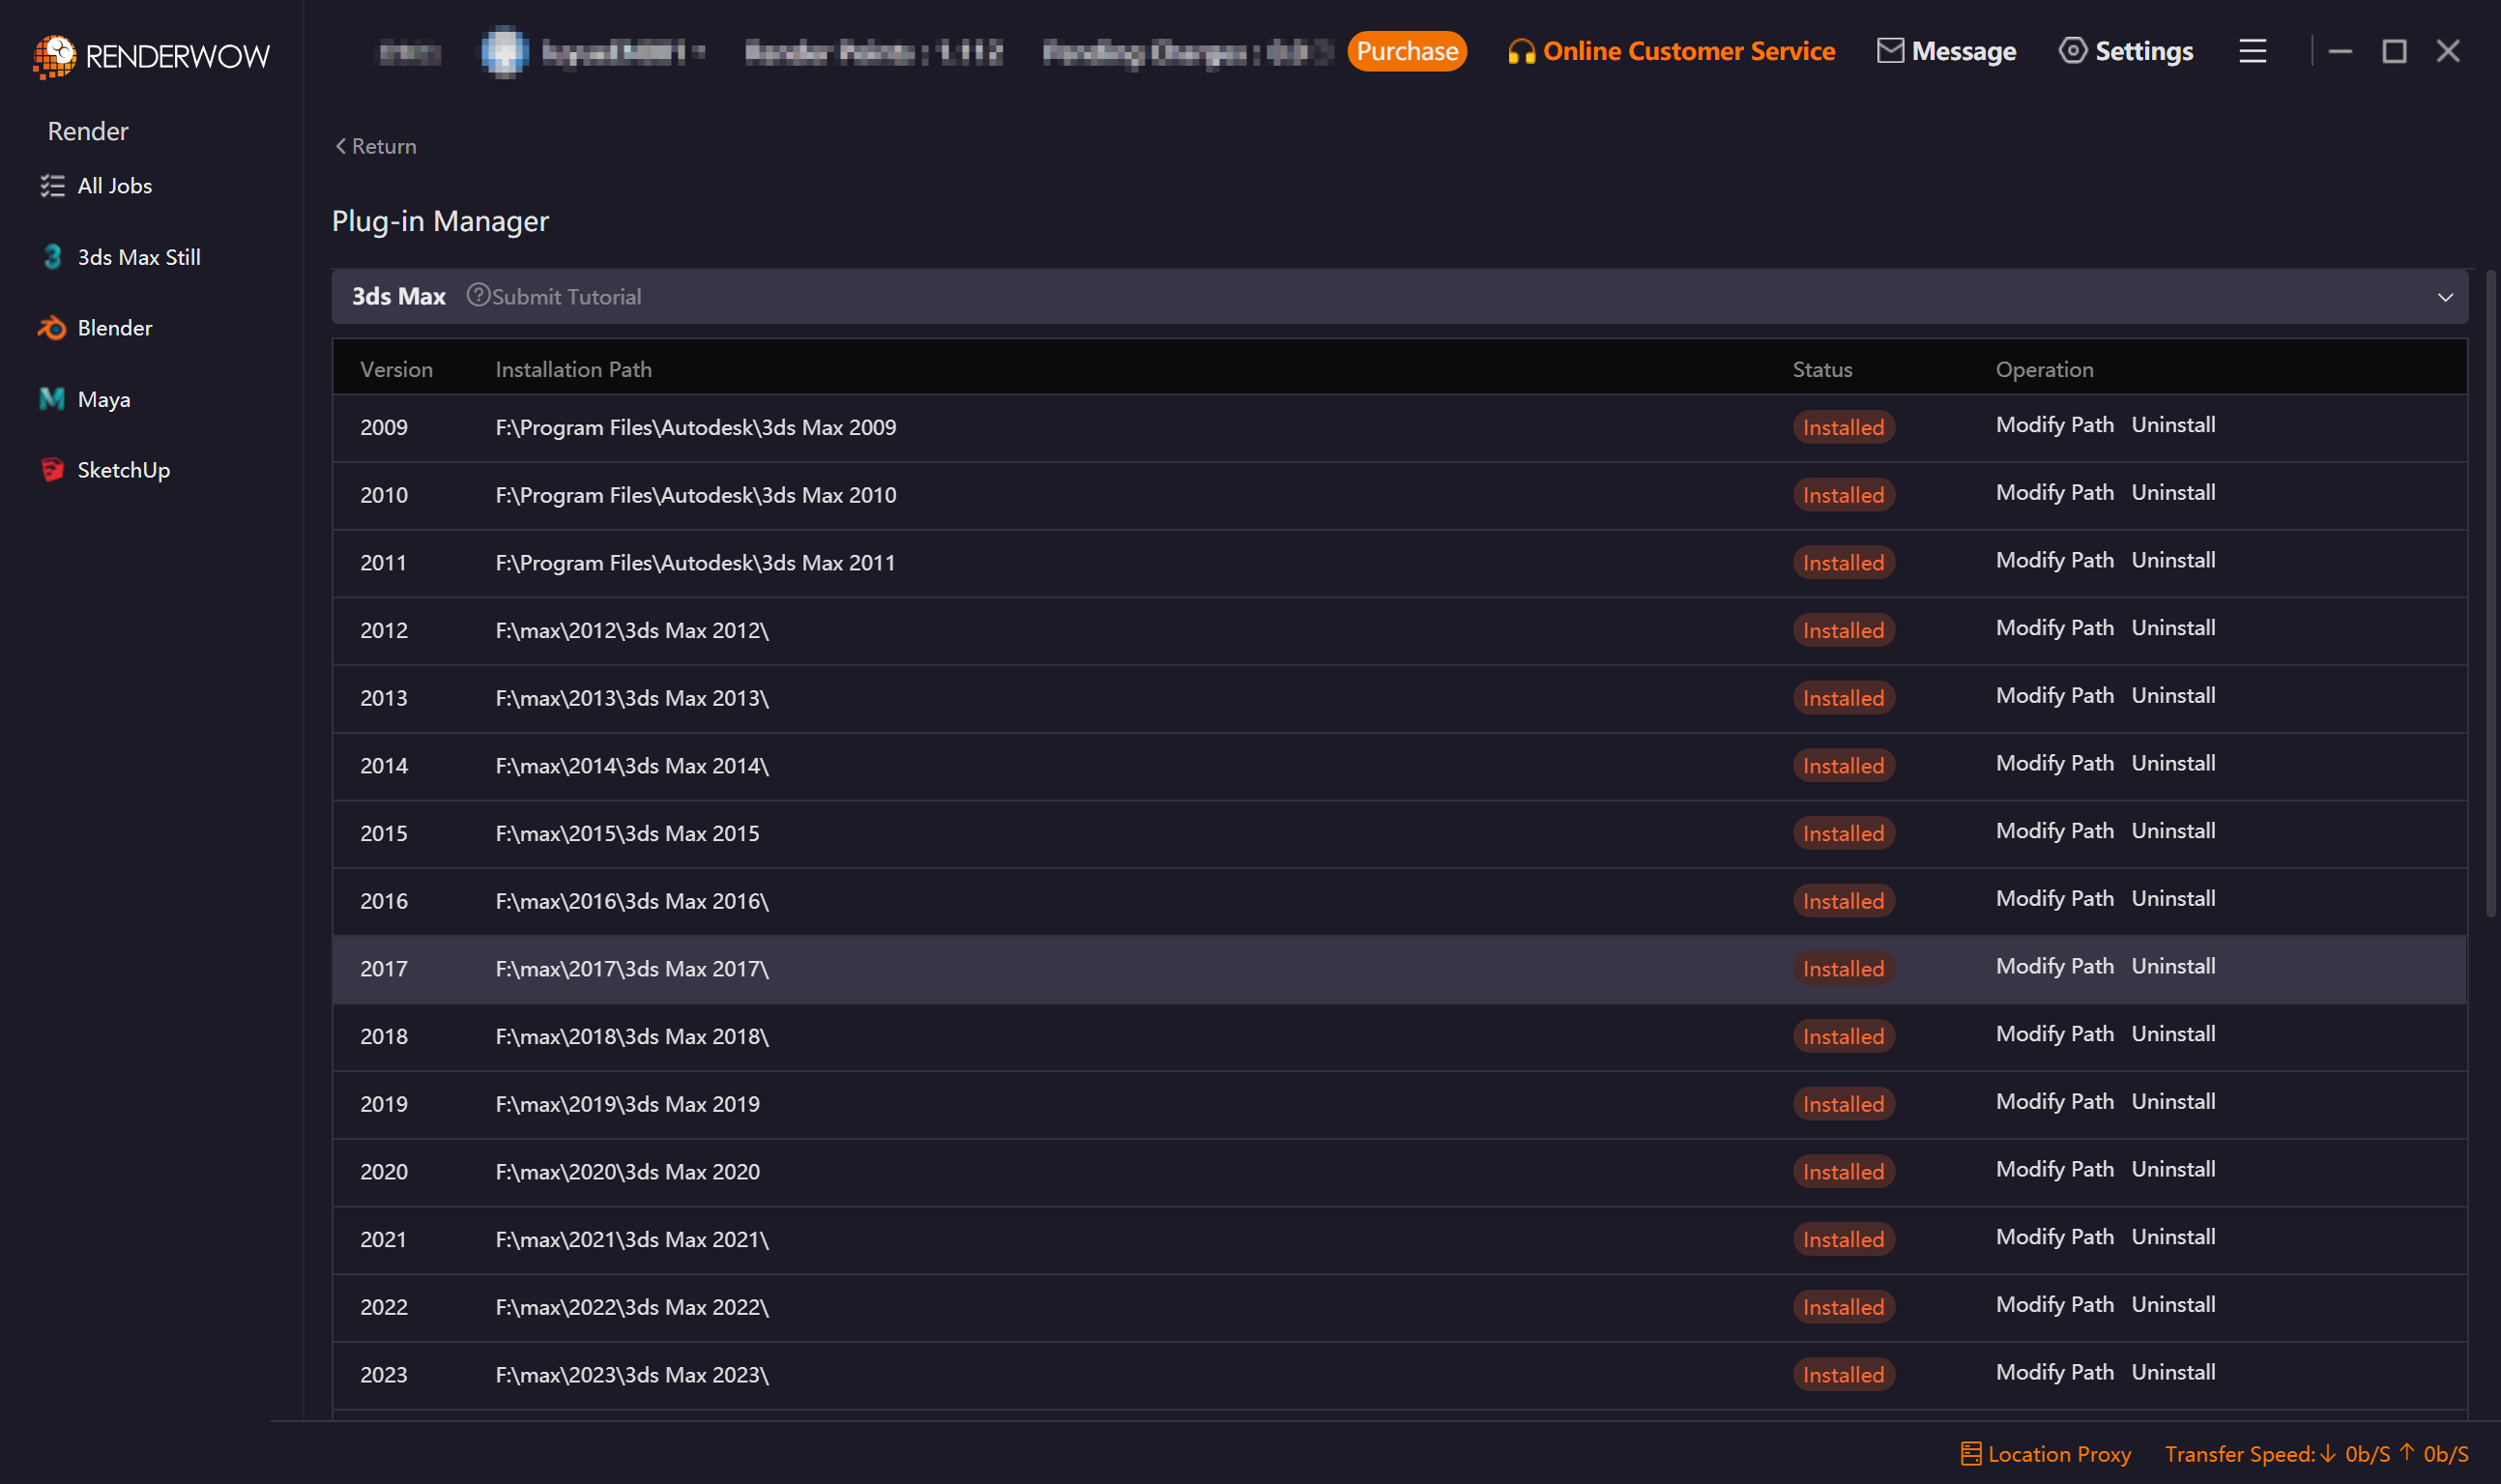
Launch the Renderwow Client. Install the Renderwow plugin matching your local 3ds Max version either from the automatic plugin detection popup or by navigating to the [Plug-in Manager] page. Once the installation is complete, Renderwow will display an [Installation Successful] notification, and the corresponding 3ds Max version in the list will show as Installed.
Video for 3ds Max Plugin Still Submission
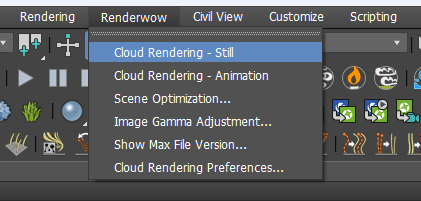
1. Click Renderwow Menu → Cloud Rendering – Still.
For still jobs, you must use Cloud Rendering – Still to submit. If the current scene’s time output setting is not a single frame, selecting rendering will automatically change the current scene’s time output mode to single frame mode.
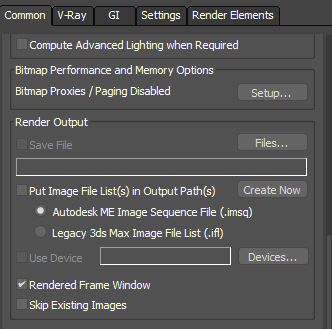
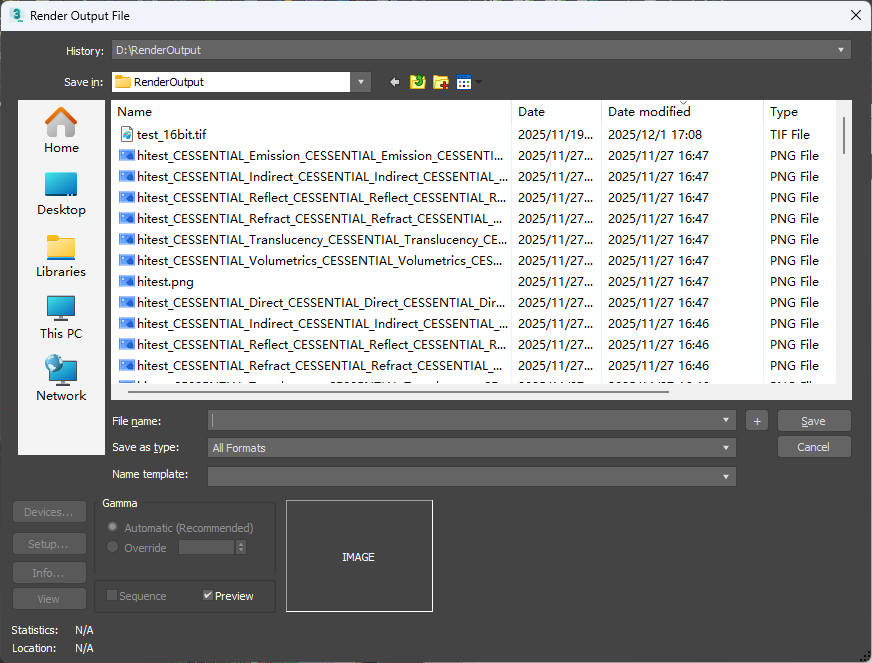
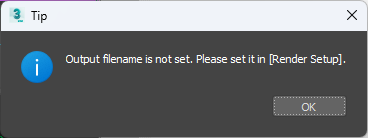
2. Output Path Detection and Setting.
Renderwow will detect whether the render output path is correctly set. If not, it will automatically pop up the output path setting window. You must set it correctly before proceeding with job submission; otherwise, an error will be reported.
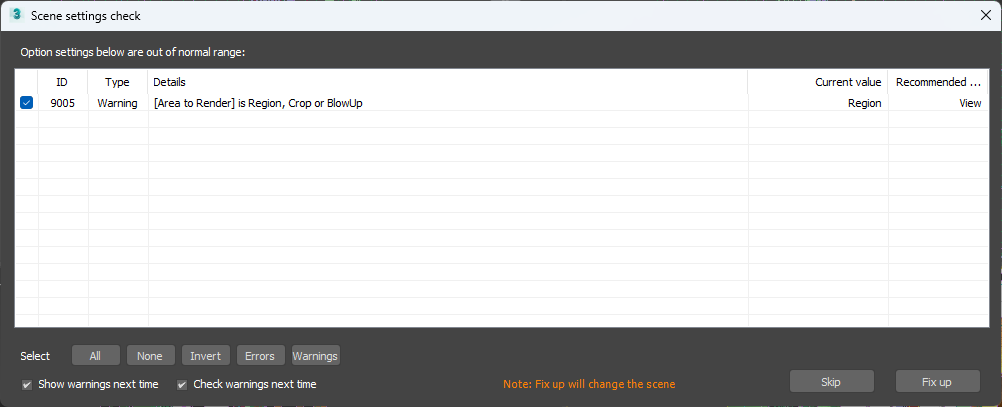
3. Scene Settings Check
After the previous step, Renderwow will perform scene parameter detection. If there are warnings or errors after detection, a "Scene Settings Check" pop-up will appear, displaying all warning and error items. Errors must be fixed before continuing submission. If there are only warnings and no errors, you can click the "Skip" button to ignore the warnings and continue submission. Most warning and error items can be automatically fixed by clicking the "Fix up" button in this pop-up. Error items that cannot be automatically fixed must be manually repaired before clicking Submit again.
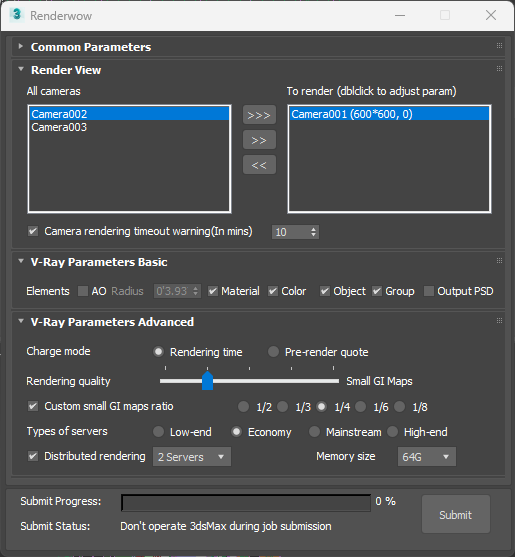
4. Parameter Setting.
After the previous step, the job submission window appears. Select the camera to render and submit with default parameters, or set relevant parameters as needed before submitting.
5. Job Submission.
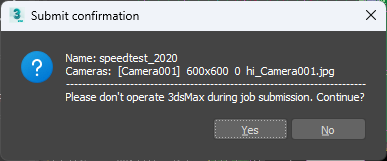
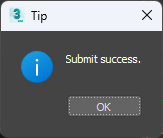
Click the "Submit" button in the lower right corner of the submission window to start submitting the job. First, Renderwow will temporarily save the scene, then perform antivirus operations, and a job submission confirmation pop-up will appear. Click "Yes" to continue submission. After submission is complete, the scene will be restored, and a submission completion pop-up will appear.
6. Progress Tracking.
In the Renderwow client, you can see the just-submitted job. The job will go through packaging, uploading, rendering, and download stages before the results are automatically saved to the previously set render output path.
Video for 3ds Max Plugin Animation Submission
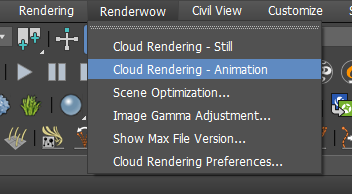
1. Click Renderwow Menu → Cloud Rendering – Animation.
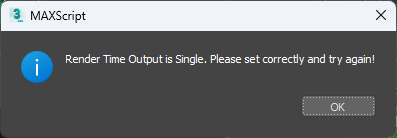
For animation jobs, you must use Cloud Rendering – Animation to submit. If the current scene is set to single frame mode, submitting an animation job will result in an error.
2. Output Path Detection and Setting.
Renderwow will detect whether the render output path is correctly set. If not, it will automatically pop up the output path setting window. You must set it correctly before proceeding with job submission; otherwise, an error will be reported.
3. Scene Settings Check
After the previous step, Renderwow will perform scene parameter detection. If there are warnings or errors after detection, a "Scene Settings Check" pop-up will appear, displaying all warning and error items. Errors must be fixed before continuing submission. If there are only warnings and no errors, you can click the "Skip" button to ignore the warnings and continue submission. Most warning and error items can be automatically fixed by clicking the "Fix up" button in this pop-up. Error items that cannot be automatically fixed must be manually repaired before clicking Submit again.
4. Parameter Setting.
After the previous step, the job submission window appears. Select the camera to render and submit with default parameters, or set relevant parameters as needed before submitting.
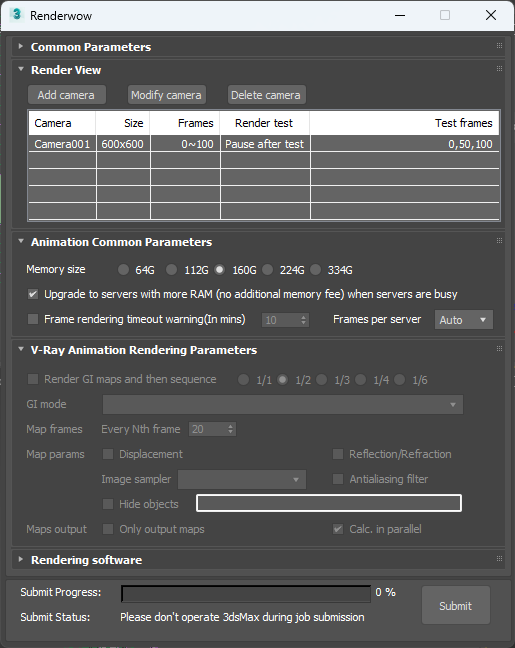
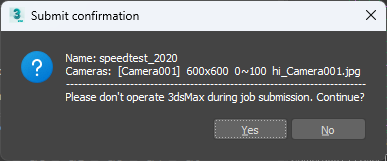
5. Job Submission.
Click the "Submit" button in the lower right corner of the submission window to start submitting the job. First, Renderwow will temporarily save the scene, then perform antivirus operations, and a job submission confirmation pop-up will appear. Click Yes to continue submission. After submission is complete, the scene will be restored, and a submission completion pop-up will appear.
6. Progress Tracking.
In the Renderwow client, you can see the just-submitted job. The job will go through packaging, uploading, rendering, and download stages before the results are automatically saved to the previously set render output path.
For detailed feature descriptions, please refer to : 3ds Max Renderwow Plugin Functionality