Renderwow
Designers who use Unity will inevitably encounter other models of design software. But sometimes there will be lost material and texture, how can we avoid such a situation? today we show you how to export the Revit scene through 3ds Max 2019 to Unity without losing material and texture.
1. Import the Revit scene to 3ds Max 2019 by .fbx-file export or import the Revit file into 3ds Max 2019.
2. Make sure that no textures are missing. If necessary, copy the textures to a single folder and relink the path to it by using the Asset Tracking Window in 3ds Max.
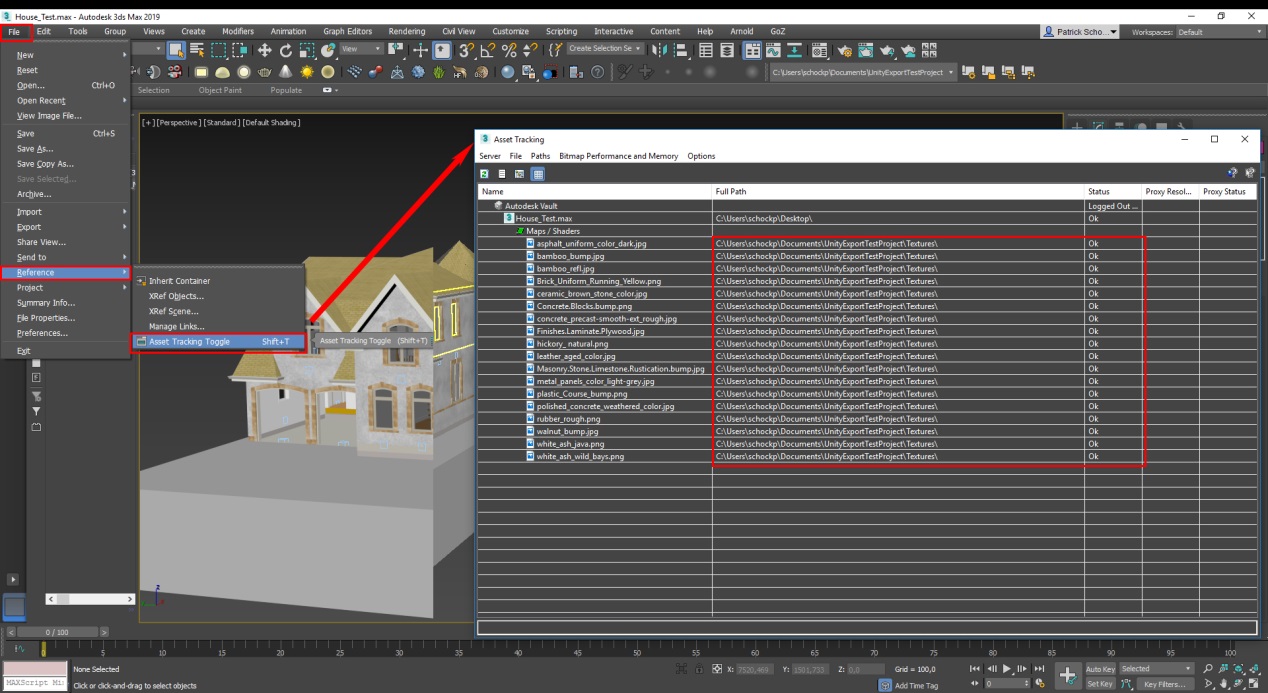
Textures can be relinked by right-mouse click on the texture and click Set Path or Browse in the context menu:

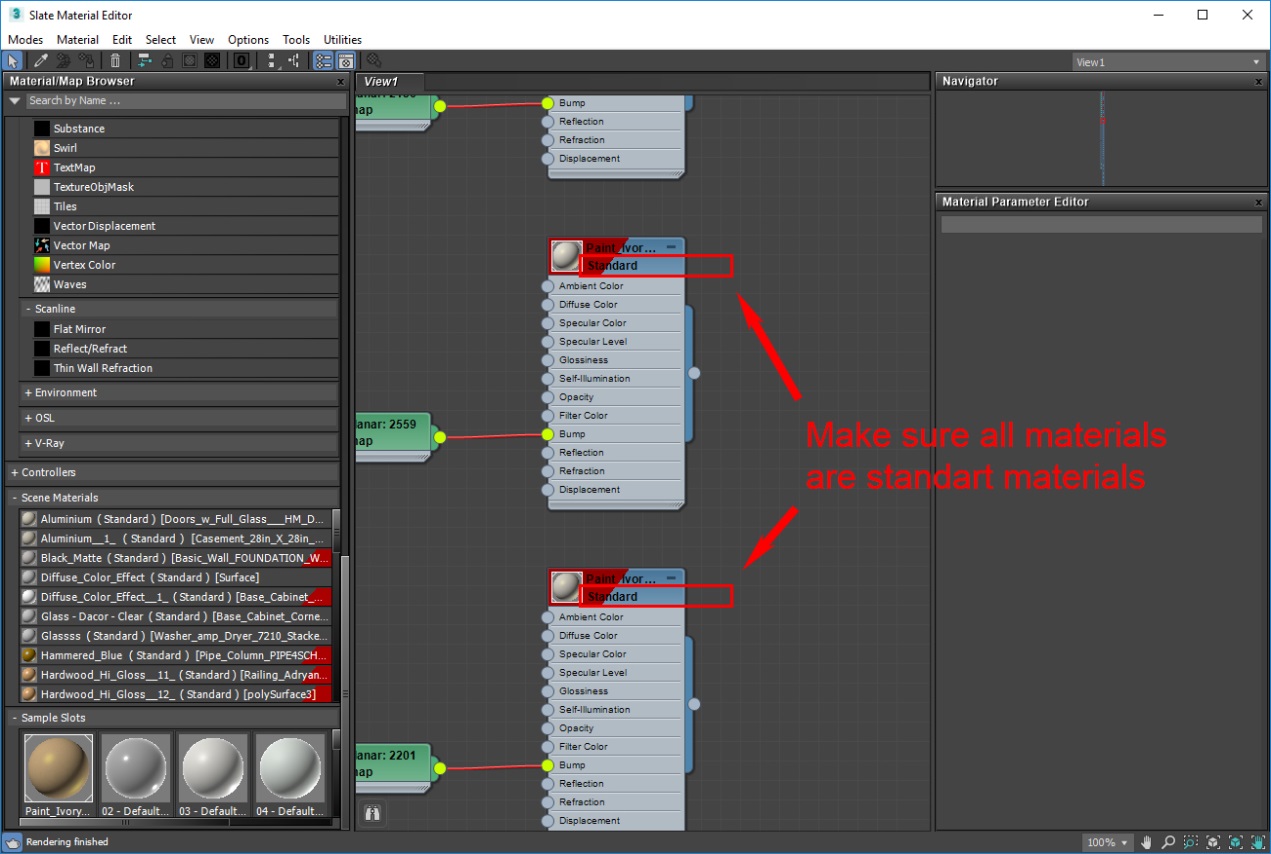
3. Make sure that all materials in the scene are Standard Materials:
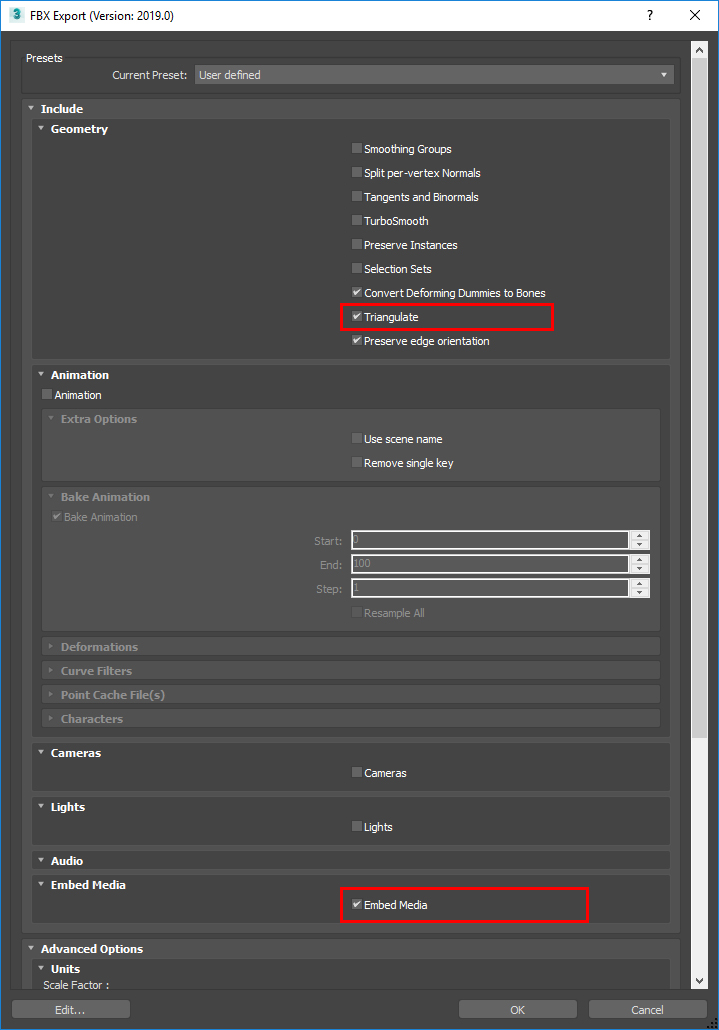
4. Export the scene as FBX file with the highlighted settings activated:
5. Create a new Unity project.
6. Copy all textures from the 3ds Max scene into the Asset folder of the new Unity project.
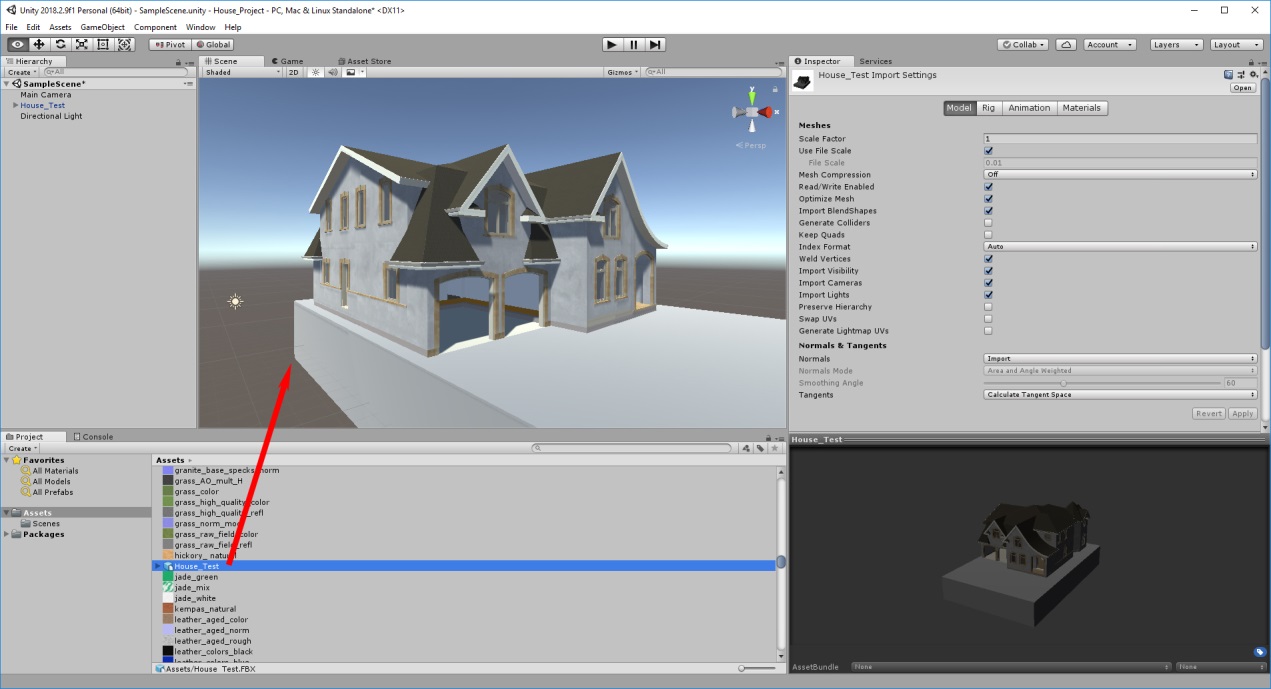
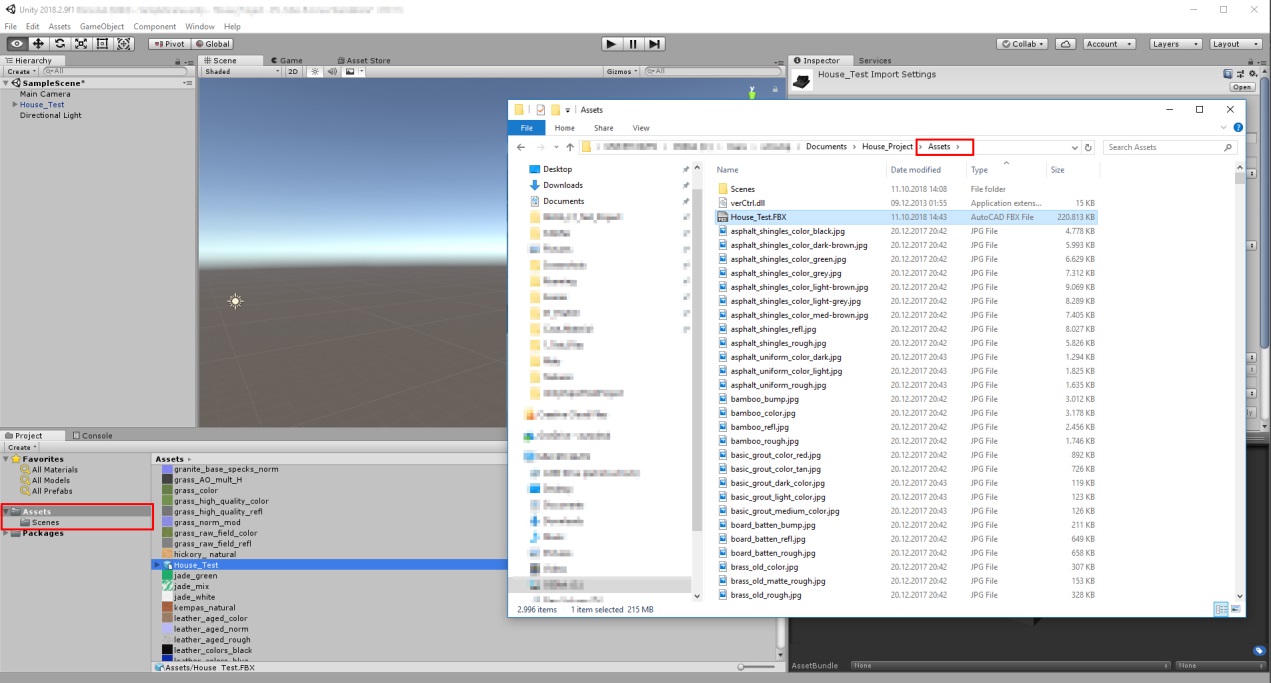
7. Copy the exported 3ds Max FBX file at the same place:
8. Drag the FBX file into the viewport of Unity to place it in space: