


Renderwow
Many color palms have encountered exposure or overexposure when mixing colors. This article will show the techniques of color mixing.
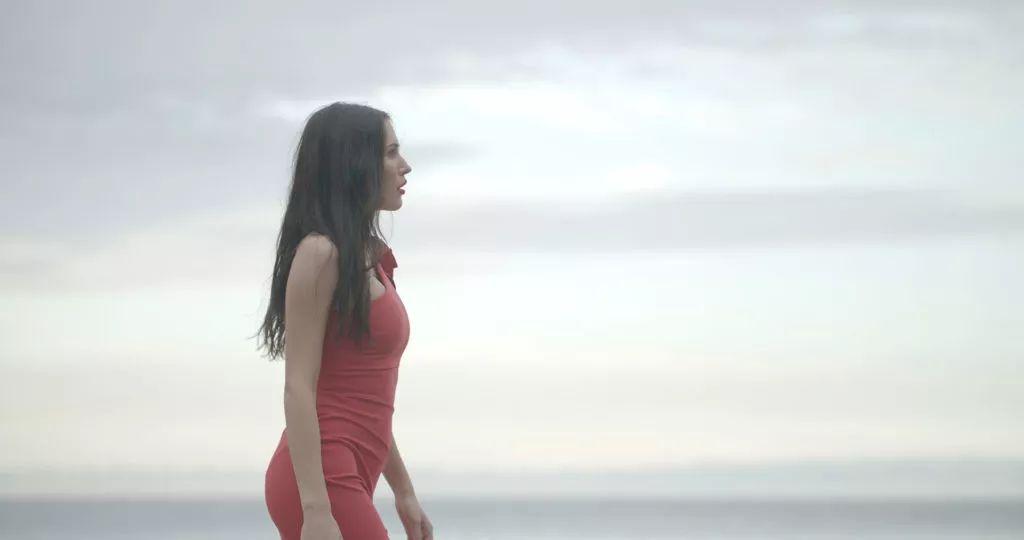
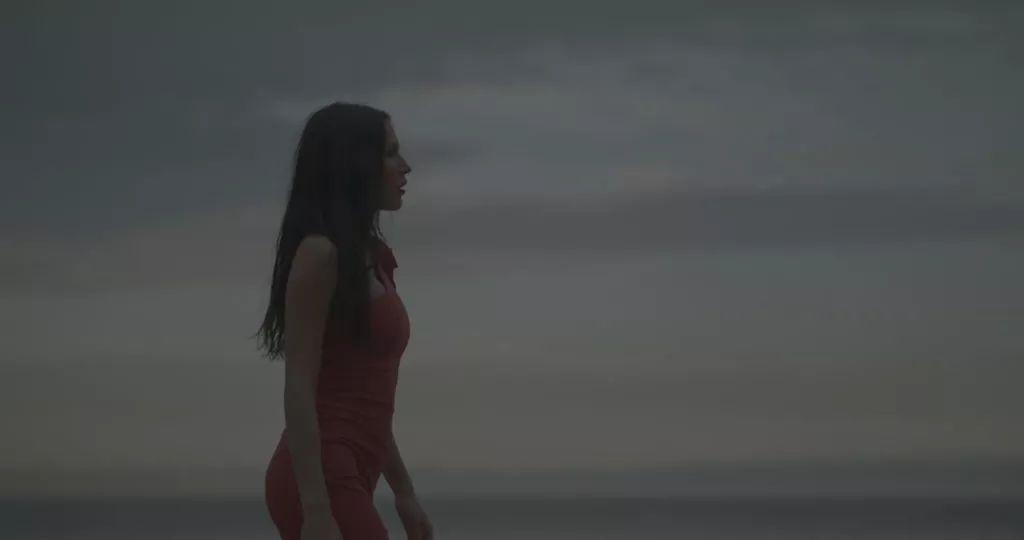
From the above material, we can observe that, the picture is exposed to the right as a whole, at the same time, the details of the sky are not trimmed, obviously, this is the right exposure of the photographer to get a cleaner shadow.
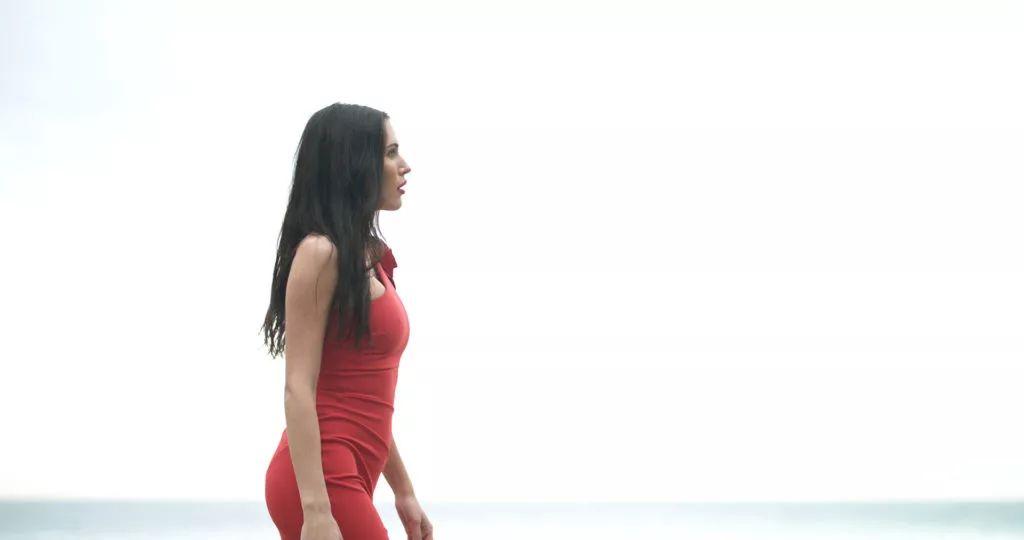
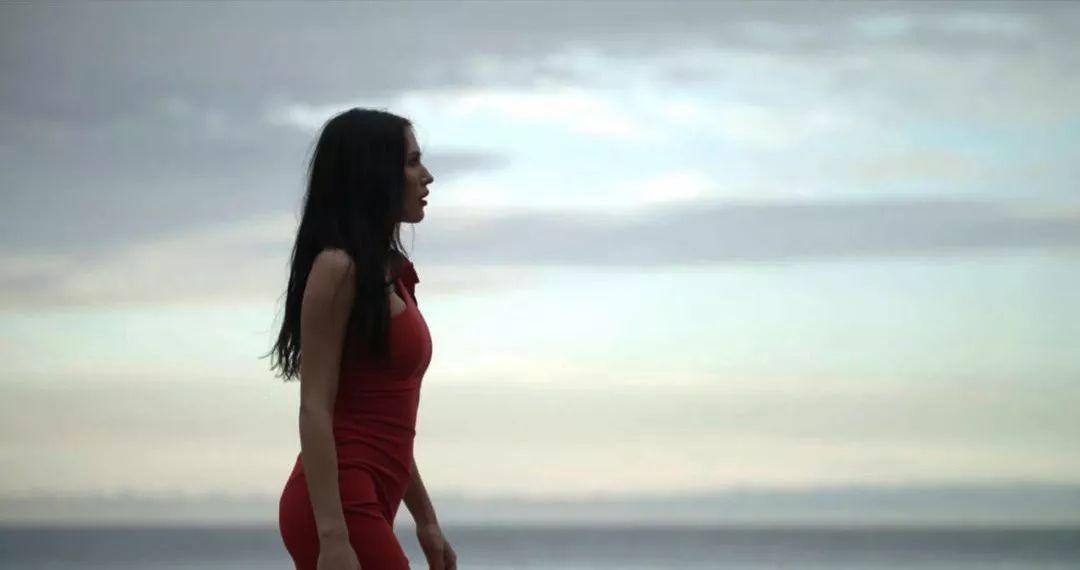
Using technology LUT correctly restore results
After using LUT technology to restore 709 material, you can see that the details of the sky are missing, so we need to manually adjust the screen.
If there is only scenery in this shot, that directly reduces exposure in DaVinci Resolve, add a little contrast, then just adjust the color balance. But because there are characters in the picture, so if I reduce the exposure directly, the following things will happen:
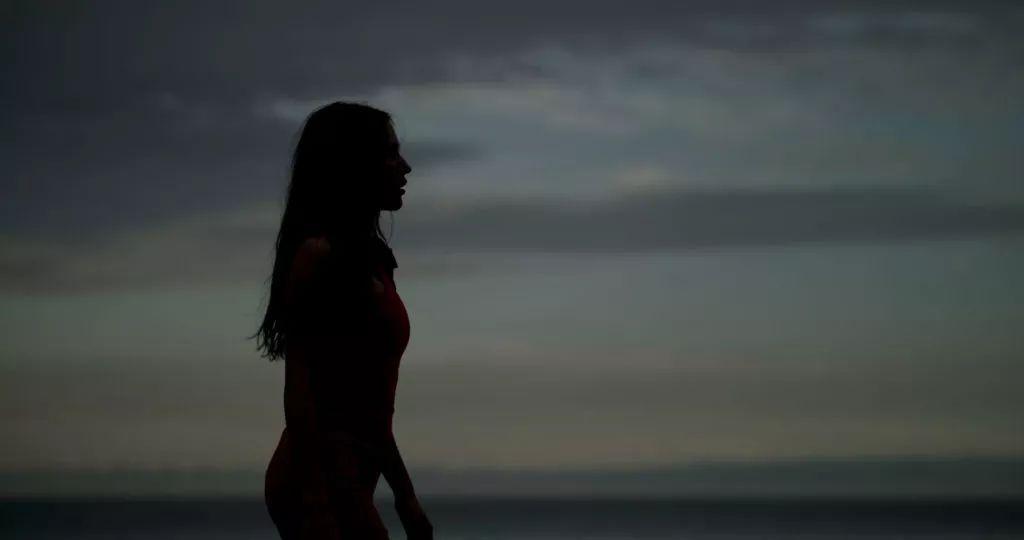
The details of the sky will come out, but the characters in the picture are completely silhouetted . If you continue to adjust, you need to improve the shadow, then the picture will become very grey and flat,it may also bring a lot of noise.
You will get the wrong result after raising the shadow
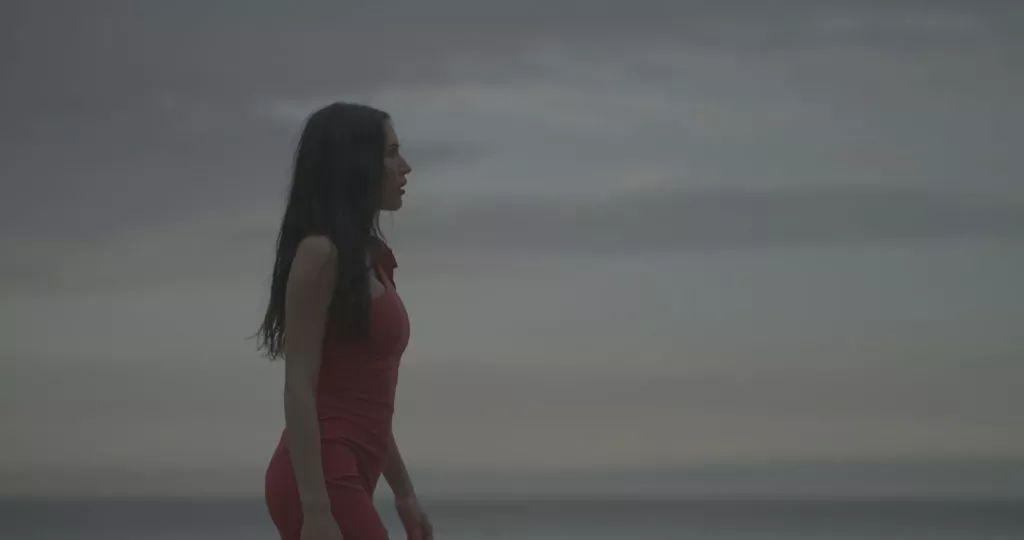
The result is very similar to the fact that we didn't use LUT at the very beginning, but the overall exposure is low. Conversely, if only the highlight pressure is low, you may get the same result:
Only reduce the result of high gloss
Technically speaking, we can continue to process these two results in DaVinci Resolve, add more nodes to pull the contrast apart, until a relatively reliable result is found.
In the process of color matching, professional color tiners will reduce complex operations as far as possible. This is especially true in this case, because this material is not RAW, and the compression rate is relatively high, 120fps was shot, so the adjustment space is not big.
Here’s a secret skill that has been tested repeatedly: start with the middle tone. You can see some details of the sky by lowering the middle tone appropriately, then deal with Gao Guang and shadow, expand the details in the picture, this way you can avoid drastically pulling the screen.
Only adjust the intermediate tone
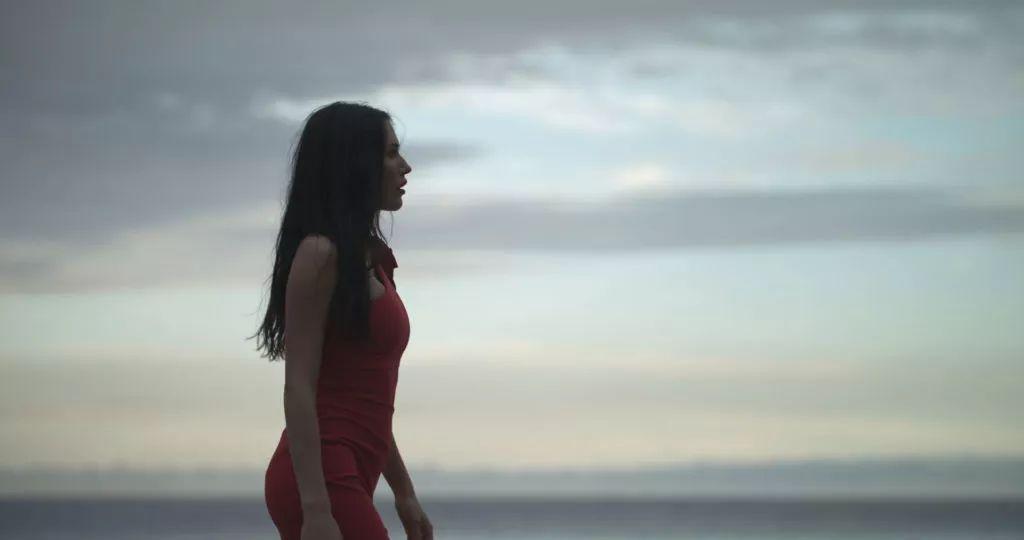
Then adjust the result of highlight and shadow
Although the above can not achieve the final effect, but contrast and exposure have reached the correct range, next we can adjust the picture further. Add some saturation, adjust the color temperature, let the picture show the feeling of sunset.
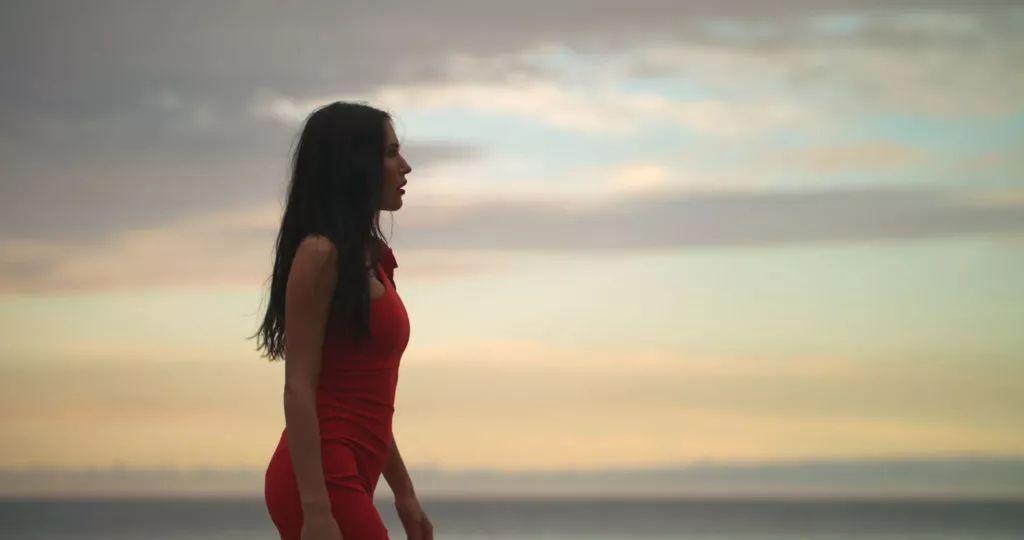
The result of increasing saturation and adjusting the color temperature
This picture is close to the final effect, please see the following node editing panel:
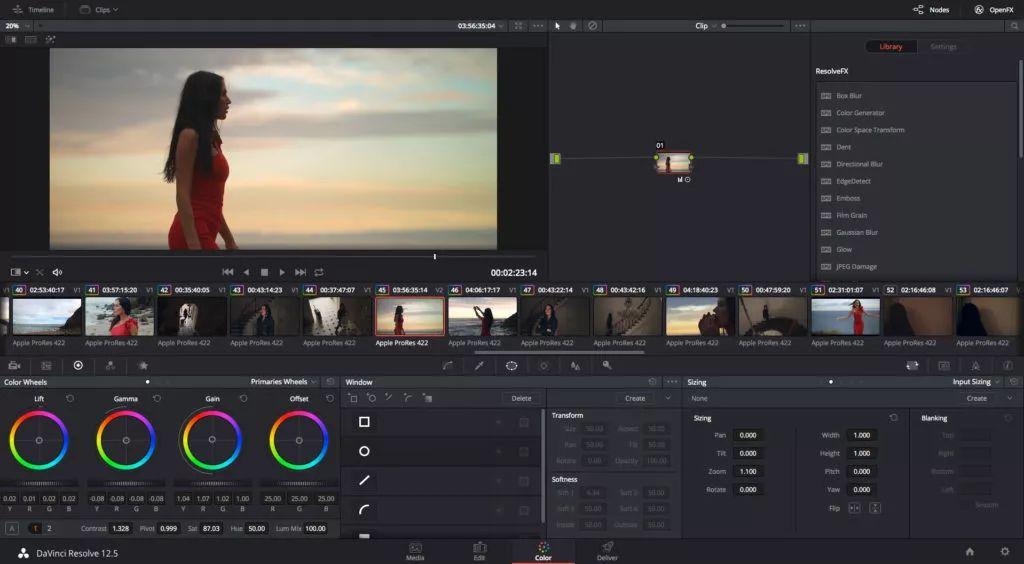
Only one node is used to adjust Lift, Gamma, Gain and saturation
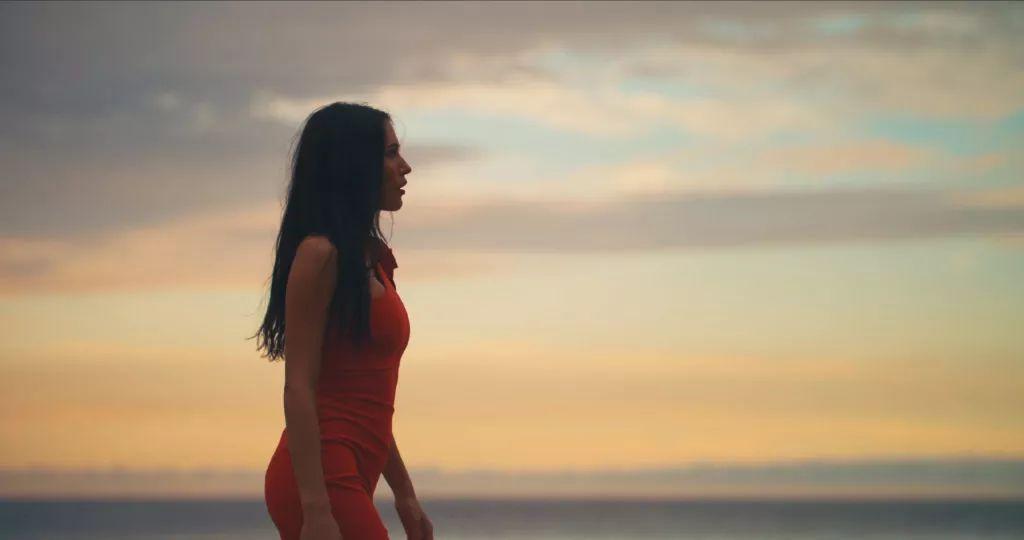
Results after using stylized LUT
Stylized LUT creates subtle differences in color, contrast, tone and overall balance that make the image more active, at the same time, the details of cloud and sky are further enhanced. Now we have finished the toning of this lens, all this is done with only one node and one LUT.
There is another point to note.
Maybe many people think that Window is painted on the characters, then it will be more convenient to reduce background exposure directly, but renderwow, I do not recommend this. for dramatic scenes with high contrast, Power Window will be very difficult to control, it even led to flaws in the picture. So, in addition to special circumstances, PowerWindow always does more harm than good.
The above skills introduced by renderwow can help to remedy the previous shooting problems to a certain extent. To put it another way, if the picture has been cut or lost details, it cannot be salvaged. So the problems that can be solved in the early stage must be solved in the early stage.


