


Renderwow
This article is about the steps of creating 3D landscapes for renderwow cloud rendering. This will teach you how to use Wysilab's Instant Terra tool to create your own natural environment and create a realistic environment with high efficiency.

Using Wysilab's Instant Terra tool, world architecture has become almost simple and easy to implement. Once you know what you are doing, you will be able to complete a realistic landscape from scratch in six steps.
01. Generating terrain
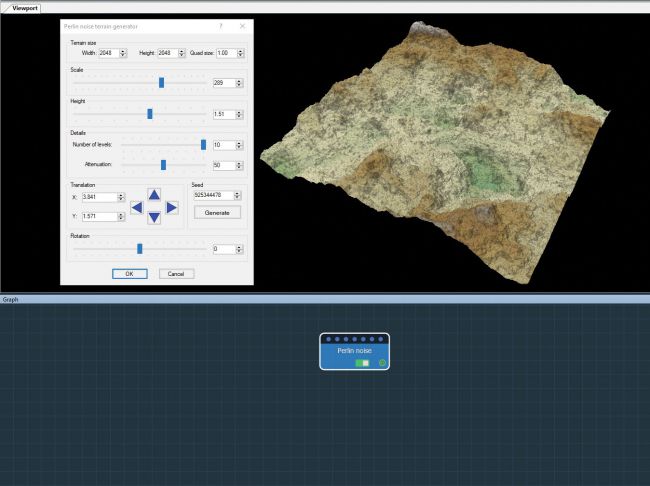
Modify node parameters to start shaping the landscape
Start the project by adding an InstantTerra terrain generator. Visual ports show the visual representation of terrain and graphics hosts program link nodes that make up terrain. Double-click on the node to open its parameters and modify it to start shaping the terrain. You can also import and modify terrain from a single image file or multiple image files.
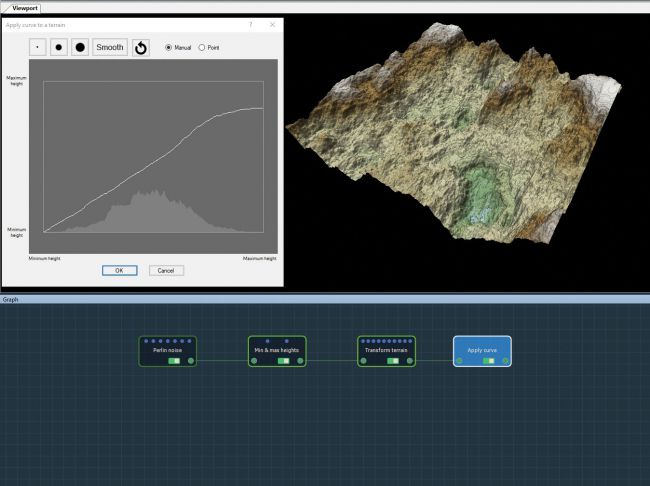
02. Change terrain
By linking nodes, you can create different geological features.
Explore different approaches by linking nodes. For example, constraining elevation, compressing the terrain on the Y-axis to achieve folding structure and create natural slope. each node accumulates programmatically. Composite nodes can be used to mix to form different geological properties of the terrain. First, focus on global forms, then the terrain is optimized by adjusting the parameters of each node.
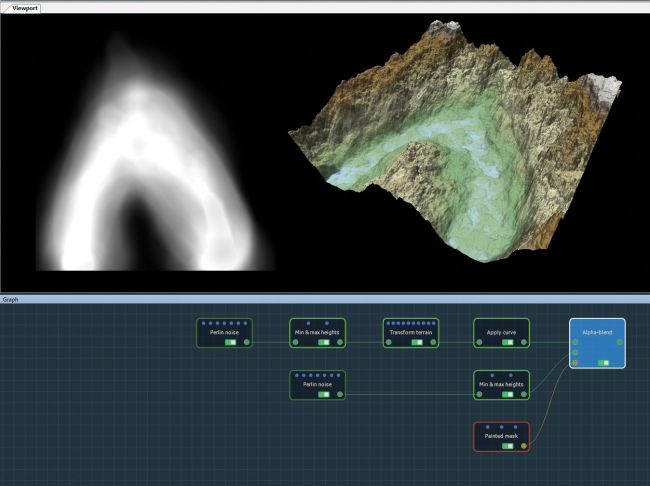
03. Constructing Terrain
You can combine two terrain in different ways: To get more varied ingredients.
Combine two terrain and use the multiplier coefficients of each terrain to create the combined results. When combining terrain with translation, scaling and rotation options you must first complete composition provides maximum freedom. you can also use masks to form two terrain. For example, a mask is drawn directly in a 3D view, it is composed of mountains and less steep sandy terrain to define the flow position of a river.
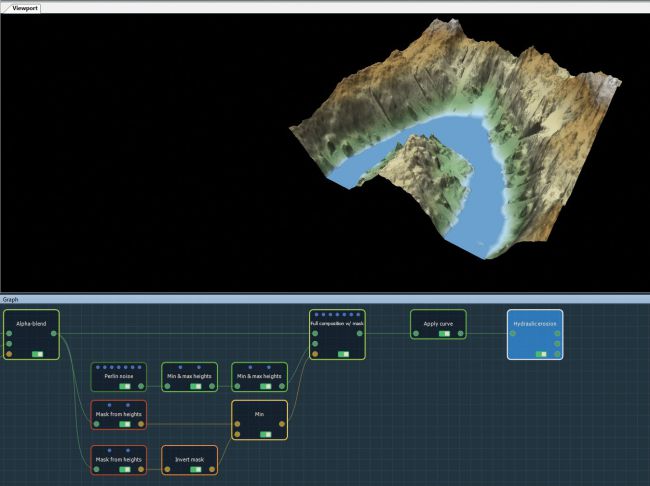
04. Simulated erosion
By combining masks, you can simulate the effects of rainfall and rivers.
Create realistic erosion and sediment effects caused by rainfall and rivers. Combine two masks of different heights then height values are used to define the area between rivers and mountains. Edit mask attributes or combine them using mask synthesis nodes to get the final result. Global erosion is used to simulate sediments washed away by runoff.

05. Generate masks and export options
The generated mask has the same size and resolution as the input terrain.
Generating masks from terrain attributes, for example, slope, height, curvature or angle, and export them so that they can be used later to achieve results. The mask created has the same size and resolution as the input terrain. You can also export the terrain as a gray level map or grid. If the terrain has a color map, it can be exported as an image file.
06. Create a landscape
Render the completed landscape in your preferred 3D package.
Use the rendering engine to import terrain, merge the exported mask, and apply different materials, the mask is used to define the location of the application terrain asset, for example, grasslands, trees or rocks, in order to create the landscape. for all rendering engines, the workflow remains roughly the same. Here, we use the illusion engine but you can also export to other software, for example, 3dsMax, Unity or Maya.


