


Renderwow
As a 3D artist, there are always some hands-on tools so artists can use that help lessen energy consumed and improve the quality of their works. The use of PBR mapping has become the norm for artists: This kind of texture can improve the fidelity of the work.
So how do artists balance speed and fidelity? The answer is Substance Source and Substance Painter.
Art creation needs to concentrate more on creativity, not on the operation and learning of complex software tools. Substance Painter and its own material library has an intuitive interface. There are a lot of practical tools to control the details of texture that help artists work better. Substance Painter is very convenient to use and it can be learned quickly.
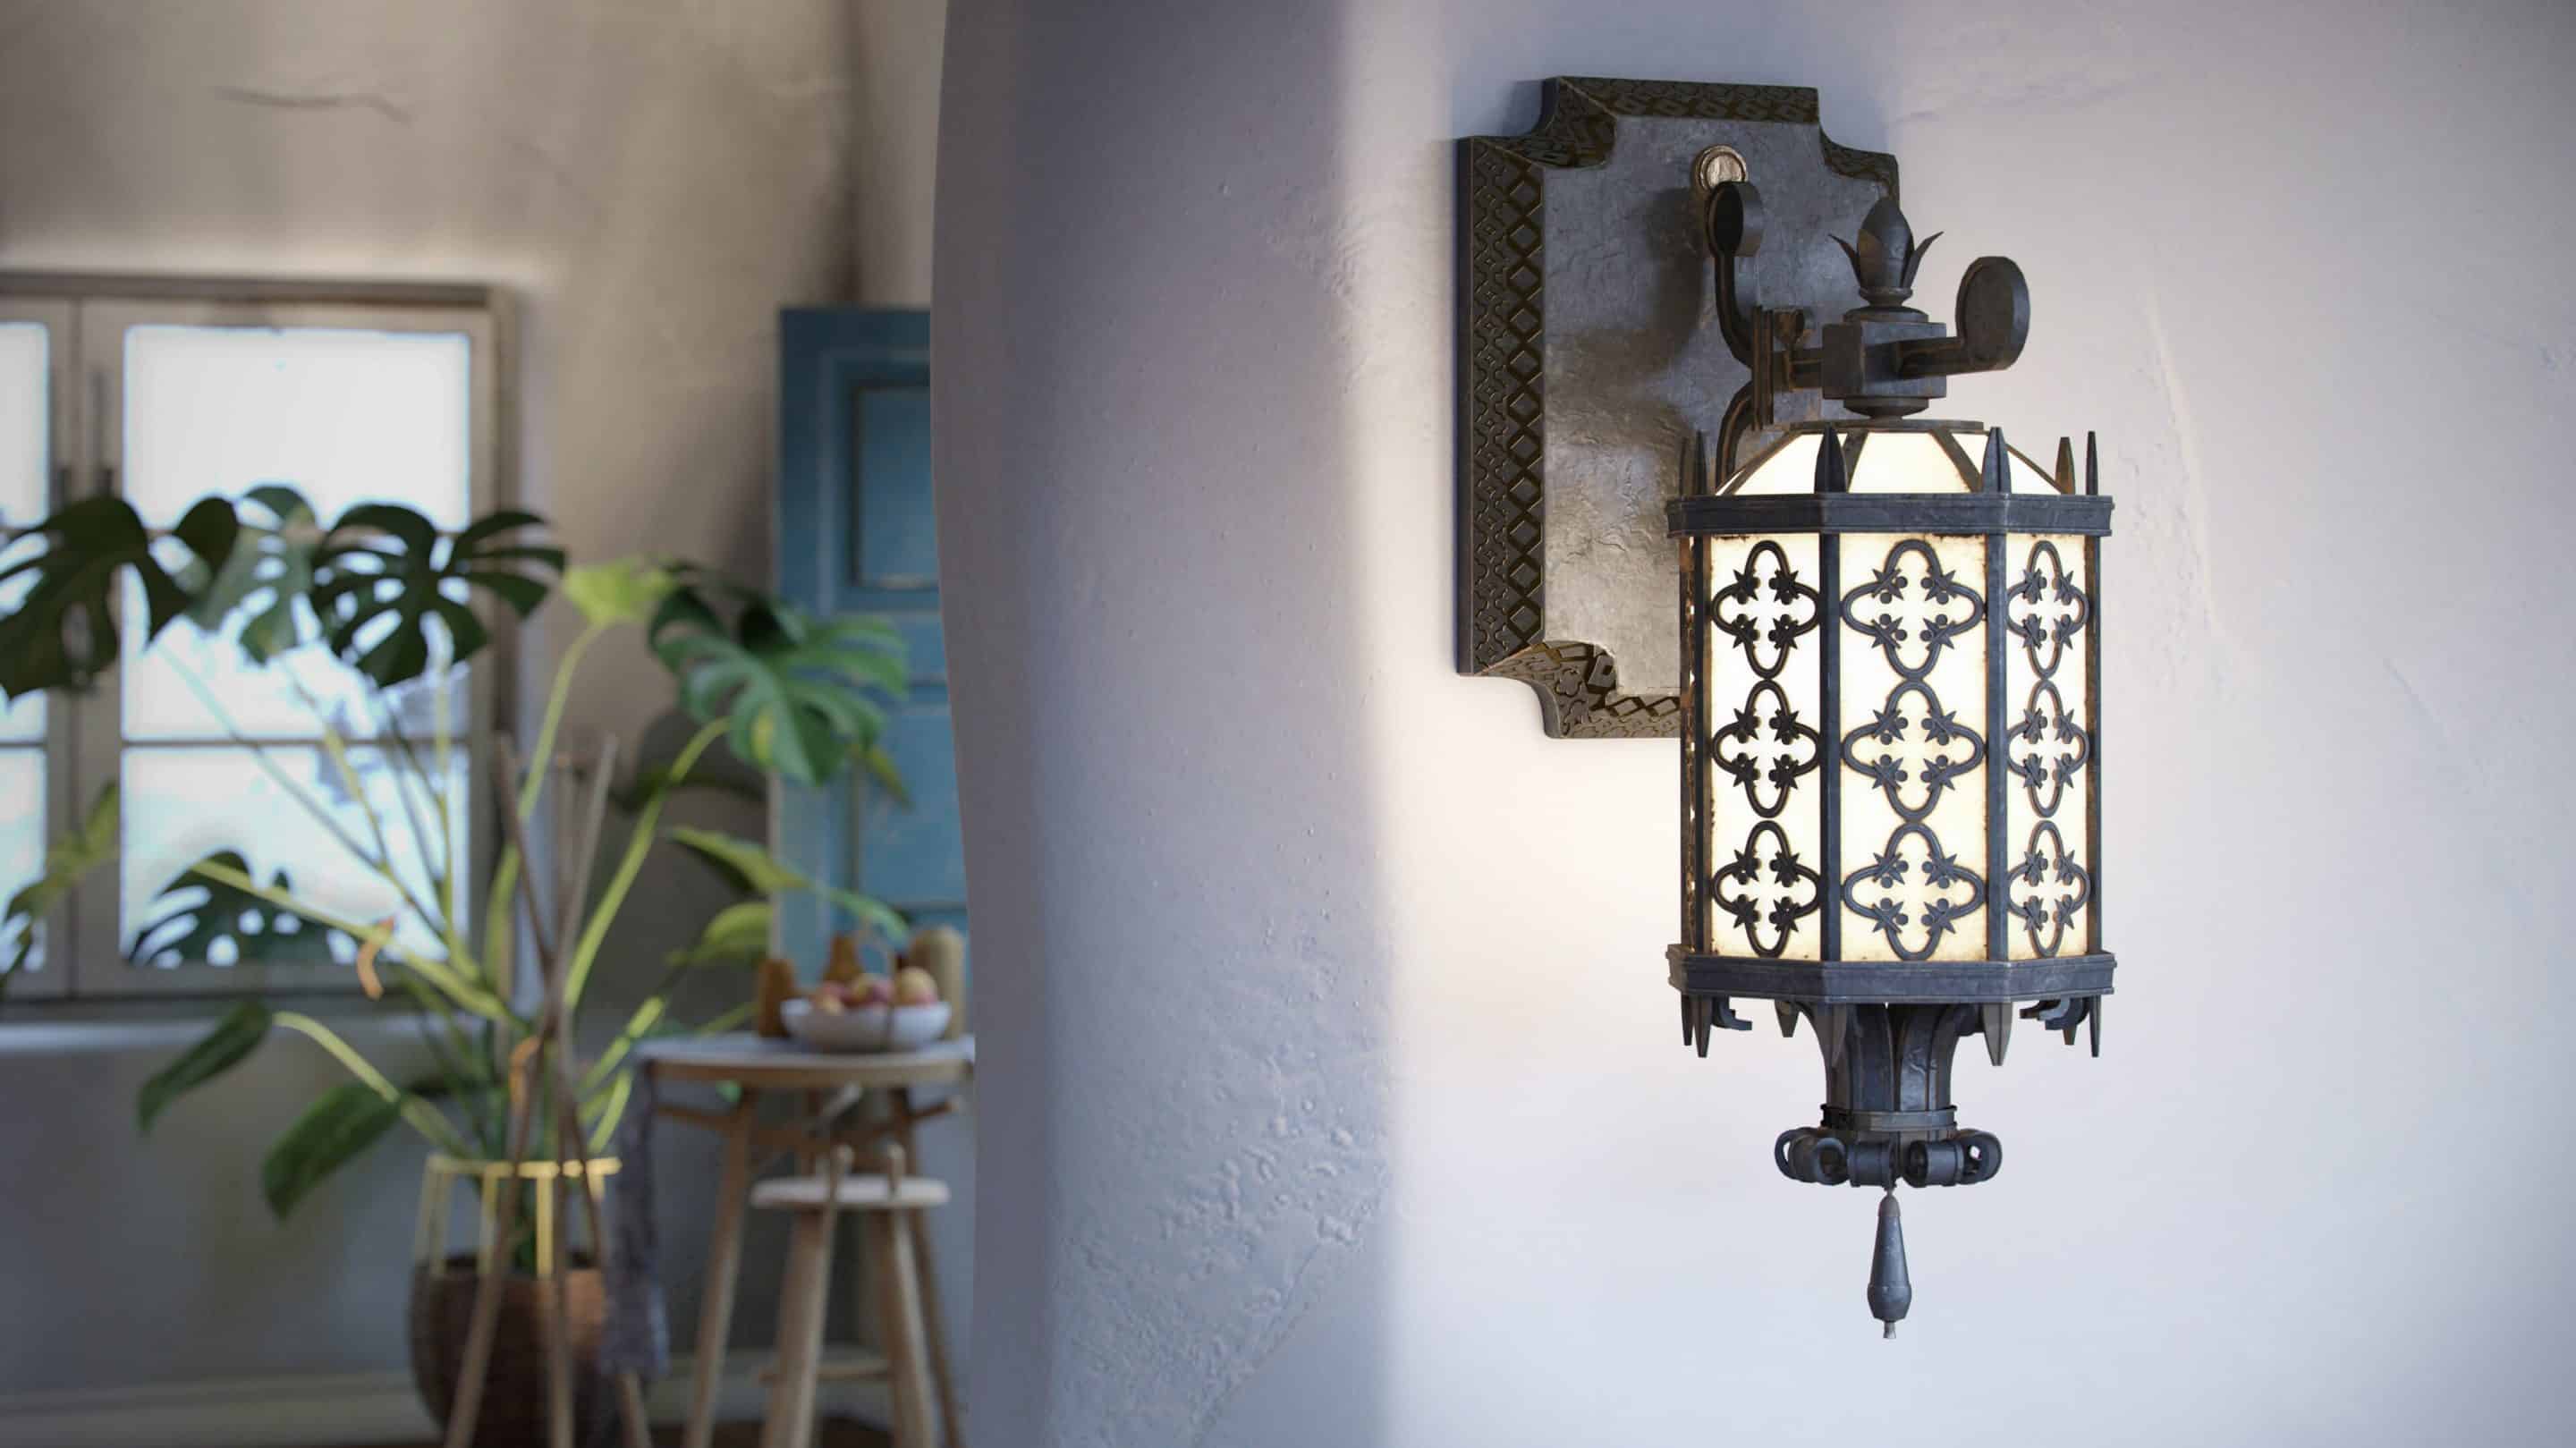
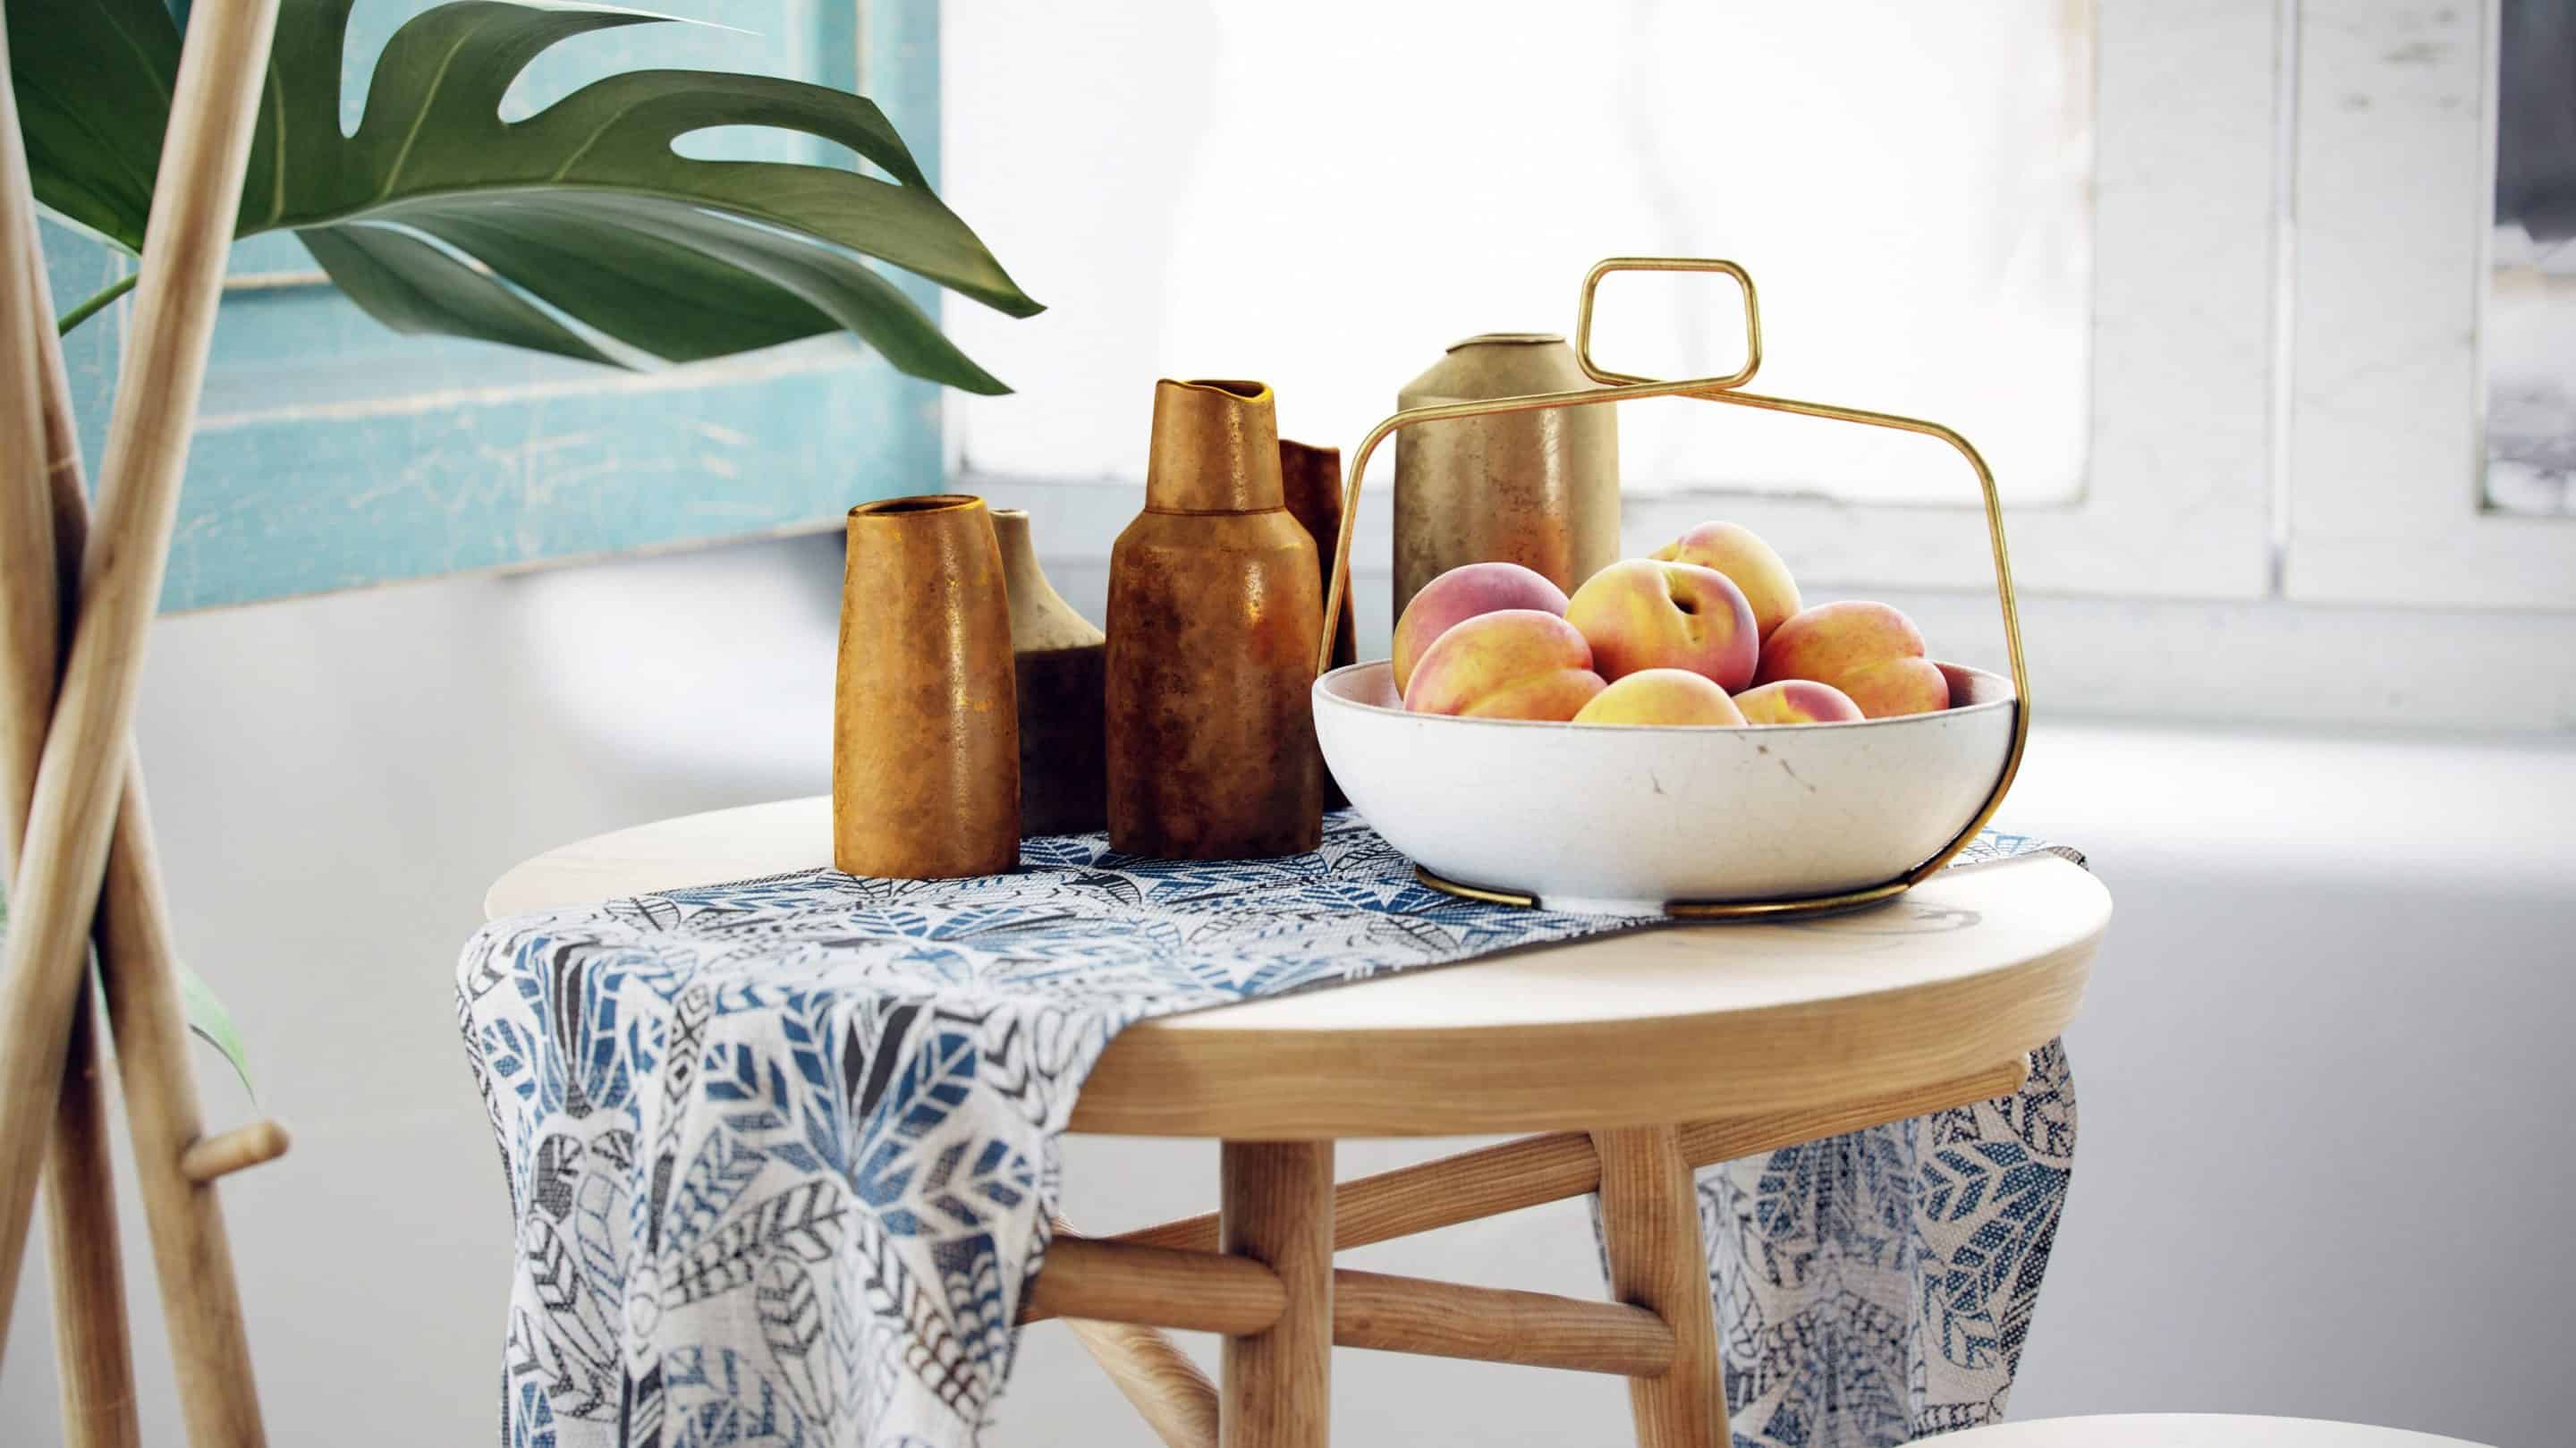
Here is a Mediterranean indoor performance project to introduce my basic operation process:
On Substance Process
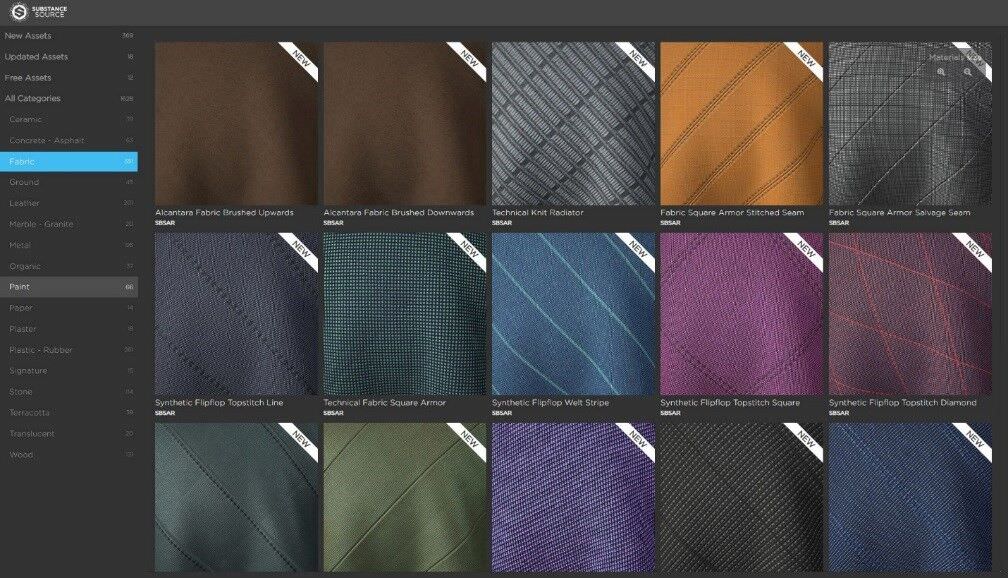
Start by retrieving Substance's material library -- there are plenty of good materials to choose from and it's all made of scanned PBR material. The advantage of this material library is that it can add new wood grain, cloth, tile, wall and other textures. Some textures themselves have preset parameters with different effects, which make it easy for the artist to make all kinds of textures.
The way to get into this material bank is very simple -- there are roughly three kinds, mainly through official links or plug-ins to provide access. Plug-ins themselves can directly search, download, give and edit these materials in Max function. The accuracy of the texture can also be switched and parameter settings can be saved for repeated calls in the future.
If you want to make some special texture adjustments, Substance Painter should be used. For example, make minor adjustments to the texture image and add some details to the nearest texture.
The first step is to search the material base and find the basic material. Then add the details, for example, draw a circle of cup marks left by coffee cup on the table, wear and tear on the edge of furniture, wrinkles on the surface of fabric, fingerprints left on glass or metal surface, etc. Computer paintings are too perfect and clean and lack of nature and reality. In Painter, you can freely and quickly add various wear and weathering effects to break this unnatural perfection and make it closer to reality. It is these imperfect details that make your material look more realistic.
Here is an example of how to use it from modeling, texture to rendering.
1 reference
Design starts with a reference, because in the process of collecting pictures, you can constantly think of many details. These details can make your rendering work more realistic and natural.

Reference map
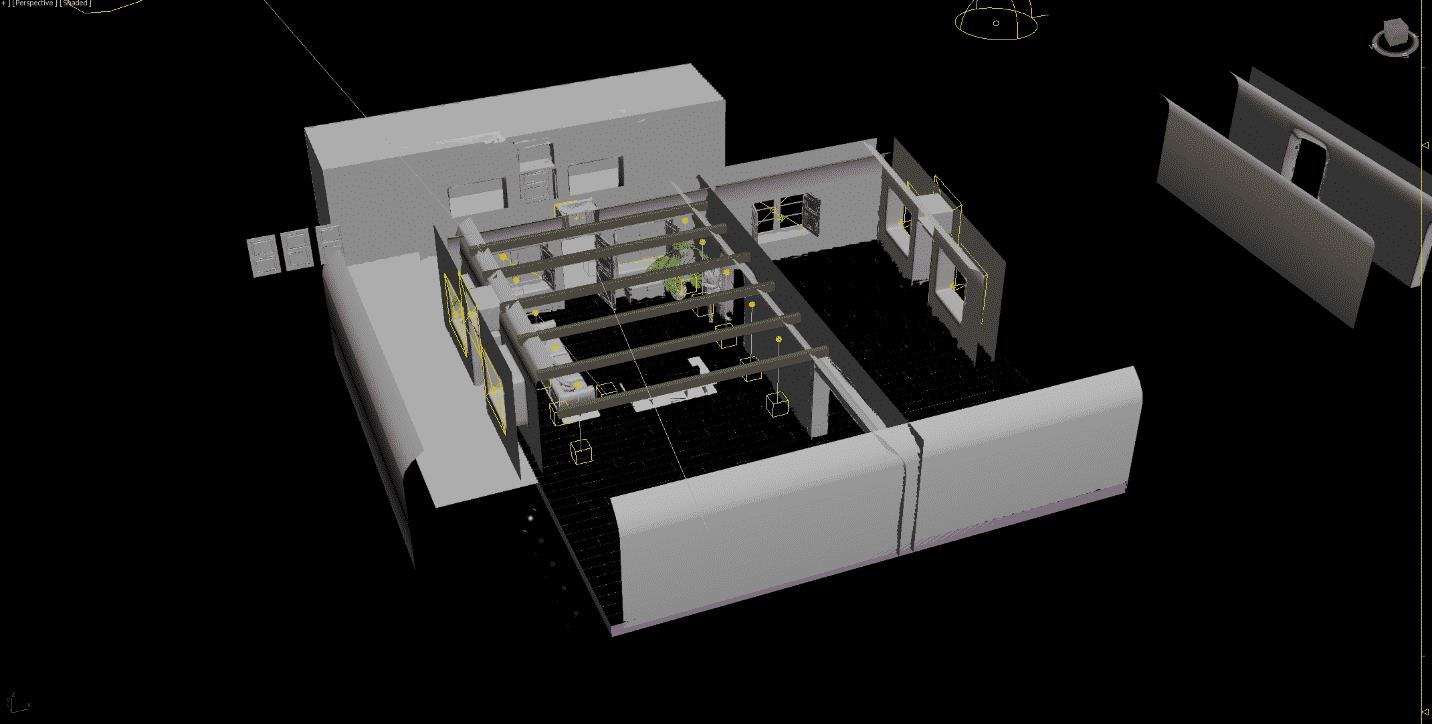
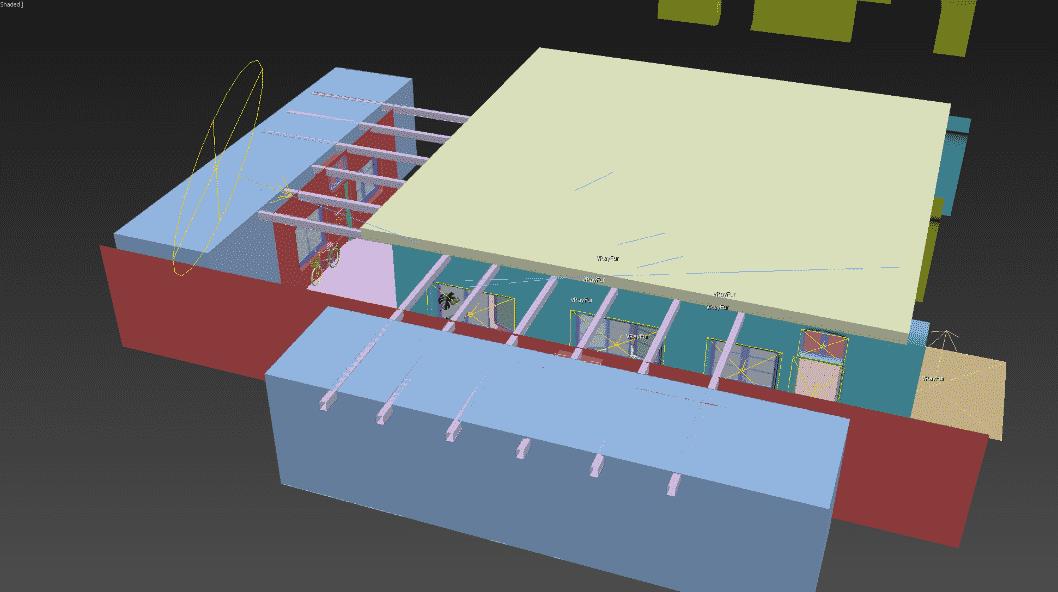
2 modeling
Modeling starts with the simplest cube as the approximate proportion of space, units must conform to the actual proportion, because rendering engines like V-Ray are based on real-world proportions, information such as the proportions of various spaces and the dimensions of furniture can be easily searched on the Internet.
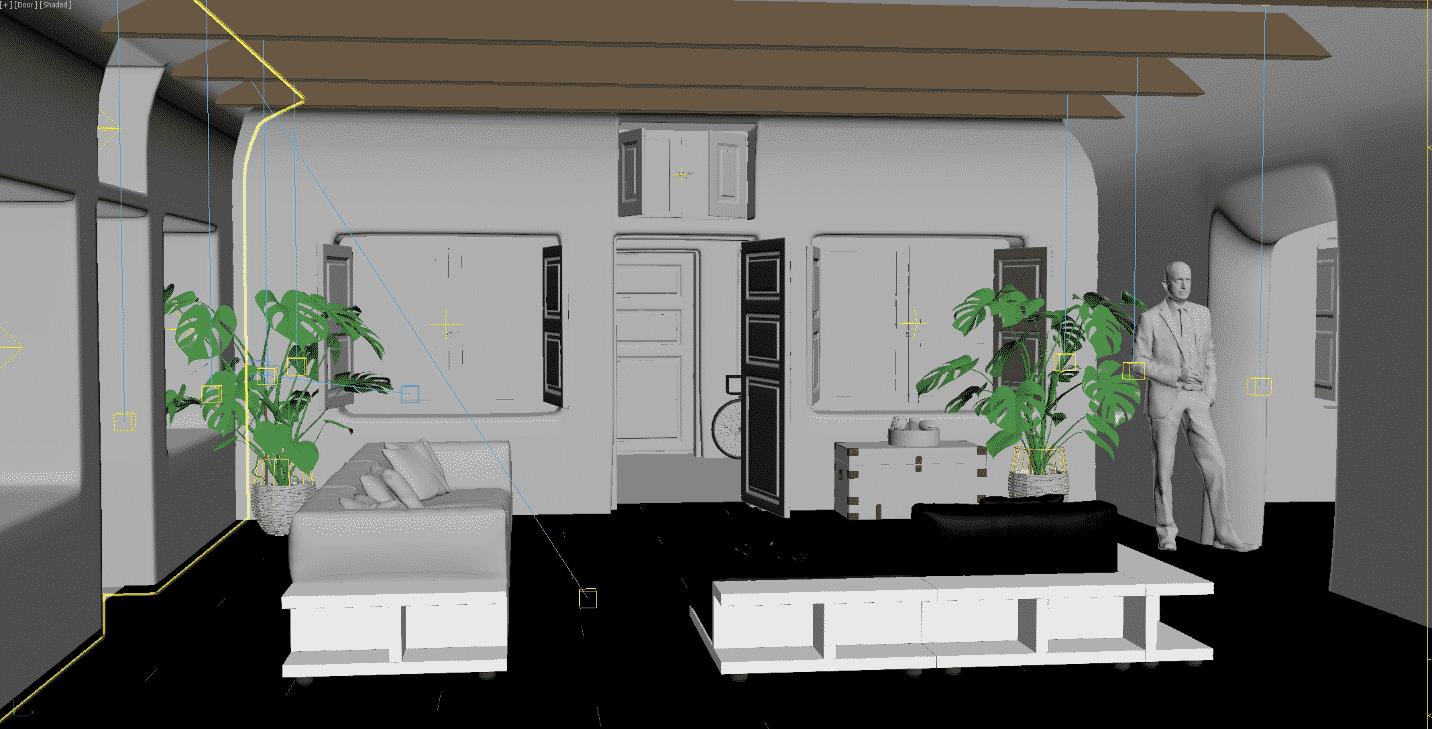
In addition, placing a three-dimensional character model in space can help you feel the size of space. Create doors and windows, walls, beams, and various large elements to help improve the space. The floor uses a classic combination of floor generation plug-ins and Multi-Texture.
Ornaments can be downloaded from major model websites to fill the whole scene. This can make the whole picture live quickly, but we need to pay attention to the collocation of model style. Some of the UV models are in place, which can be easily processed when input into Substance Painter.
3 texture
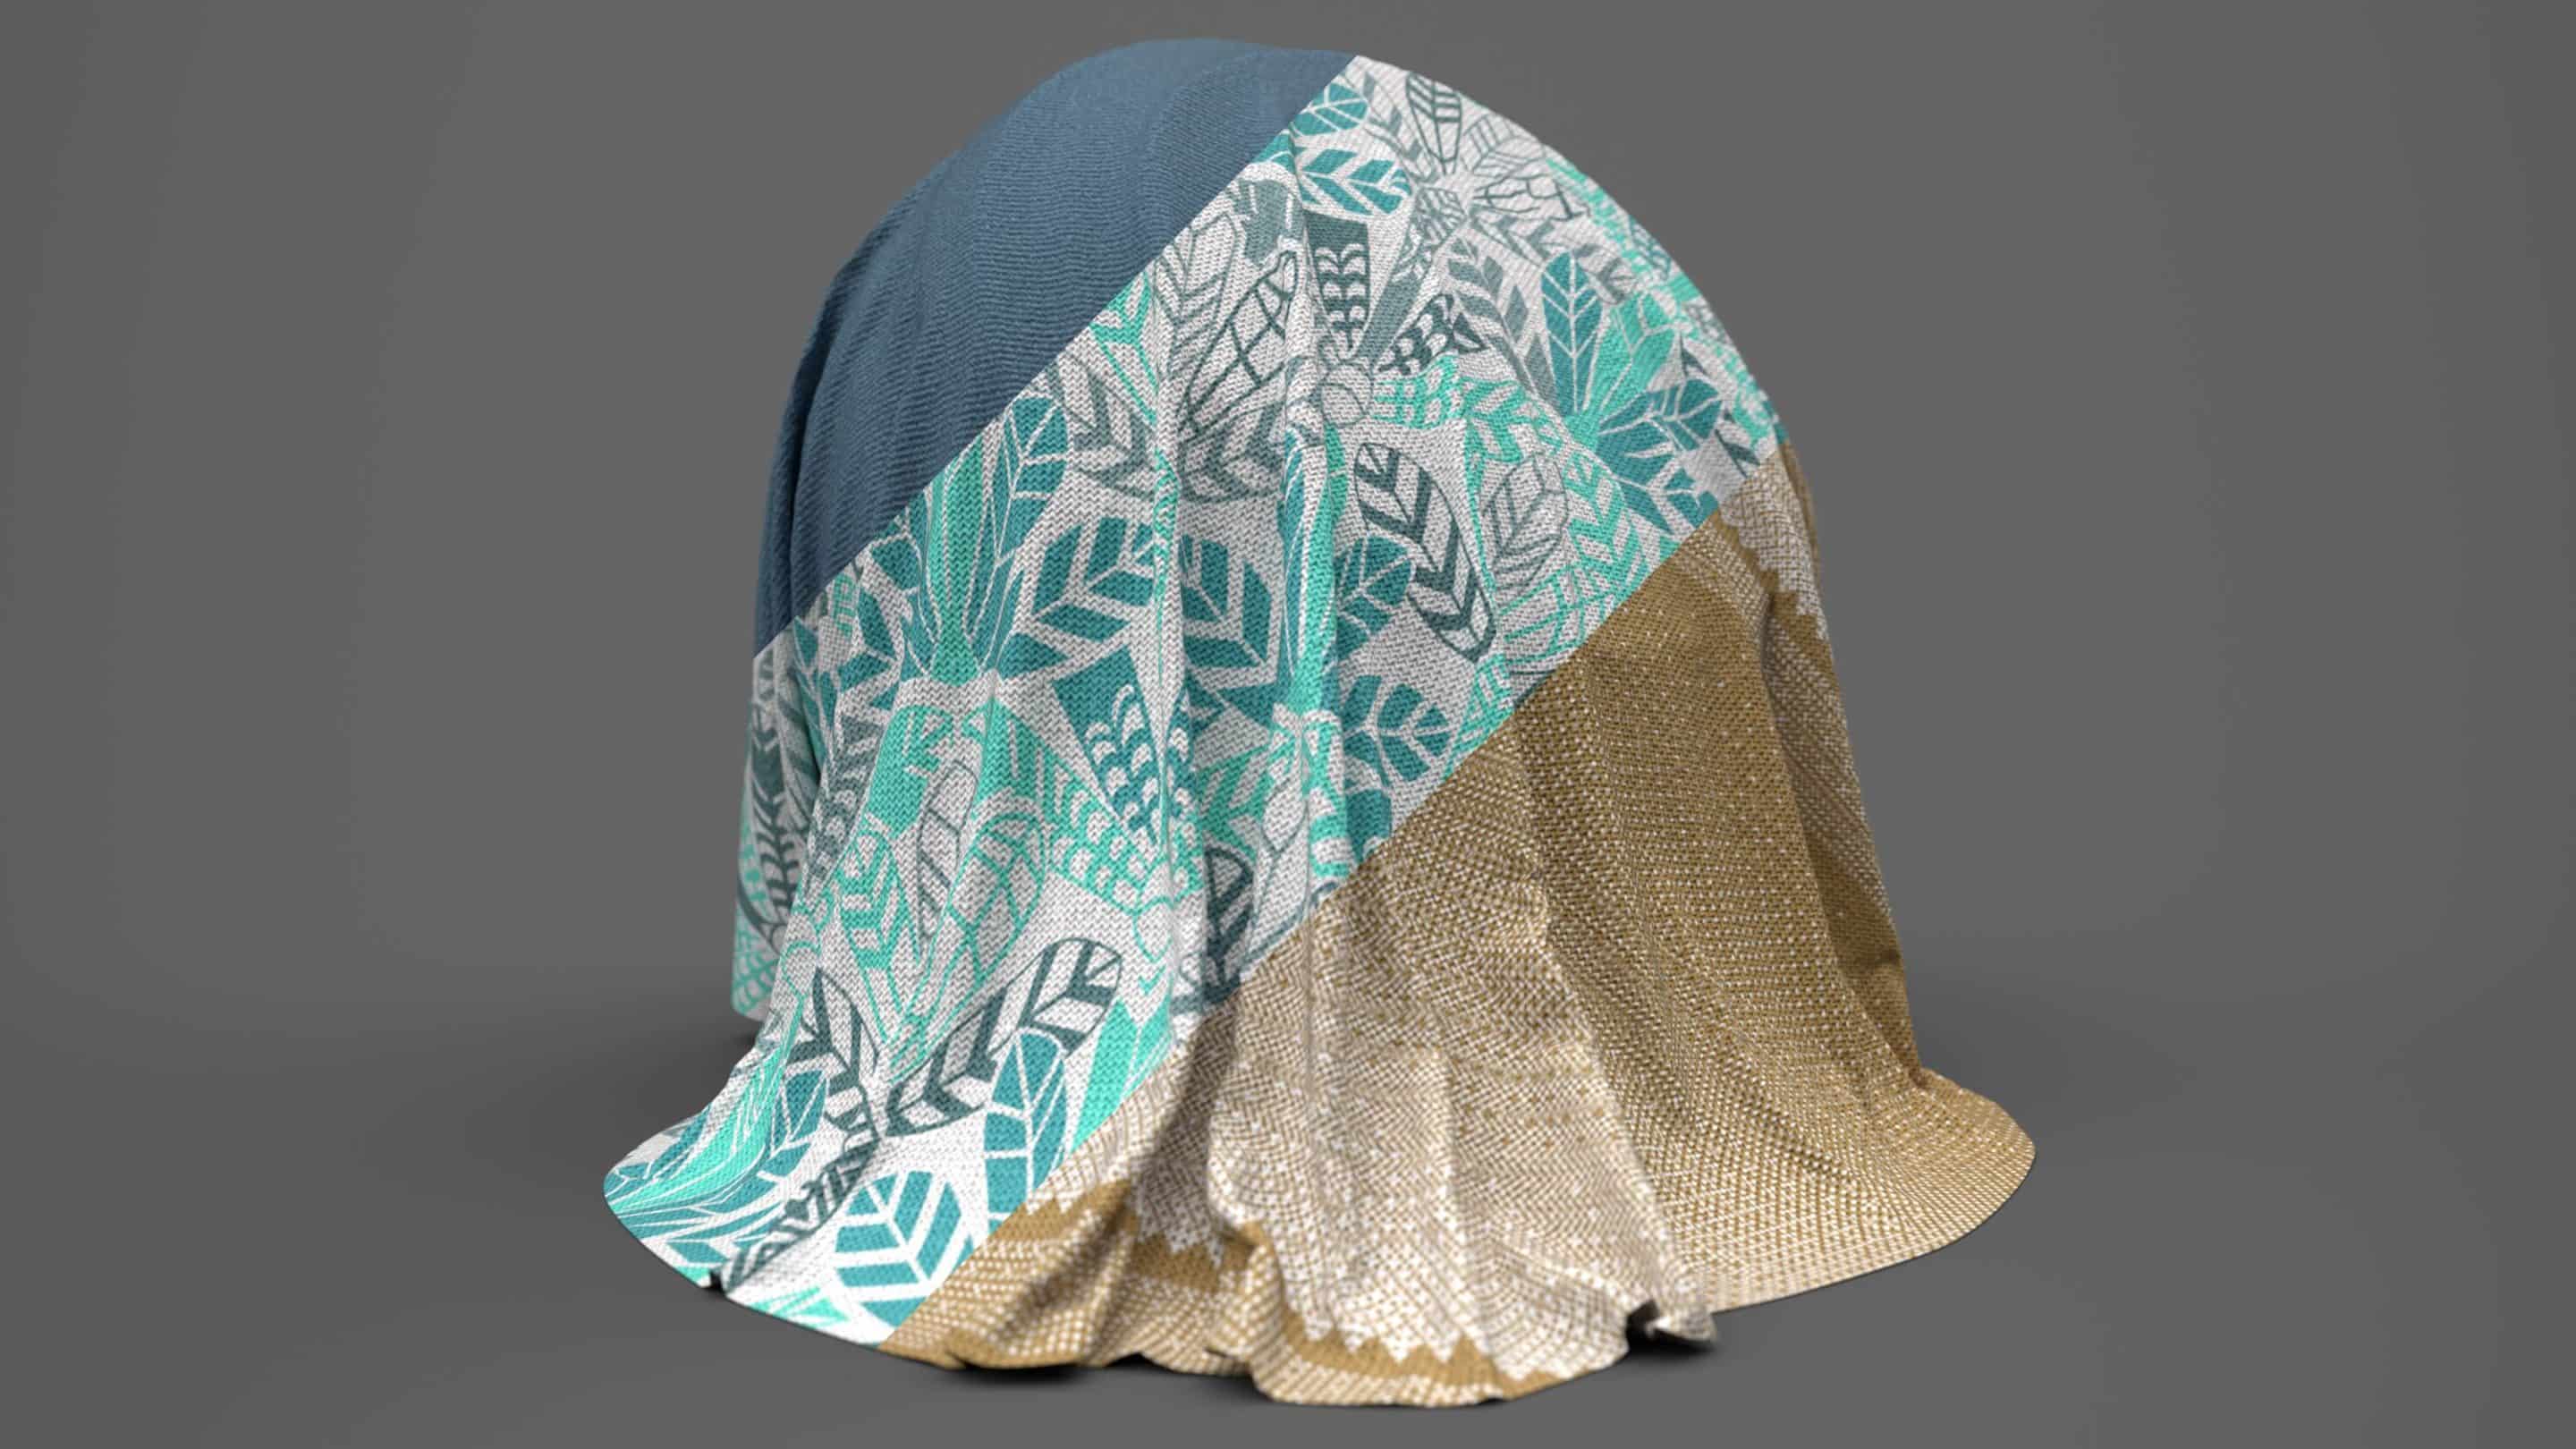
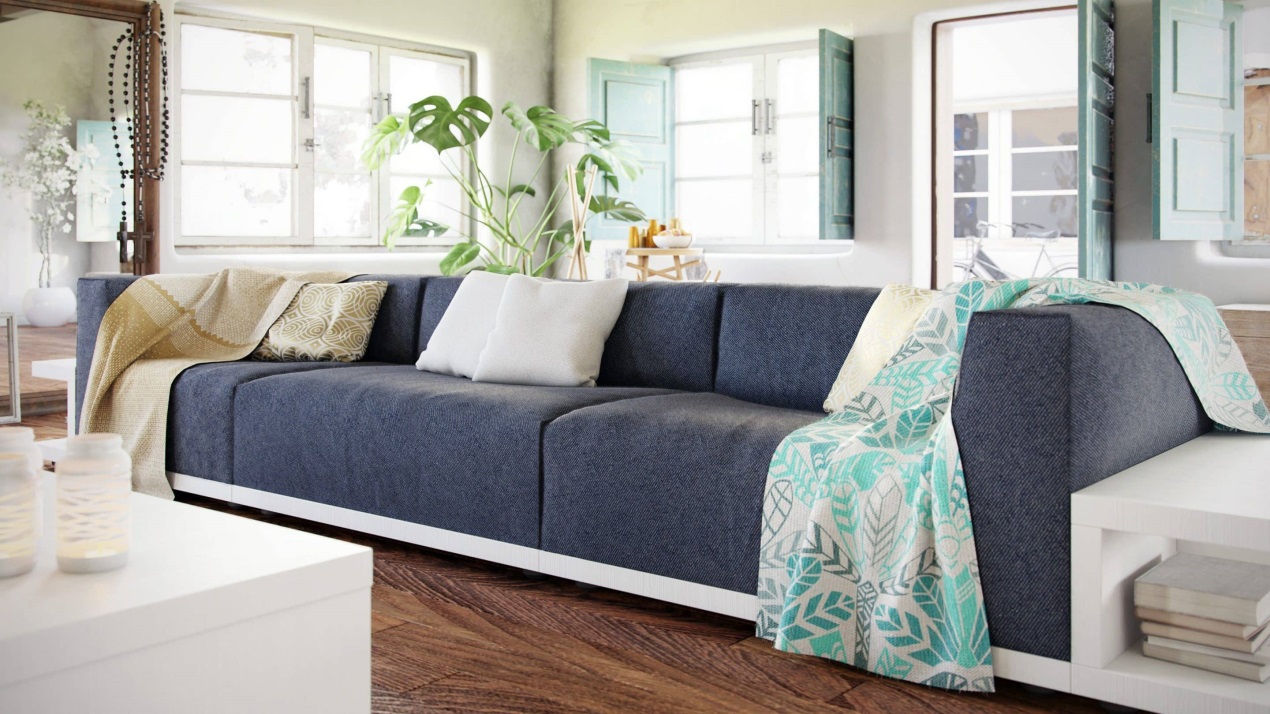
It's a little interesting from here: First draw all the textures of the fabric, such as pillows, sofas and blankets, which are easy to handle, this kind of material is enough to use the self-contained material bank, there's a bunch of exquisite material, you just must drag it onto the model. If you are using version 18 or 19, you can call these materials directly from the view of Max through the Allegorthimic plug-in.
Because the sofa model has its own UV, it takes only a few minutes to get this done. The hardest part of this step is to choose the most suitable cloth among hundreds. Many fabrics have different colour numbers to choose from, so that you can match the colour matching you want freely.
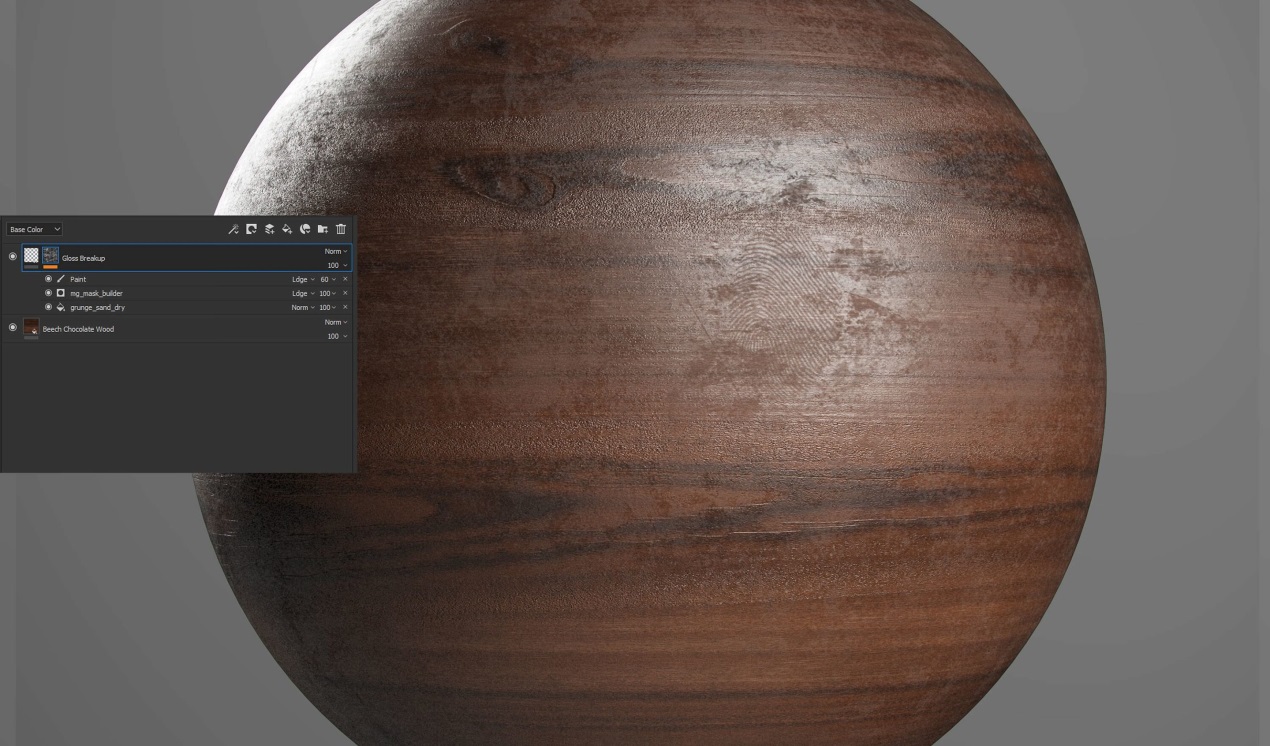
The next step is to do the wood grain. There are more than 100 wood grain images to choose from so simply choose the beech wood grain of your choice. So if the texture looks to clean , you must add some wear and tear marks to make it look more realistic.
In Substance Painter, drag this material onto my model first, and then start drawing various scratches in detail. All the descriptions are expressed in two layers, as long as the material does look so clean.
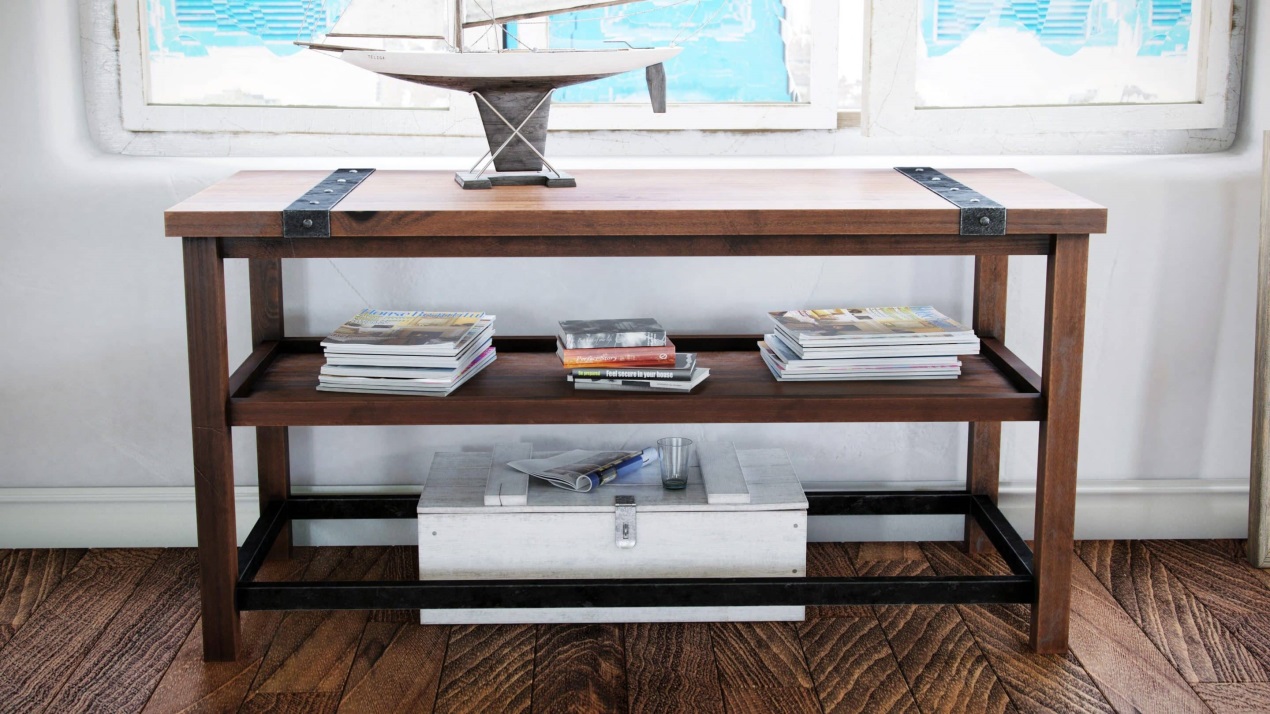
The next step is to assign this material to other different objects, but each object must use a different texture instead of the same texture being used repeatedly.
While Substance Painter can make seamless maps, the greatest feature of this tool is that it can make every object with the same texture look like it has its own texture and make the scene more rich in hierarchical effect.
Here,let's do it the other way ,save the texture as a smart material, group all the layers together, right-click, and select "Create Smart Material" from the pop-up menu.
After this step, you can open another object model, drag this material onto other objects, at first, it will look as good as the previous one, but you can continue to do all kinds of fine-tuning to make some changes. This Smart Materials approach is very practical, it is convenient to make every cross beam and window frame in the scene look different in texture and avoid stiff feeling.
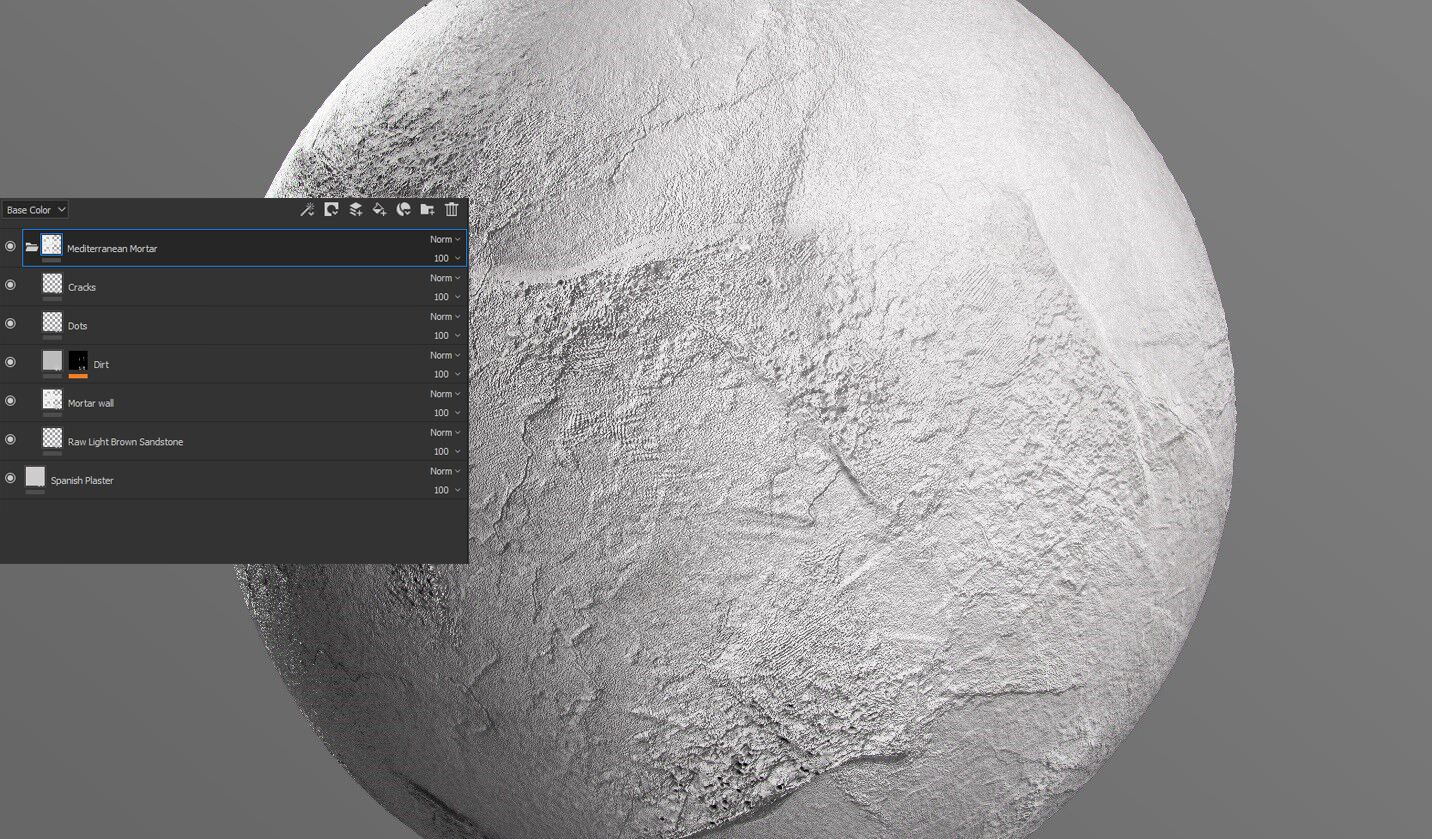
The gypsum walls are also a large area of material in the scene. Similarly, we first searched the basic material in the material library and found a good material called Spanish Plaster, Of course, there must be some adjustments, so we added a Sandstone texture called Raw Light Brown Sandstone superimposed over it to add some texture effect to make it look less smooth,if you want to add more wear, you can continue to superimpose effects and add dirty old textures to depict details. Maybe others will say that the wall is too dirty, but it's these elements that make our rendering look closer to the real world.
Finally, we need some small cracks to create more depth. All kinds of effects are added in order to make the wall look less perfect and fake. The Substance Painter is the perfect tool to achieve these kinds of effects.
4 lights
Back in V-Ray for lighting: The sunset is usually a combination of hemispheric lights + HDRI, a V-Ray sun, and a supplementary light in the window.
If you use V-Ray 4.0, you can use the newly developed Adaptive Dome Light.
Here's a very useful script called Find and Bind -- this script automatically aligns the position of the VRay sun in the scene with that of the HDRI sun so you can rotate your hemispheric lamp at will, and the VRay sun will follow you automatically.
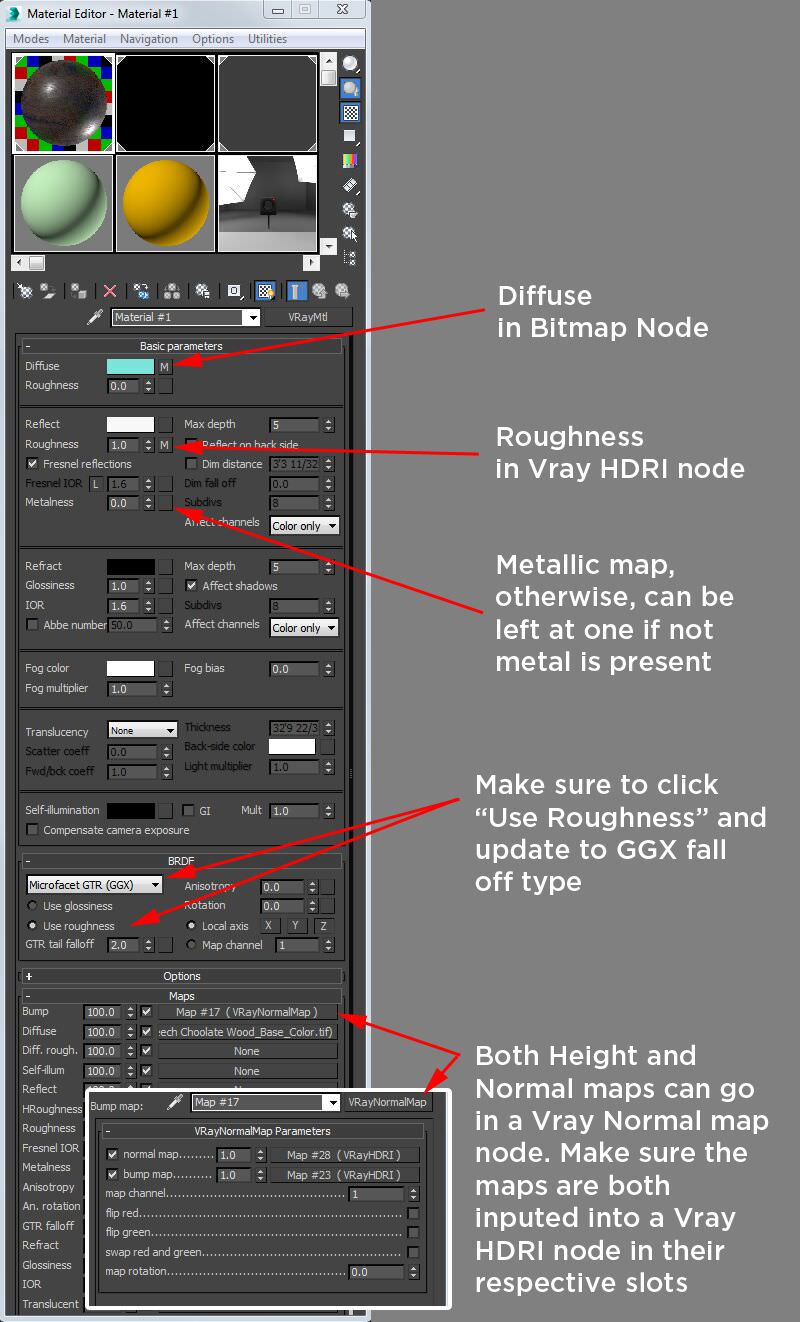
5 rendering
Because the scene texture needs to show a lot of details, this is rendered with 4K precision. The screenshot shows how to use Metal/Roughness to set materials.
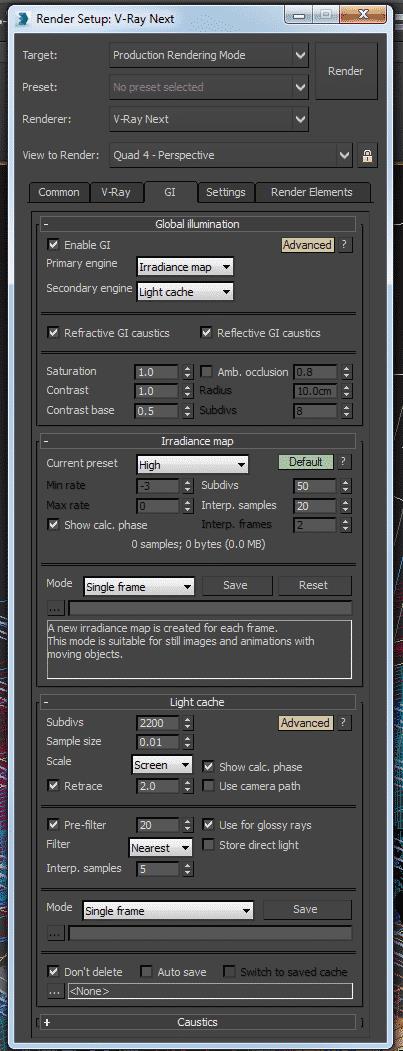
Next, in the global settings, if there is a metal texture in the scene, the Max Ray Intensity parameter is set to 9.0, it can remove the bright spots in the rendering. In the interior, Irradiance Map acts as Primary Engine and Light Cache acts as Secondary Engine.
It is worth mentioning that if the Max Rate parameter in Irradiance Map is less than 0, the material will lose some details in rendering. Subdivision can be increased to 60-70 to enhance the detail of the shadow. In the setting of Light Cache, when Store Direct Light is checked, the light and shadow will look unnatural.
In color mapping, we choose exponential exposure mode. If the sun is a little exposed, we can use Reinhard instead.
For example, in this rendering, the intensity of the sun is 0.05, however, there is still a little exposure, so the settings must be changed to Reinhard exposure mode, Burn Value was also reduced to 0.2, this can make the light inside and outside relatively average. In the render passes, with the atmosphere, diffuse, lighting, reflection, refraction, VRayExtraTex, VRayDirt, wire color these channels, they give you the freedom to make post-production changes, especially if you need to make quick drawings, saving you time to adjust in 3D.
6 later stage
There are no standards in the latter period, and everyone has their own aesthetic tastes.
For this image, "Load Files Into Stack" was used to load all channels at one time, superimposed mode of lighting and GI channel is changed to Screen or Linear Burn to help make the image look more relaxed.
Then for reflections, refractions, specular channels, use screen overlay mode and give the layer a little transparency. You can also change to Subtract Overlay mode. If you want to remove the overexposed reflection in the scene, you can use the VRayDirt channel, change the overlay mode to Linear Burn, and set the layer transparency to 50% or even lower.
After complete adjustment, all layers are merged, and a curve is adjusted. Then add the halo effect and chromatic aberration in the Lens Correction option. Finally, use an Unsharpen mask with a transparency of about 50-75.
summary
Drawing in this way can show a lot of artistic effects. Material library is very good, and the operation is simple, so you can save a lot of tedious operation time and spend more time on artistic creativity like a true artist.


