3ds Max Submission Tutorial
Renderwow supports all 3ds Max versions from 2009 to 2026. It supports the built-in 3ds Max renderer, V-Ray, Corona, FStorm Render, Redshift, and Octane Render, as well as commonly used Max plugins.
There are two submission methods:
-
Submit directly via the Renderwow menu inside 3ds Max (supports both still images and animation).
This method is simple to use and is the primary method. When using this method, the scene must be opened first. Note that submitting unsaved scenes is not supported.
-
Drag and drop the scene file into the Renderwow Client for submission.
Supports drag-and-drop submission for all 3ds Max versions. The workflows for 3ds Max 2016 and above differ slightly from those below 2016. Both support single-scene and multi-scene file submission via a single drag-and-drop action.
Core Version Differences:
3ds Max 2016 and Above: After dragging the scene to the Client, completing the analysis, and clicking Submit, the full parameter configuration page opens directly. Set the parameters and submit the rendering job. (Only supports submitting animation jobs.)
Below 3ds Max 2016: After dragging the scene to the Client, 3ds Max will be launched automatically. Configuration must be completed in the [Renderwow] menu window inside the software before proceeding with job submission. (Supports submitting both animation and still image jobs.)
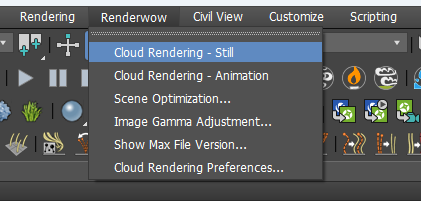
Cloud Rendering — Still
This section primarily introduces the still image job submission workflow and various related parameter settings.
Overview
The process for submitting a still image job via Renderwow is as follows:
-
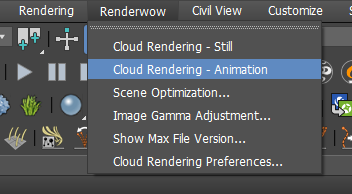
Click Renderwow menu → Cloud Rendering — Still.
For still image jobs, use Cloud Rendering — Still to submit the job. If the current scene’s Time Output setting is not set to Single Frame, selecting Still Image Rendering will automatically change the current scene’s Time Output mode to Single Frame.
-
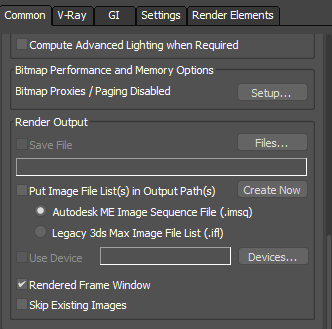
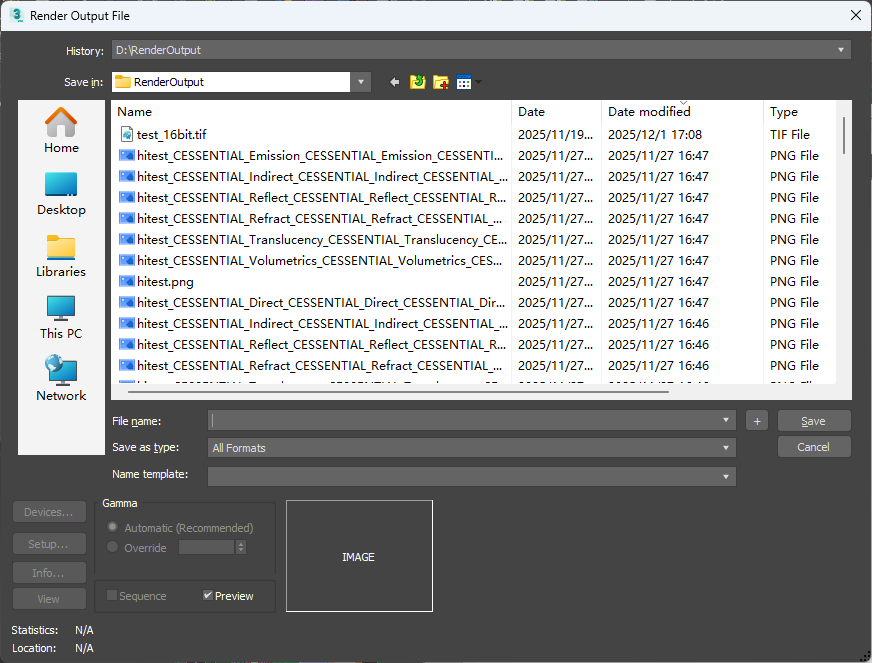
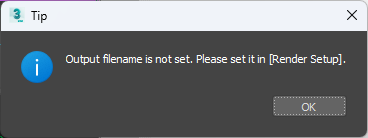
Output Path Detection and Setting.
Renderwow will detect whether the rendering output path is correctly set. If not, an output path setting window will automatically pop up. The job can only be submitted after the path is correctly set; otherwise, an error will be reported.
-
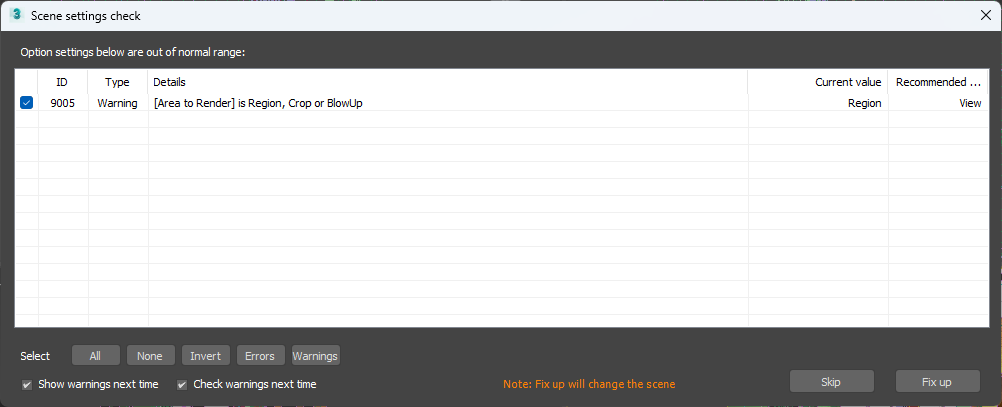
Scene Parameter Detection.
After the previous step, Renderwow will perform scene parameter detection. After the detection is complete, if there are any warnings or errors, a "Scene Settings Check" dialog will pop up, displaying all warning and error items. If there are errors, they must be fixed before proceeding with the submission. If there are only warnings and no errors, you may click the Skip button to ignore the warnings and continue submitting. Most warning and error items can be automatically fixed by clicking the Fix Up button in this dialog. Error items that cannot be automatically fixed must be manually repaired before clicking Submit again.
-
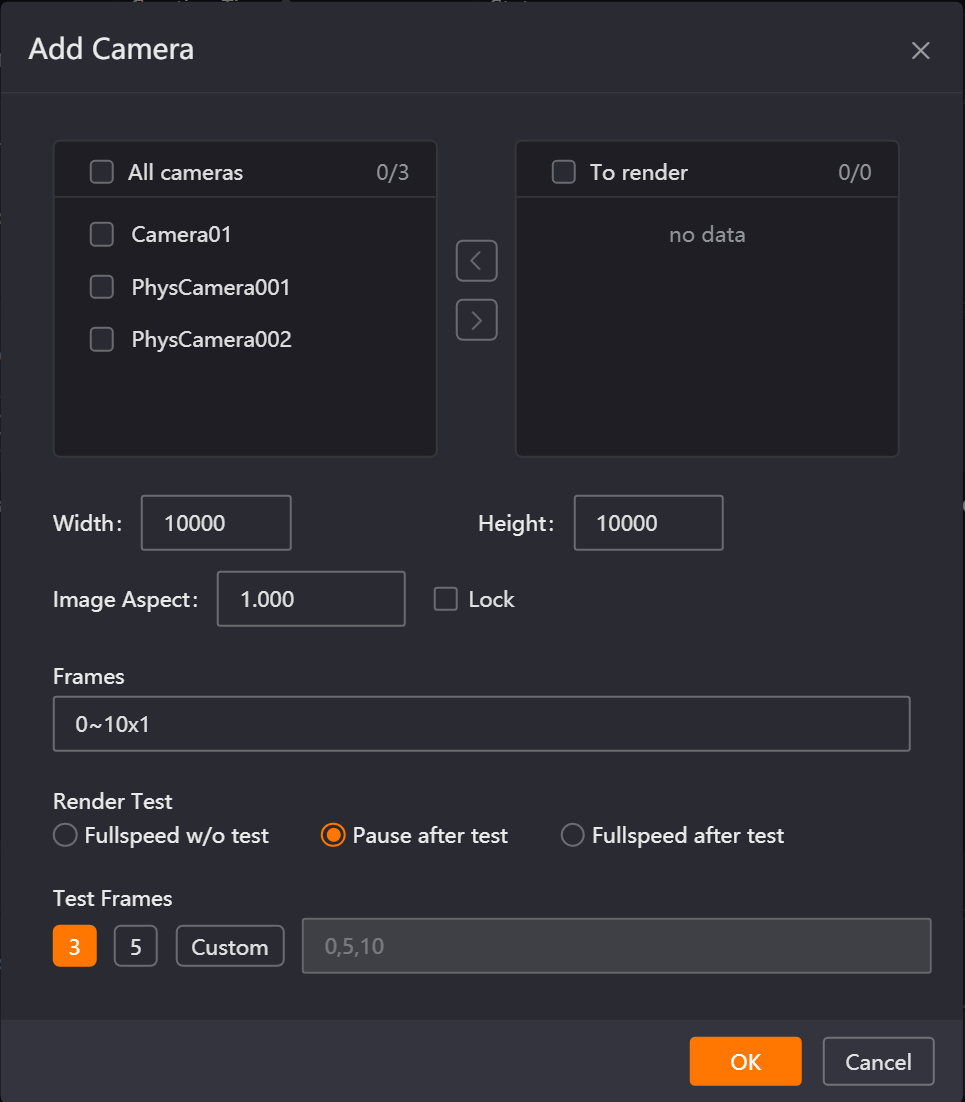
Parameter Settings.
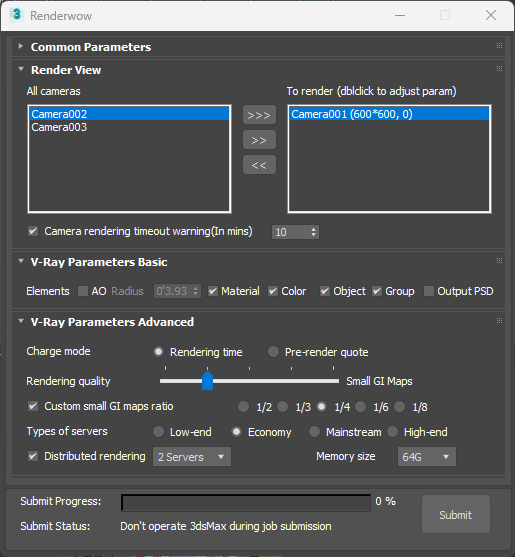
After the previous step, the job submission window appears. Select the camera(s) to be rendered and submit with default parameters, or configure the relevant parameters as needed before submitting.
-
Job Submission.
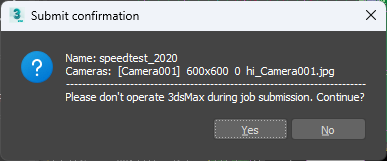
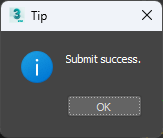
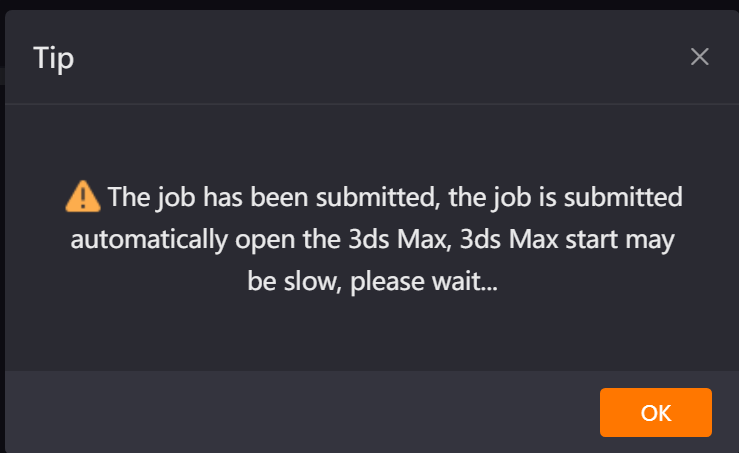
Click the Submit button in the lower-right corner of the submission window to begin submitting the job. First, Renderwow will temporarily save the scene, then perform virus scanning and other operations, and pop up a job submission confirmation dialog. Click Yes to continue the submission. After the submission is complete, the scene will be restored, and a submission completion dialog will pop up.
-
Progress Tracking.
In the Renderwow Client, you can view the newly submitted job. The job will go through the packaging, uploading, rendering, and downloading stages before the results are automatically saved to the previously set rendering output path.
Cloud Rendering — Animation
This section primarily introduces the animation job submission workflow and various related parameter settings.
Overview
The process for submitting an animation job via Renderwow is as follows:
-
Click Renderwow menu → Cloud Rendering — Animation.
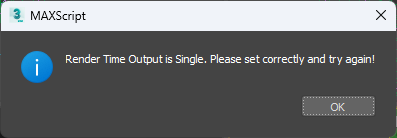
For animation jobs, use Cloud Rendering — Animation to submit the job. If the current scene is set to Single Frame mode, submitting an animation job will result in an error.
-
Output Path Detection and Setting.
Renderwow will detect whether the rendering output path is correctly set. If not, an output path setting window will automatically pop up. The job can only be submitted after the path is correctly set; otherwise, an error will be reported.
-
Scene Parameter Detection.
After the previous step, Renderwow will perform scene parameter detection. After the detection is complete, if there are any warnings or errors, a "Scene Settings Check" dialog will pop up, displaying all warning and error items. If there are errors, they must be fixed before proceeding with the submission. If there are only warnings and no errors, you may click the Skip button to ignore the warnings and continue submitting. Most warning and error items can be automatically fixed by clicking the Fix Up button in this dialog. Error items that cannot be automatically fixed must be manually repaired before clicking Submit again.
-
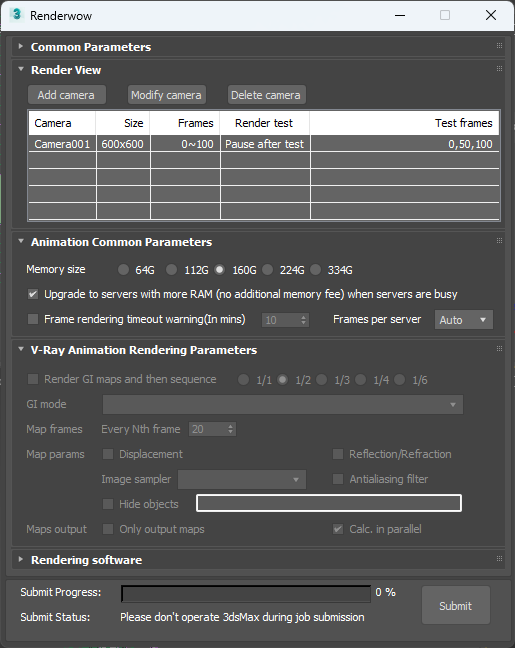
Parameter Settings.
After the previous step, the job submission window appears. Select the camera(s) to be rendered and submit with default parameters, or configure the relevant parameters as needed before submitting.
-
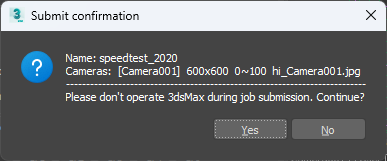
Job Submission.
Click the Submit button in the lower-right corner of the submission window to begin submitting the job. First, Renderwow will temporarily save the scene, then perform virus scanning and other operations, and pop up a job submission confirmation dialog. Click Yes to continue the submission. After the submission is complete, the scene will be restored, and a submission completion dialog will pop up.
-
Progress Tracking.
In the Renderwow Client, you can view the newly submitted job. The job will go through the packaging, uploading, rendering, and downloading stages before the results are automatically saved to the previously set rendering output path.
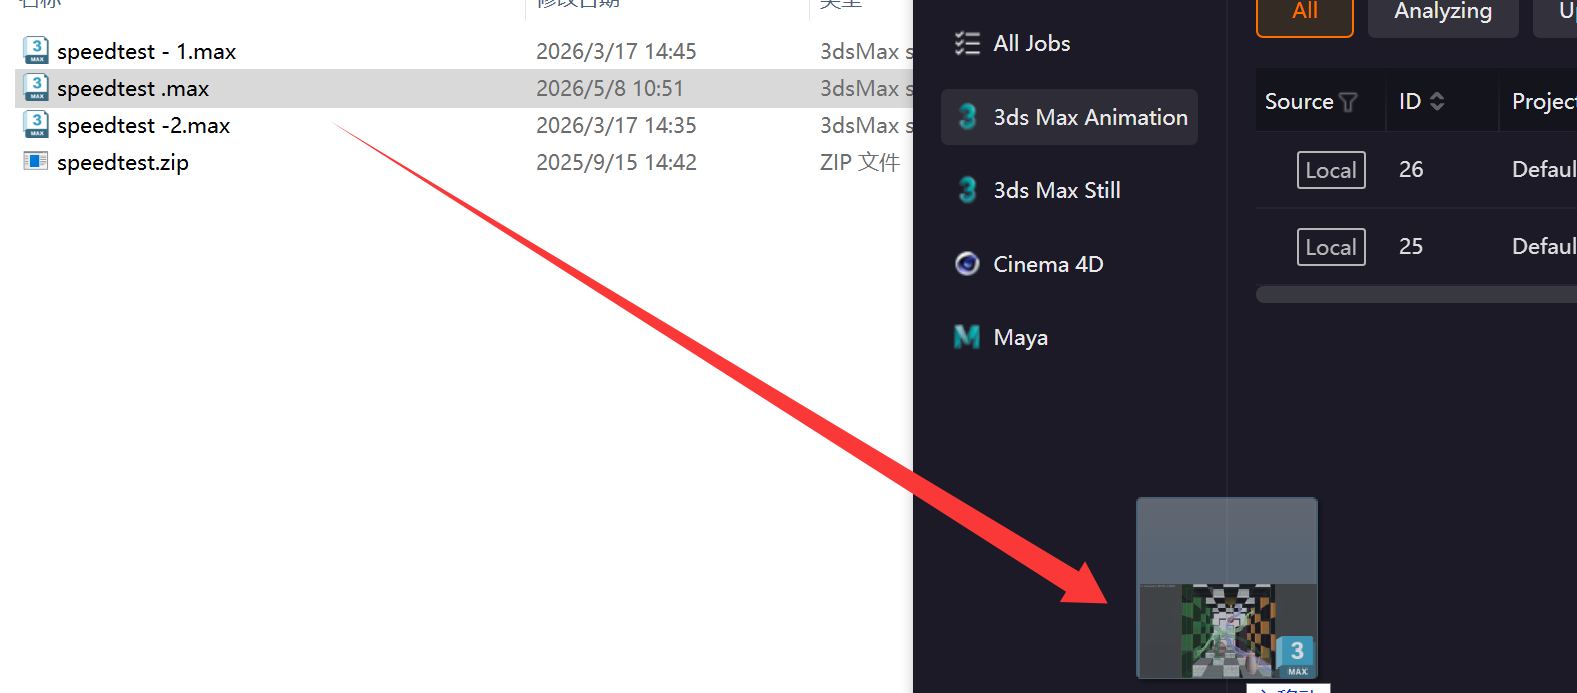
Drag-and-Drop — Single Job Submission (Max 2016 and Above)
-
Drag Scene to Client: Set the scene to Animation mode and drag the .Max scene file into the Client.
-
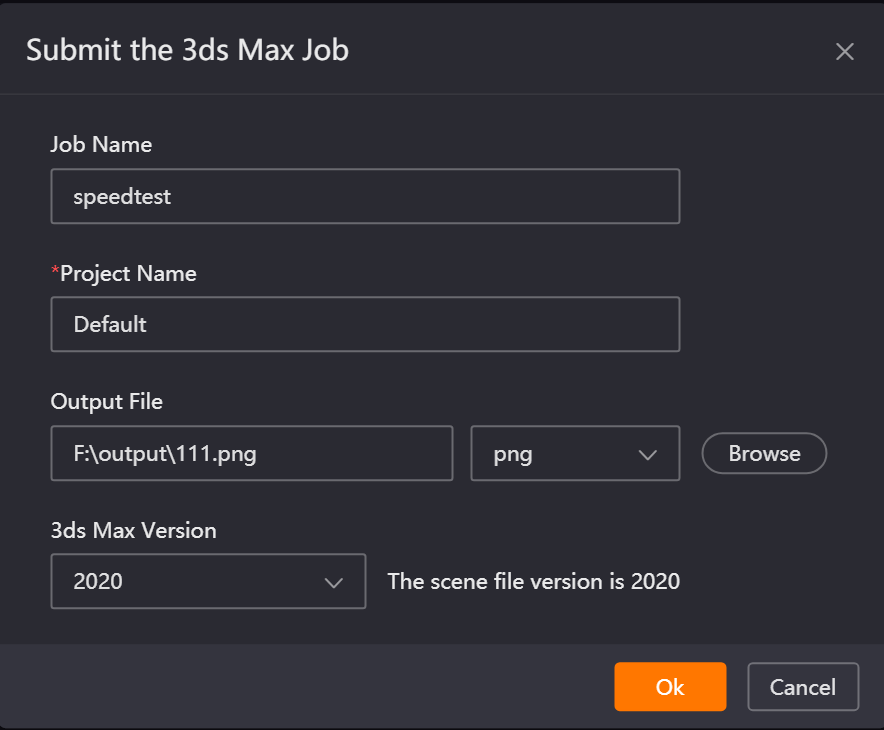
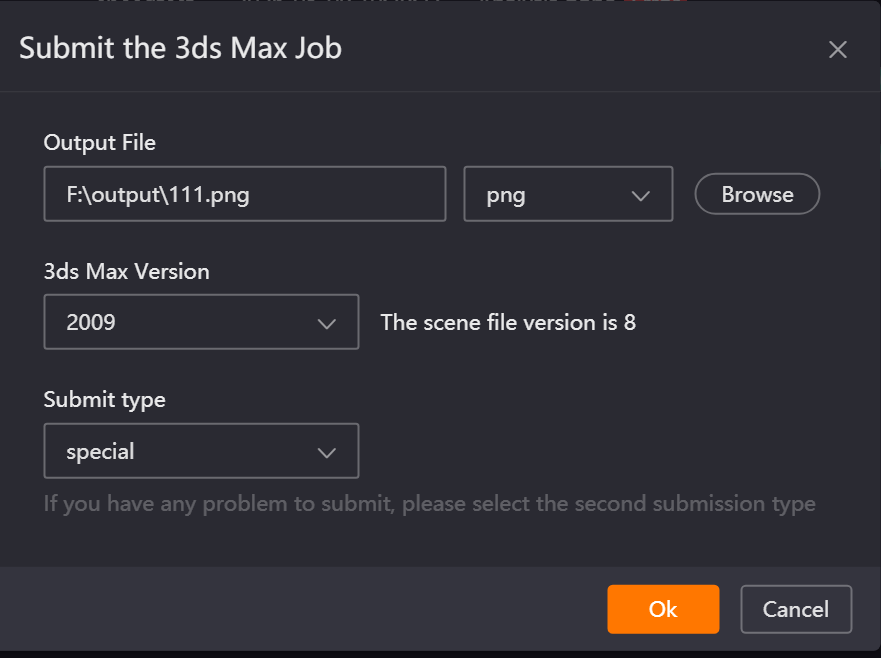
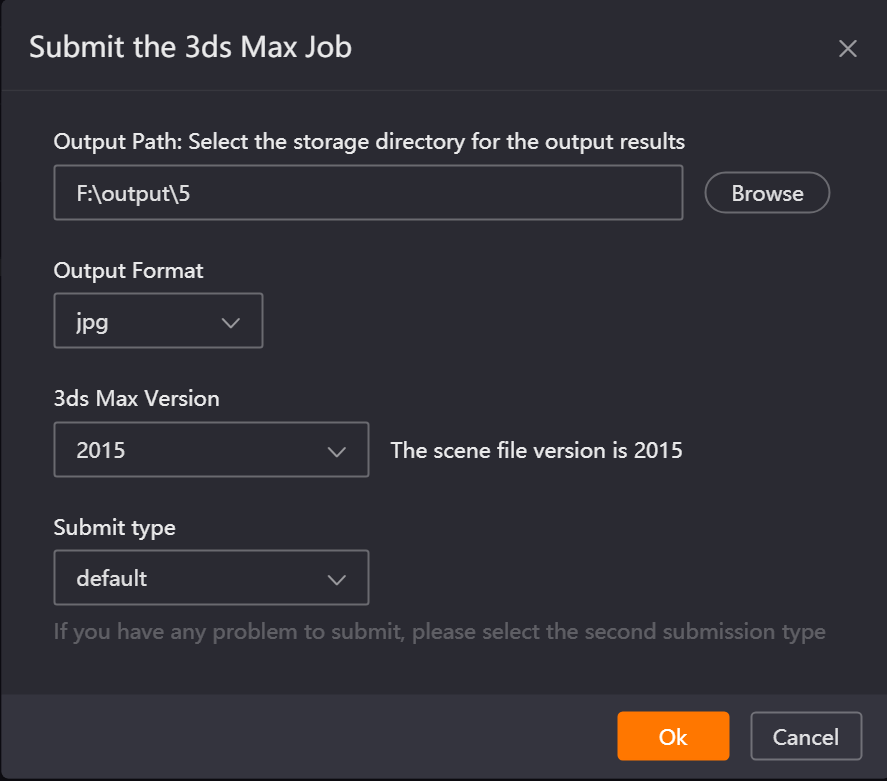
Configure Parameters and Analyze Scene: On the job submission page, configure the job name, project name, output file path and format, and 3ds Max version number, then click OK to enter the scene analysis stage and launch 3ds Max.

-
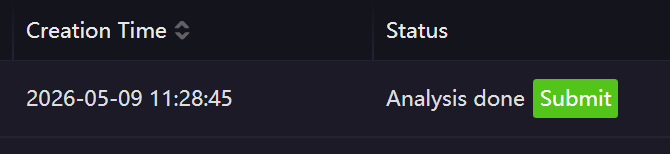
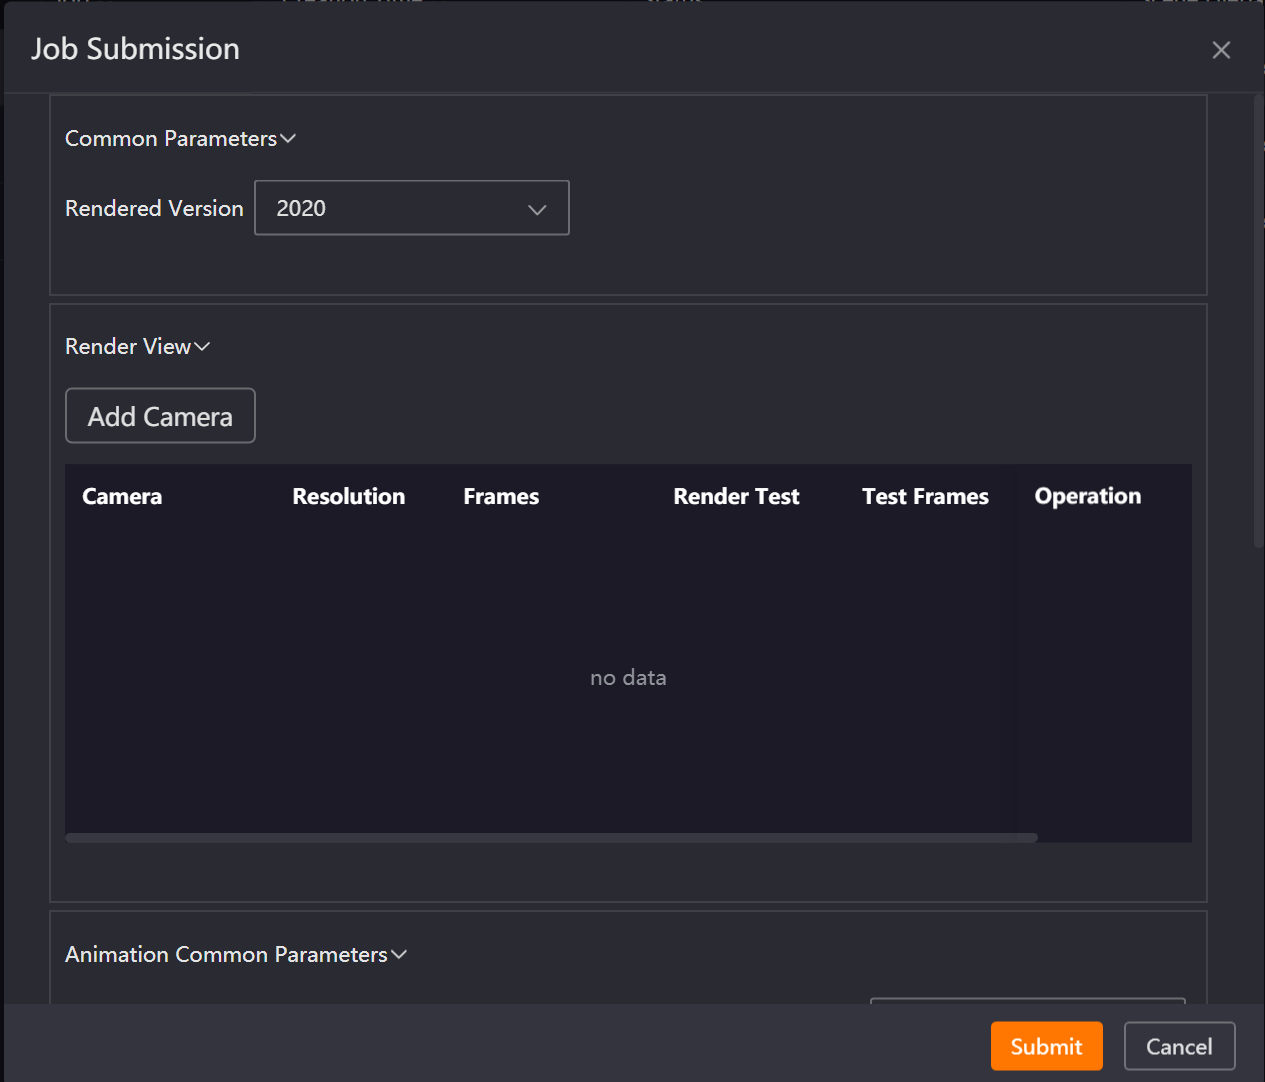
Configure Rendering Parameters: After the analysis is complete, click the "Submit" button to open the submission window. In the submission window, add the camera(s) to be rendered and configure the corresponding parameters, then click the Submit button to enter the submission status.
-
Job Submission: During job submission, 3ds Max will be launched again to open the scene file. After the job is generated, it will no longer be displayed on the Analysis page. The job submitted to the Client will sequentially enter the uploading, unpacking, rendering, and result downloading stages.
Drag-and-Drop — Single Job Submission (Below Max 2016)
-
Drag Scene File to Client: Drag the .Max scene file into the Client.
-
Configure Parameters and Open Scene: On the job submission page, configure the output file path and format and the 3ds Max version number, then click OK to launch 3ds Max and wait patiently.
-
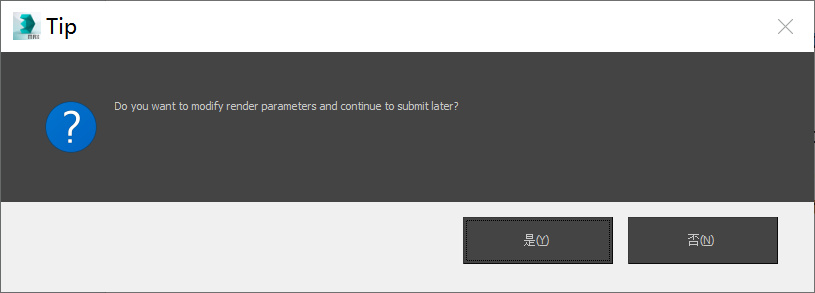
Configure Parameters and Submit Job in the Renderwow Submission Interface: Configure the corresponding parameters in the Renderwow submission interface within the scene, then click "OK" to submit the job. If you need to re-adjust the rendering setting parameters, you may first close the Renderwow submission page. In the confirmation prompt that pops up, click "OK", and the system will automatically open the rendering settings page. After modifying the parameters, closing the rendering settings page will automatically reopen the Renderwow submission interface, allowing you to continue submitting the job.
After the job is submitted to the Client, it will sequentially enter the uploading, unpacking, rendering, and result downloading stages.
Drag-and-Drop — Multi-Job Submission (Max 2016 and Above)
-
Drag Scenes to Client: Set the scene to Animation mode, select multiple .Max scene files, and drag them into the Client at once. A multi-scene submission interface will pop up.
-
Configure Parameters and Analyze Scenes: On the job submission page, configure the project name, output file path and format, and 3ds Max version number, then click OK to enter the scene analysis stage and launch 3ds Max.

-
Configure Rendering Parameters: After each scene analysis is complete, click the "Submit" button respectively to open the job submission window. In the window, select the camera(s) to be rendered and configure the relevant parameters, then click Submit again. The job will enter the submission status.
-
Submit Jobs: During job submission, 3ds Max will be relaunched to open the scene file. After the job is generated, it will be removed from the Analysis page and will subsequently enter the uploading, unpacking, rendering, and result downloading stages.
Drag-and-Drop — Multi-Job Submission (Below Max 2016)
-
Drag Scenes to Client: Set the scene to Animation mode, select multiple .Max scene files, and drag them into the Client at once. A multi-scene submission interface will pop up.
-
Configure Parameters and Open Scenes: On the job submission page, configure the output file path and format and the 3ds Max version number, then click OK to launch 3ds Max. (Submitting several scenes at once will open several instances of the same 3ds Max version simultaneously.)
-
Configure Parameters and Submit Jobs in the Renderwow Submission Interface: In the submission interfaces opened in multiple 3ds Max scenes, check and configure the corresponding parameters, then click the OK buttons to submit the jobs respectively. If you need to reconfigure the parameters in the rendering settings, you may close the Renderwow submission page. In the prompt that appears, click the OK button, and Renderwow will automatically open the rendering settings page. After reconfiguring, closing the rendering settings page will automatically reopen the Renderwow submission interface, allowing you to continue submitting the job.
Multiple jobs submitted to the Client will normally go through the uploading, unpacking, rendering, and result downloading stages.
Notes:
-
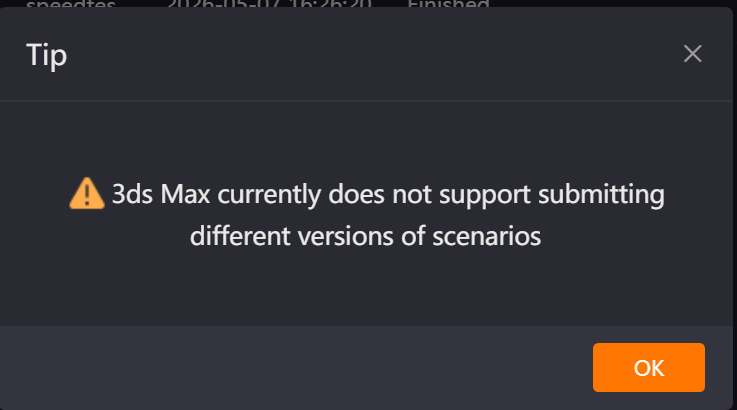
When submitting multiple scenes via drag-and-drop, only scene files of the same 3ds Max version can be dragged; otherwise, submission will not be possible.
-
When submitting multiple scenes via drag-and-drop, if you want multiple scenes to be analyzed simultaneously (3ds Max 2016 and above), you may modify the value of "Number of Parallel Analyses for Drag-and-Drop Jobs" in Settings → Basic Settings. This configuration requires restarting the Client to take effect.