Cloud Rendering Preferences
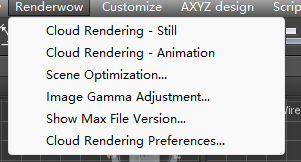
Click Renderwow menu → Cloud Rendering Preferences to open the cloud rendering settings window.
This section contains the global settings for the 3ds Max Renderwow cloud rendering. Most options affect both jobs submitted via the menu in 3ds Max and jobs submitted by dragging .max files into the Renderwow client.
Output Settings
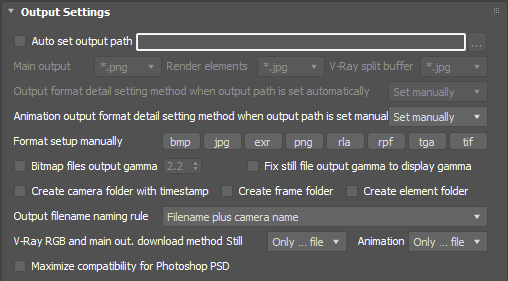
Auto Set Output Path — Disabled by default. When this option is enabled and the result save directory is correctly set, the output path is automatically configured when submitting jobs via the Renderwow menu in 3ds Max, eliminating the need to set the output path through the Render Setup Common tab. This reduces path configuration time and prevents result overwrites caused by multiple saves to the same path. Note that this feature directly modifies the render output path in the scene file. A directory is created under the root directory for each submission, named in the format SceneFileName_MMDDhhmm, where MM is the month, DD is the day, hh is the hour in 24-hour format, and mm is the minute. For example, if the scene name is "testscene" and the submission time is 13:46, the render result will be saved in {Auto Set Output Path}\testscene_01061346. When this option is enabled, related options automatically change from grayed-out (unavailable) to available.
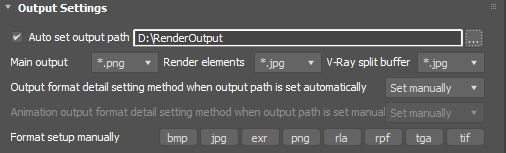
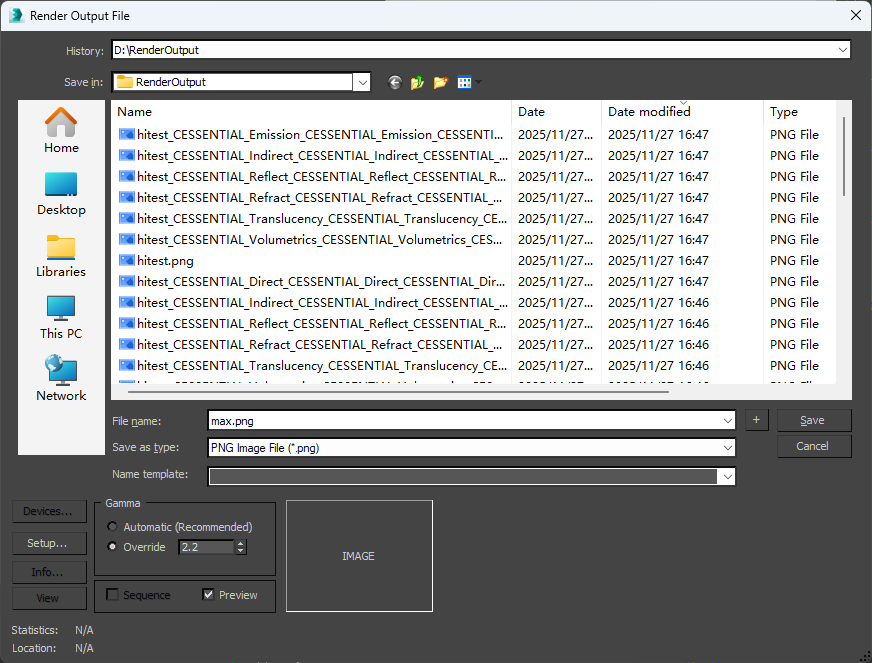
… — Sets the output path. Click this button to browse for the root directory where render results will be saved in the file manager.
Main Output — The render output file save format in the Common settings of Render Setup, selected via a drop-down list.
Render Elements — The render element result save format in the Render Elements tab of Render Setup, selected via a drop-down list. In 3ds Max, this format is generally consistent with the main result, but can also be set to a different format.
V-Ray Split Buffer — Specifies the save format for V-Ray Frame Buffer separated channels via a dropdown list.
Output Format Detail Setting Method When Output Path Is Set Automatically — Determines how the detailed settings for the output result file save format are configured. Selected via a drop-down list, with two options: System Default and Set Manually. When set to System Default, all detailed output format settings use the 3ds Max defaults. When set to Set Manually, detailed settings can be configured individually for the following formats: BMP, JPG, EXR, PNG, RLA, RPF, TGA, and TIF.
Animation Output Format Detail Setting Method When Output Path Is Set Manually — Determines how the detailed output format settings are configured when the output path for animation jobs is set manually. Selected via a drop-down list, with three options: System Default, Set Manually, and Automatic Check; the default is Set Manually. This option affects both the detailed render output format in the Render Setup Common tab and the output formats for render elements and split channels. When set to System Default, the detailed output format settings use the 3ds Max defaults. When set to Set Manually, detailed settings can be configured individually for BMP, JPG, EXR, PNG, RLA, RPF, TGA, and TIF. When set to Automatic Check, the detailed format settings in the scene are automatically analyzed; if detection fails or is unsuccessful, the system defaults are used.
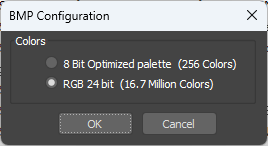
Format Setup Manually — This feature provides a button for each of the following formats: BMP, JPG, EXR, PNG, RLA, RPF, TGA, and TIF. Clicking any button opens an output format settings dialog. The dialog title displays the format to be configured and reminds the user to set an arbitrary save path; the save path is only used to trigger the detailed format settings dialog for that format and is unrelated to the actual result save path. Using BMP as an example, the dialog and detailed format settings dialog are shown below. After configuration, the button color changes; hovering over the button displays the detailed settings for that format. If not configured, that format uses the 3ds Max defaults. This feature is effective when Output Format Detail Setting Method When Output Path Is Set Automatically or Animation Output Format Detail Setting Method When Output Path Is Set Manually is set to Set Manually.


When the output path is not set automatically, the format settings for animation jobs are determined jointly by the Animation Output Format Detail Setting Method When Output Path Is Set Manually and Format Setup Manually options. For still image jobs, the render output format in the Render Setup Common tab is determined when the path is manually set; split channel and render element formats use the system defaults.
Bitmap Files Output Gamma — When this option is enabled, the output file gamma value is set. However, if the override gamma feature is enabled when setting the output format, the output gamma value of the output file is not affected by this option but by the override value. Disabled by default.
Fix Still File Output Gamma to Display Gamma — This option is only applicable to still image jobs and is enabled by default. When enabled, the output gamma is automatically changed to the display gamma, ensuring that the output file matches the rendering appearance. Otherwise, for file formats such as JPG that do not record the image file gamma value in their metadata, the rendered result may appear inconsistent with the rendering view when opened, leading to the mistaken assumption that the render result is incorrect.
Create Camera Folder with Timestamp — Creates a timestamped subfolder for each camera; applicable to both still image and animation jobs. A folder named in the format OutputFileName-CameraName-SubmissionTime is created under the final output directory to store render results; the generated result files no longer have the camera name appended.
Create Frame Folder — Creates a subfolder for each frame; only effective for animation jobs. A folder named after each frame number is created under the final output directory to store all render results for that frame. Photon files are still downloaded to the original output path and are not placed in the per-frame folders. Can be used in combination with Create Camera Folder with Timestamp; when combined, the OutputFileName-CameraName-SubmissionTime folder is created first, and then a subfolder for each frame is created within it. This option cannot be used simultaneously with Create Element Folder.
Create Element Folder — Creates a subfolder for each render element; only effective for animation jobs. When selected, a folder named after each render element is created under the final output directory to store render element results. The main result and photon files are still downloaded to the original output path and are not placed in the render element subfolders. Can be used in combination with Create Camera Folder with Timestamp; when combined, the OutputFileName-CameraName-SubmissionTime folder is created first, and then a folder for each render element is created within it. This option cannot be used simultaneously with Create Frame Folder.
Output Filename Naming Rule — Determines the naming rule for output files. This option offers four choices: Filename Plus Camera Name, Filename Plus Camera Name as Necessary, Camera Name if There Is, or Else Filename, and Filename (Applied if Create Camera Folder Option Is Checked). The default is the first option, Filename Plus Camera Name (i.e., Filename_CameraName). The second option, Filename Plus Camera Name as Necessary, behaves the same as the first when multiple cameras are submitted in a single job, but does not append the camera name when a single camera is submitted. The third option, Camera Name if There Is, or Else Filename, uses the camera name as the output filename; if no camera name exists, the output filename is used. The fourth option, Filename (Applied if Create Camera Folder Option Is Checked), uses the filename as the output filename without including the camera name.
V-Ray RGB and Main Out. Download Method — V-Ray split channel RGB files are generally identical to the render output results in the Render Setup Common tab. Downloading both simultaneously affects download speed and consumes local storage space; therefore, this optimization feature is provided. This feature has separate options for still image jobs and animation jobs, with three possible values: Both Files, Only Main File, and Only RGB File. Both Files downloads both files; Only Main File downloads only the main result; Only RGB File downloads only the RGB file. For still image jobs, both files are downloaded by default; for animation jobs, only the main result file is downloaded by default.
Maximize Compatibility for PSD — When enabled, saved PSD files are larger and take longer to download, but can be correctly imported by older versions of Photoshop or other software such as InDesign and Illustrator. This option is disabled by default.
Miscellaneous Settings
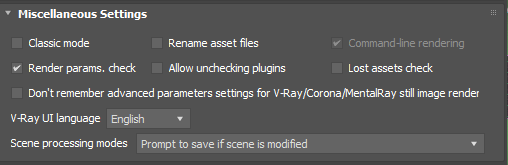
Classic Mode — Disabled by default. When enabled, the number of pop-up windows during job submission is reduced. Specifically, when enabled: if scene modifications are detected, the scene is saved automatically without prompting; no scene parameter check is performed (i.e., no parameter check dialog); no submission confirmation dialog is displayed.
Rename Asset Files — Disabled by default. When disabled, only assets that require renaming are intelligently identified and renamed; unnecessary files are not renamed. When enabled, all files are renamed.
Command-Line Rendering — This feature is deprecated.
Render Params. Check — Render parameter check. Enabled by default. When enabled, if parameters in the scene such as material subdivisions, light subdivisions, render region settings, V-Ray Global DMC, V-Ray GI, etc., are set incorrectly or unreasonably, a warning or error dialog will pop up.
Allow Uncheck Plugins — Disabled by default. When enabled, plugins automatically detected by Renderwow as being used in the current scene can be unchecked in the Rendering Software rollout, or the cache files of a specific plugin can be excluded from upload.
Lost Assets Check — Disabled by default. When enabled, the Lost Assets rollout is displayed in the submission window, showing all lost assets in the scene.
Don’t Remember Advanced Parameters Setting for V-Ray/Corona/MentalRay Still Image Render — Disabled by default. When enabled, the default settings displayed each time the submission window is opened are the last settings used before this option was enabled. Since these options are closely related to cost, an unreasonable setting that is memorized may cause all subsequent rendering jobs to use that setting, resulting in unreasonable costs. To avoid this issue, first change the settings to general-purpose values, and then enable this option.
V-Ray UI Language — This option is automatically detected by Renderwow; if the detection is incorrect, it can be set to the correct language so that V-Ray option names in messages involving V-Ray options (such as scene parameter checks) are displayed in the correct language.
Scene Processing Modes — Controls how the current scene is processed before and after job submission. Four modes are available: Hold the Scene Whether Scene Is Modified or Not, Save the Scene if Scene Is Modified, Don’t Save if Scene Is Modified, and Prompt to Save if Scene Is Modified. The first mode holds the scene after the Submit button is clicked and restores it after submission is complete; this method takes longer due to the hold and restore operations. The second, third, and fourth modes undo operations performed on the scene during submission after submission is complete; these submission methods are faster. For scenes that have already been modified, the difference between the second, third, and fourth modes lies in the handling method; the default is the fourth mode.