Drag-and-Drop Cloud Rendering Submission Tutorial and Function Introduction
9.1 Overview
This section describes how to submit cloud rendering jobs for Maya, Clarisse, Houdini, Katana, and Unreal Engine. Renderwow supports Maya 2014–2026, Houdini 17.0–21.0, Clarisse 4.0 SP3–5.5 Early Access 2, Katana 7.0v3 and 3.5v3, and Unreal Engine 5.1–5.7. It also supports common renderers (such as V-Ray, Arnold, Redshift, Software, mental ray, etc.) and associated plugins.
9.1.1 Cloud Rendering Job Submission Method:
Currently, jobs are submitted by dragging and dropping scene files into the client. The following instructions use Maya as the primary example, but serve as a reference for all supported software.
9.1.2 The Renderwow job submission process is as follows:
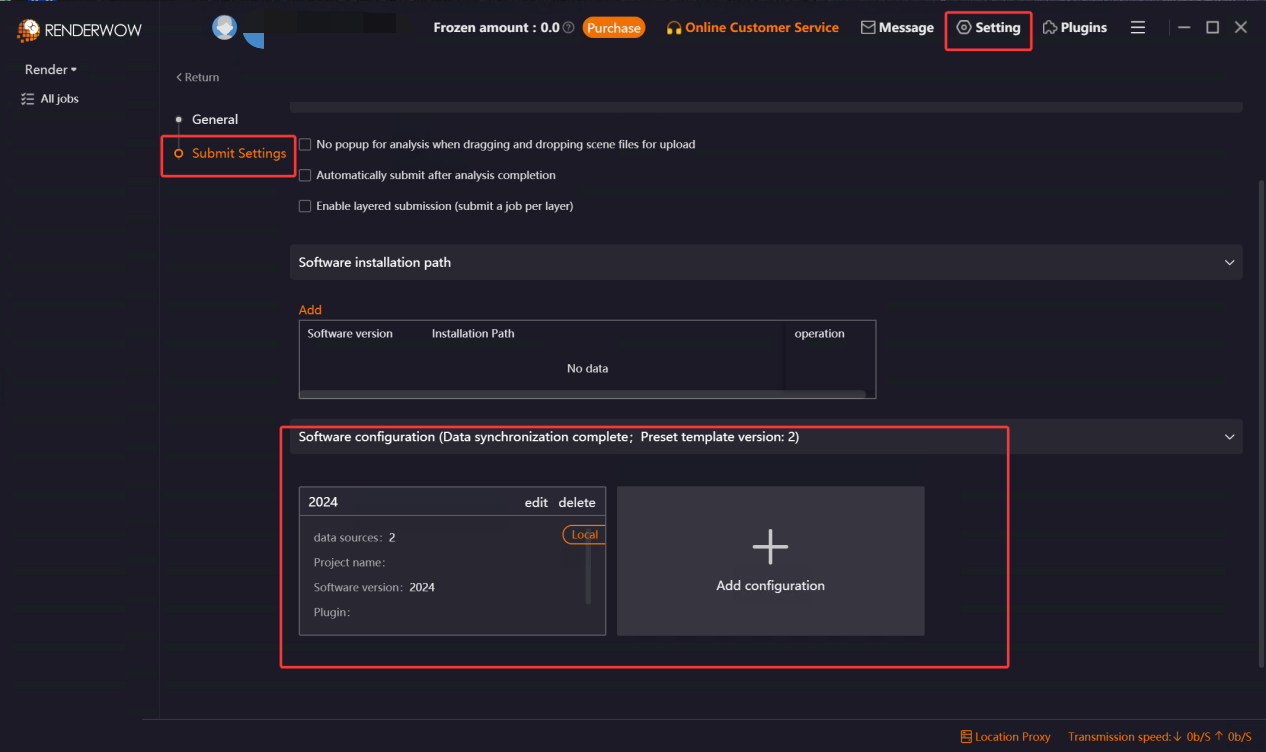
1. Edit or Create Render Preset: In the Renderwow client, navigate to [Settings] → [Submission Settings] → [Maya] to edit or add the render preset required for your job submission.
-
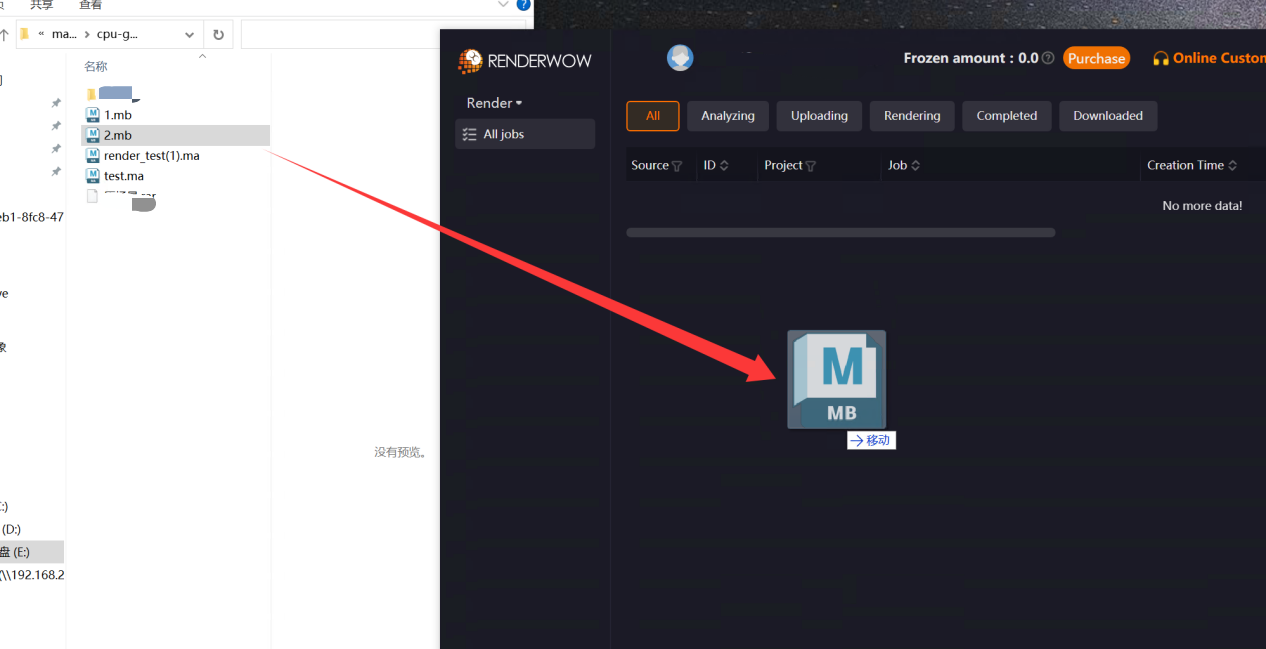
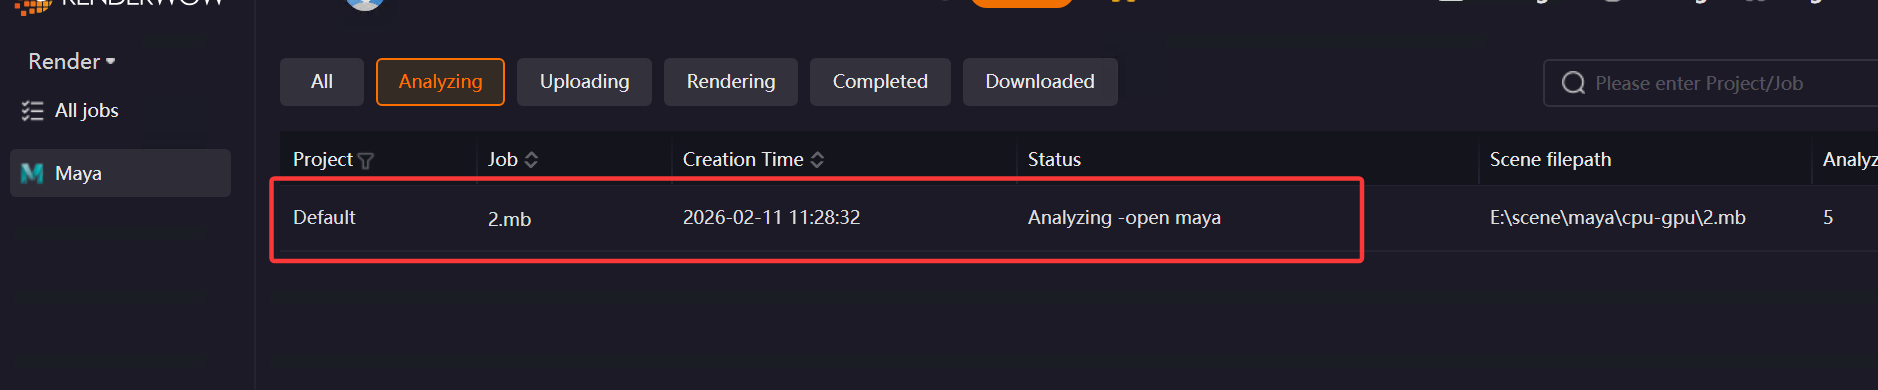
Drag and Drop Scene Files: After the previous step, save your .ma or .mb scene file and drag it anywhere within the client to open the "Job Analysis" page.
-
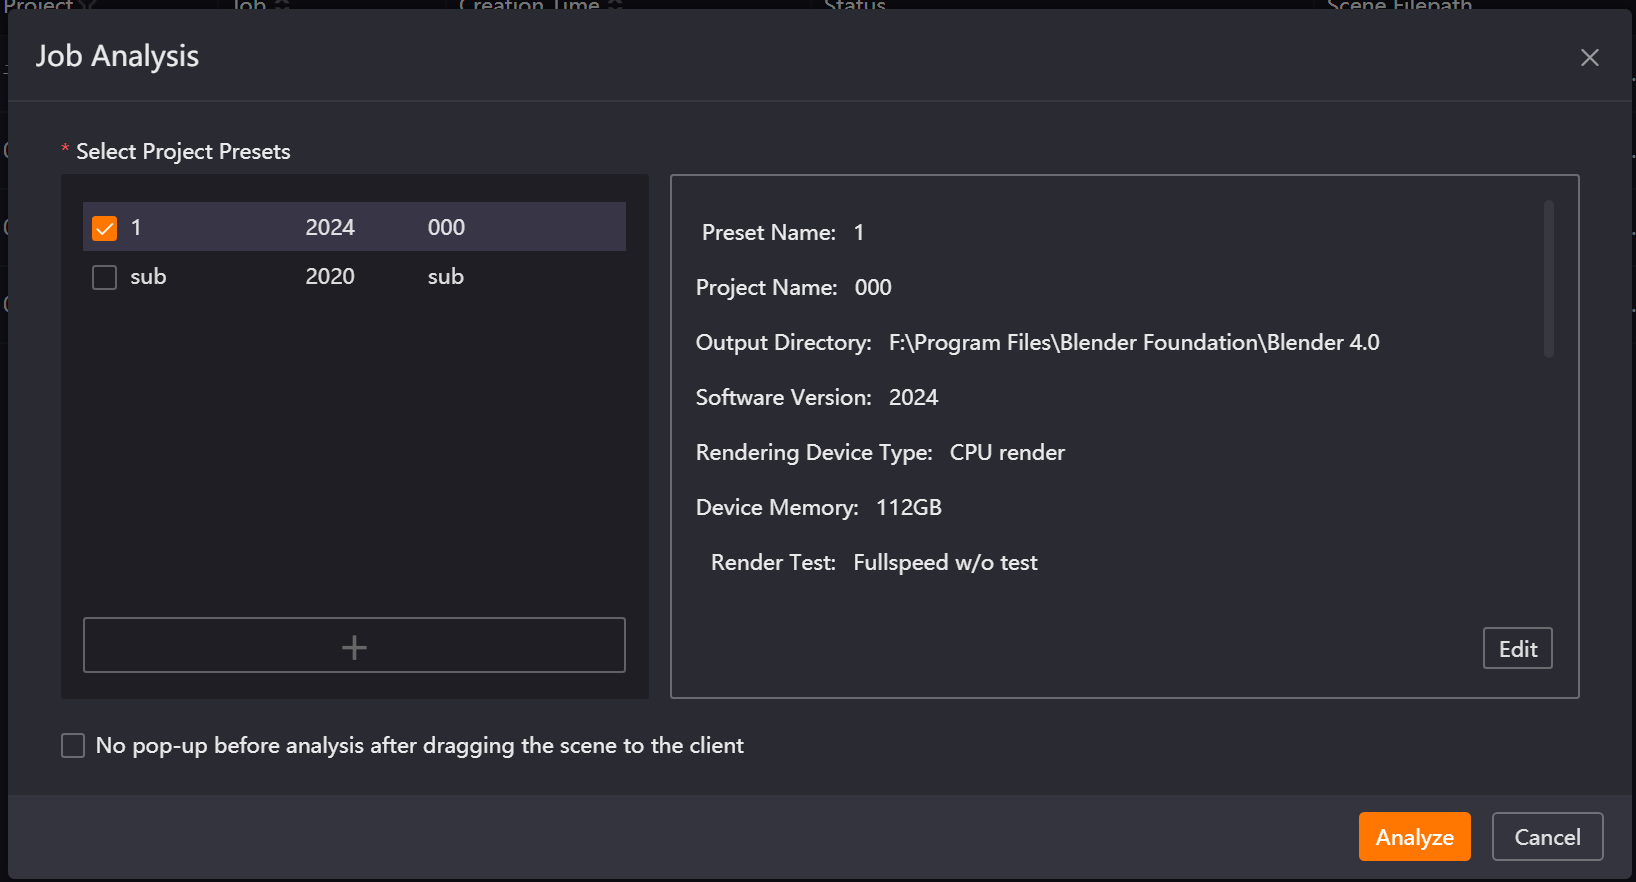
Scene Analysis: Select the configured render preset to analyze the scene. (If you need to re-edit the preset, you can click the "Edit" button to modify and save it.)
-
If a Renderwow render preset template is upgraded, you must manually update the template content before using it for analysis. Templates requiring an update will be grayed out but can still be checked. After checking it, click "Edit" to save; it will no longer be grayed out and can be selected for analysis. If you attempt to click "Analyze" on a grayed-out preset without re-editing, an error will occur, and submission will fail.
-
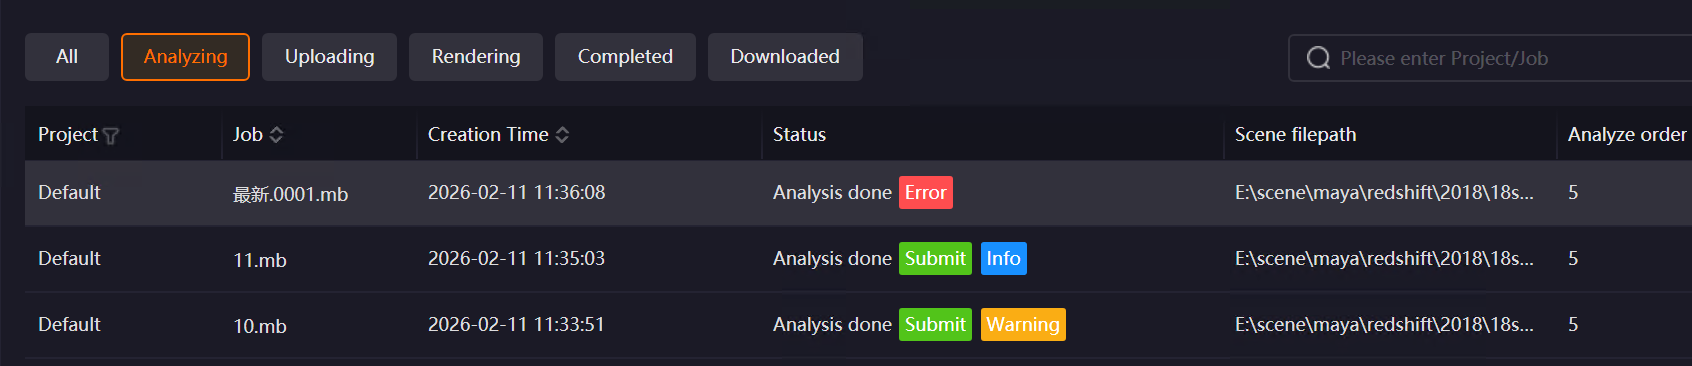
After analysis, if there are warnings or errors, corresponding "Warning" or "Error" buttons will appear. Click them to view details:
-
An "Error" button indicates the job cannot be submitted; you must modify the scene file based on the prompt and resubmit.
-
A "Warning" button indicates you can continue submitting the job if the warning does not negatively impact your rendering.
-
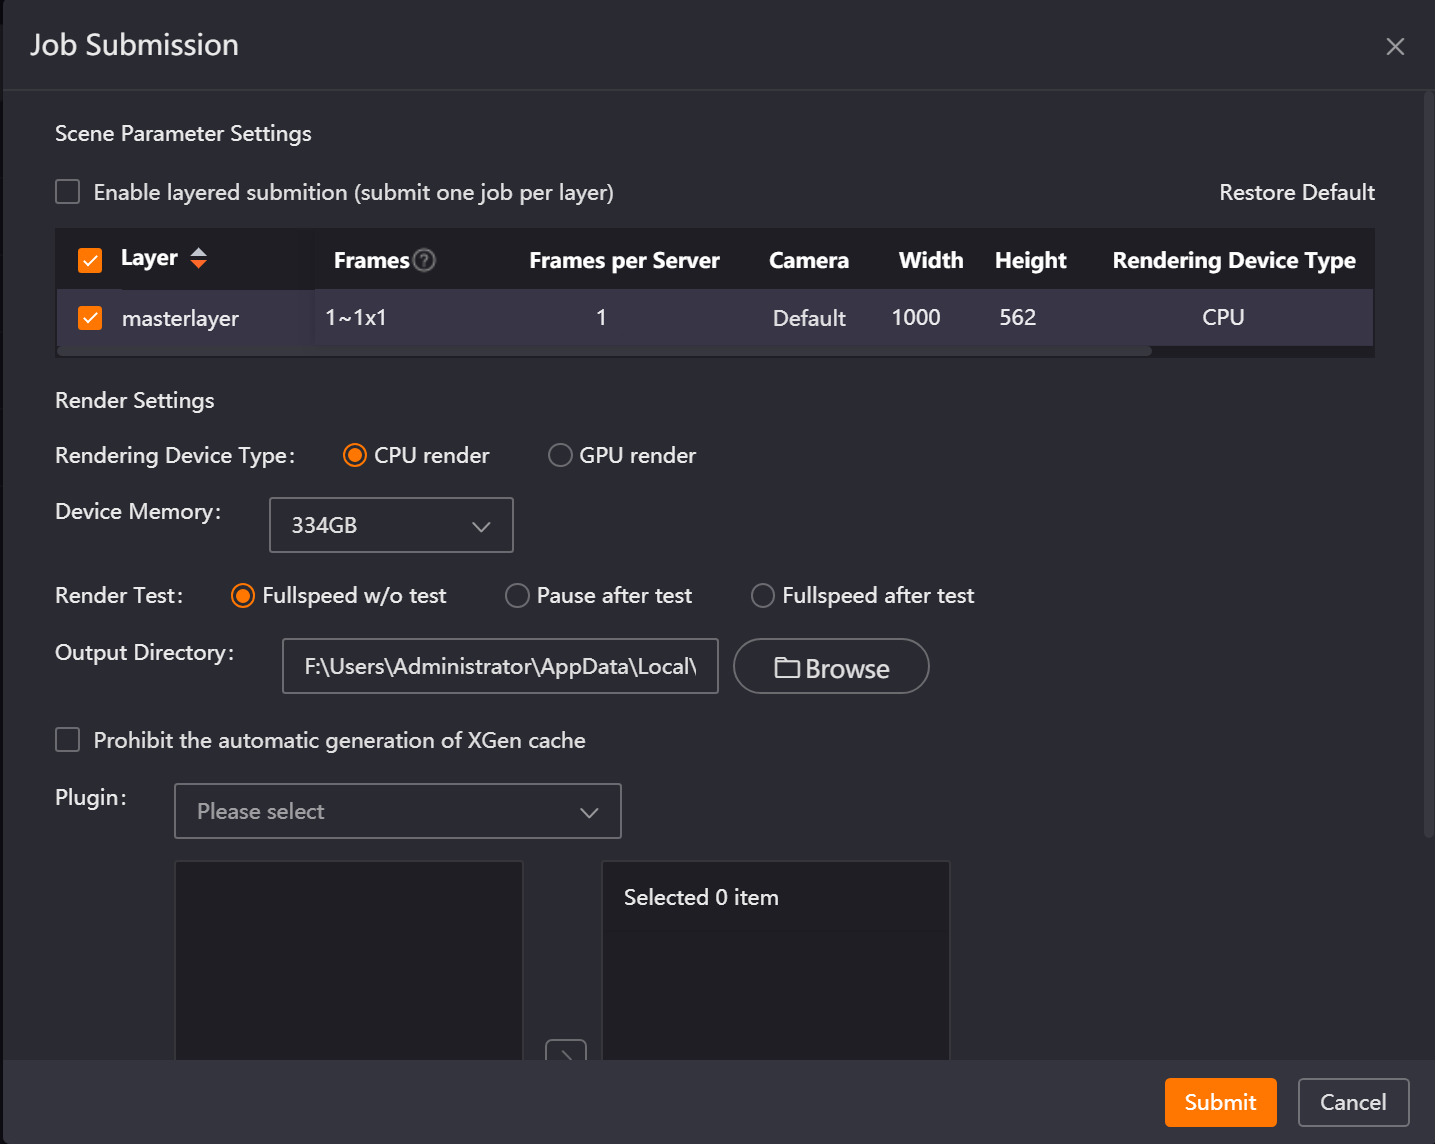
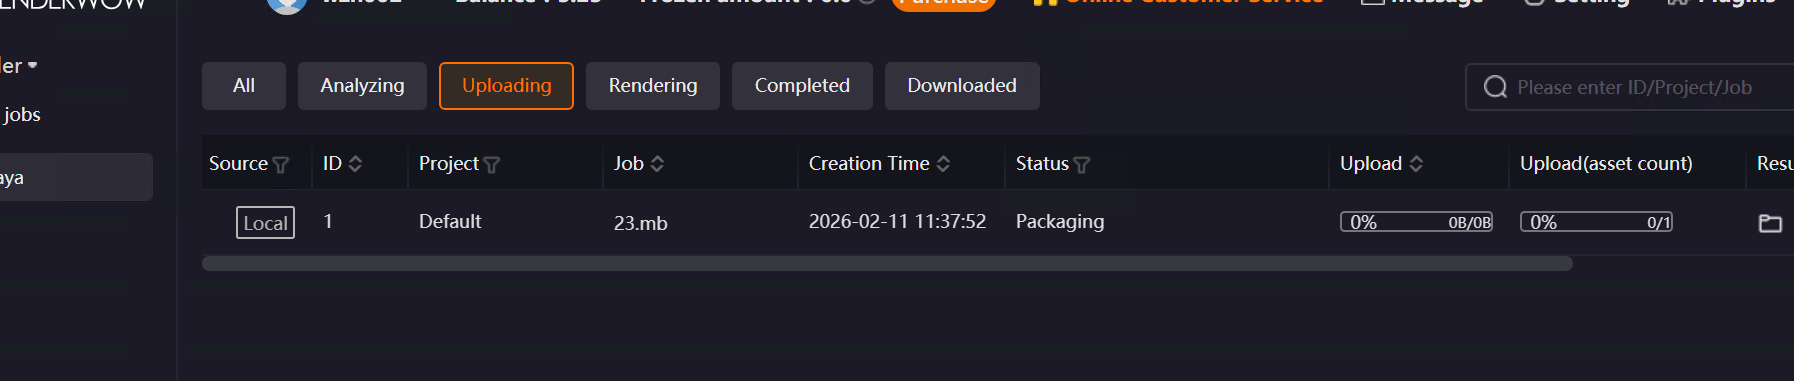
Render Parameter Settings: Clicking the "Submit" button opens the job submission window. Configure the render layers, frame range, width, height, and other parameters as needed, then click "Submit". The job will be packaged and uploaded for cloud rendering.
Notes:
-
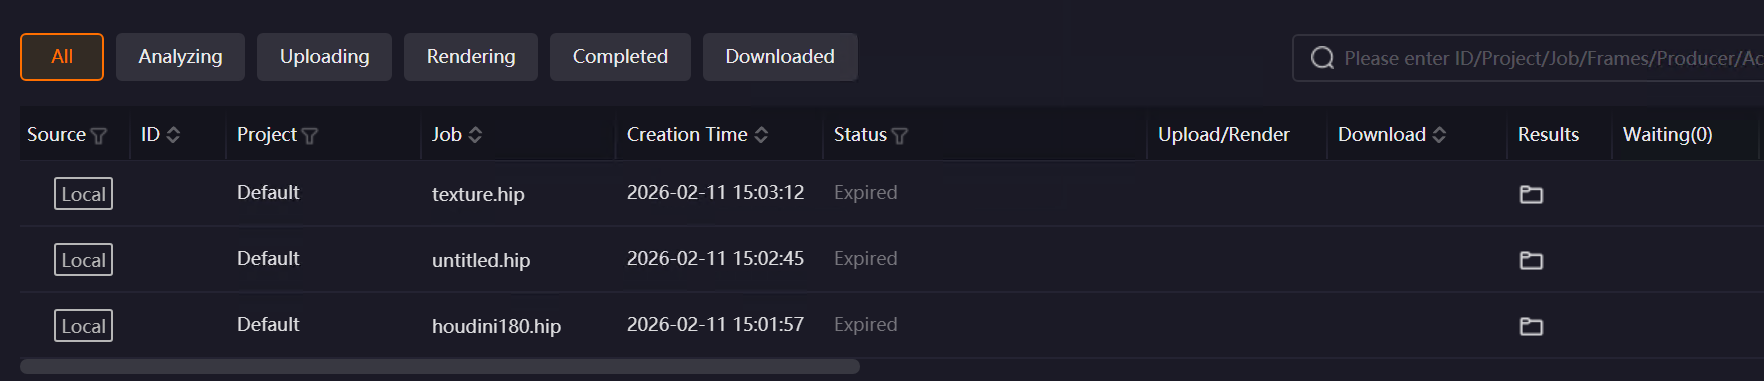
If a job is not submitted within 24 hours of completing analysis, it will time out and display a "Timed Out" status. You must drag and drop the file to analyze it again.
-
Renderwow supports batch submission for jobs of the same type that require no parameter modifications. Hold the Shift key to select multiple jobs, right-click, and select "Job Submission" to submit them in bulk.
9.1.3 Special Circumstances
-
For Unreal Engine, if you uncheck "Enable Scene Analysis (Use new drag-and-drop analysis Unreal Engine process)" in the general settings under [Settings] → [Submission Settings] → [Unreal Engine] (checked by default), you will not be able to use Render Preset to submit Unreal Engine jobs. Unchecking this is not recommended.
-
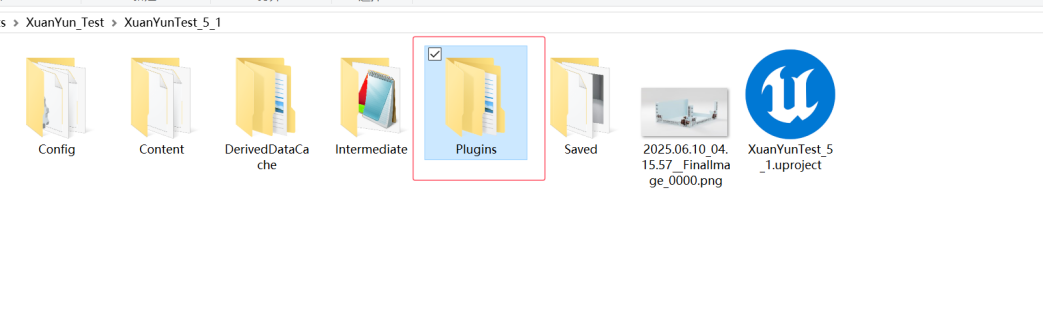
If Unreal Engine uses third-party plugins, it is recommended to copy them into the Plugins folder within the project directory to ensure consistency.
9.2 Render Preset Functions
This section introduces the parameter settings and operational rules for drag-and-drop Render Preset, providing guidance for preset creation and job submission.
9.2.1 Overview
Render Preset are used to pre-configure basic parameters for rendering jobs, including project names, output settings, software configurations, and rendering rules. Once created, they can be directly applied during job submission to improve efficiency and ensure parameter consistency.
9.2.2 General Render Preset Functions
-
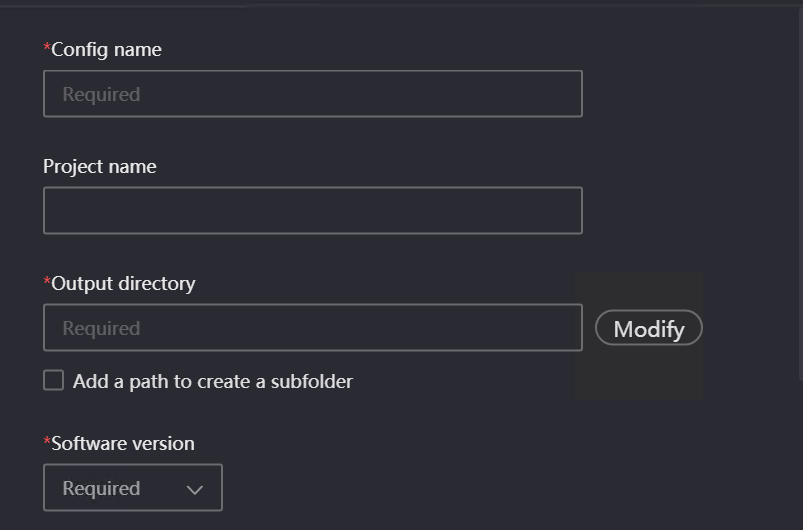
Config Name (Required): A custom identifier used to distinguish different preset schemes. The maximum character limit is 128; excess characters will not display.
-
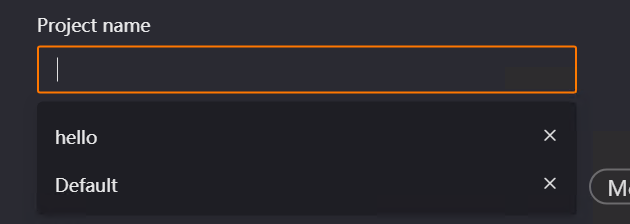
Project Name (Optional): Categorizes rendering jobs for easier sorting and filtering in the client. It supports up to 128 characters. You can manually enter a new name or select an existing one from the dropdown.
-
Manual Input: Manually entering a new project name automatically syncs it to [Basic Settings] → [Project Management]. Entering an existing name will not duplicate it.
-
Dropdown List: Displays up to 8 project names; a scrollbar appears if there are more. This list is synced with Project Management. Click the [×] next to a name to delete it globally.
-
Output Directory (Required): Specifies where rendered image files are saved. Click the [Browse] button to specify a path.
-
Add a path to create a subfolder (Optional): Automatically creates subdirectories under the output path for categorized storage. Click the + icon to choose a subfolder creation type:

-
SceneName: By scene file name
-
PID: By project directory ID
-
JID: By job ID
-
Time: By job creation time
-
ProjectName: By project name
-
JobNumber: By job number
-
JobName: By job name
-
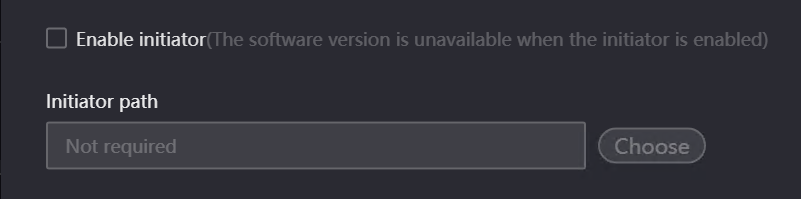
Software Version (Required): Specifies the software version for cloud rendering; it must match the version used to create the scene. Note: If Clarisse checks "Enable Launcher," the software version cannot be selected.
-
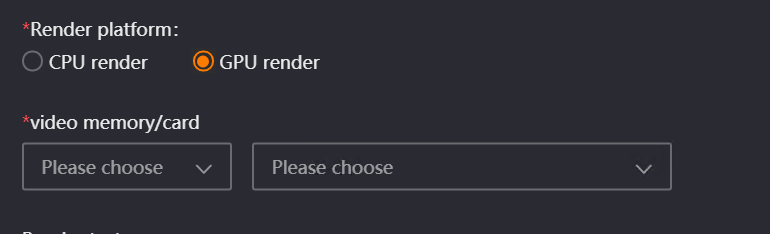
Render Platform (Required): Distinguishes between CPU and GPU rendering to allocate appropriate server rooms.
-
CPU Rendering: Displays a "Select RAM" dropdown (64GB, 112GB, 160GB, 224GB). A selection is mandatory.
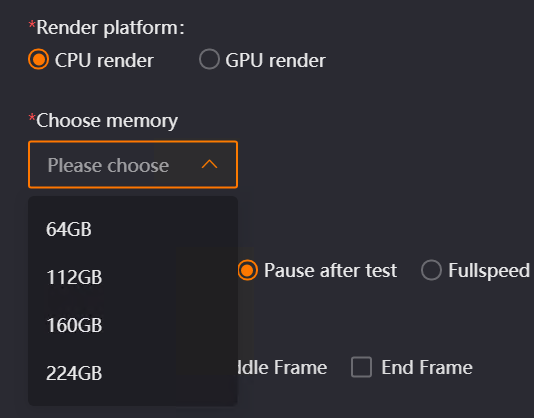
-
GPU Rendering: Displays "Select VRAM/GPU" dropdowns. Select the VRAM to see supported GPU options.
-
Note: Maya requires manual selection. Clarisse, Houdini, and Katana default to "Default" (manual modification is recommended; Clarisse’s GPU option is disabled). Unreal Engine only uses GPU rendering.
-
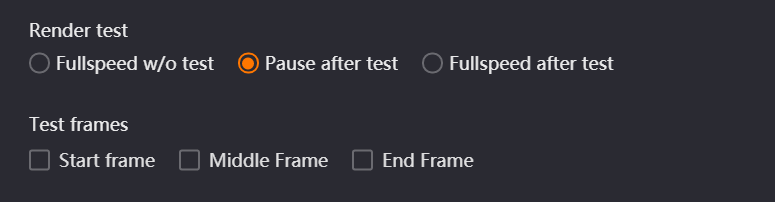
Render Test: Sets rules for pre-render testing:
-
Fullspeed w/o test: Renders at full speed immediately.
-
Pause After Test: Pauses after test frames finish; requires manual resumption.
-
Full-Speed After Test: Automatically switches to full-speed rendering after test frames finish.
-
Test Frames: Defines specific test frames (First Frame, Middle Frame, Last Frame). Only applicable if testing is enabled.
-
Timeout Alert (Mins): Sets a single-frame render time limit; the client will highlight jobs exceeding this threshold. 0 disables the alert.

-
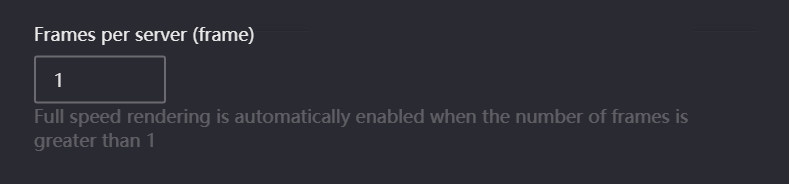
Frames Per Server: Sets the number of frames rendered simultaneously on a single nodes.
-
Maya, Clarisse, Houdini, Katana: Default is 1. At 1, the cloud optimizes frames automatically. Maya users needing strict one-frame setups can contact customer service. If >1, the cloud assigns the specified frames and runs at full speed.
-
Unreal Engine: Disabled by default. If enabled, defaults to 100. Note: Due to complex dynamic effects in Unreal Engine (particles, smoke), multi-frame rendering may break animation continuity. It is recommended to render effects and environments separately.
-
No dependency assets analysis: Controls whether to analyze referenced caches/dependencies (default: unchecked). Checking it skips detection. Recommendation: Keep unchecked to prevent missing file errors, unless manually verified.
-
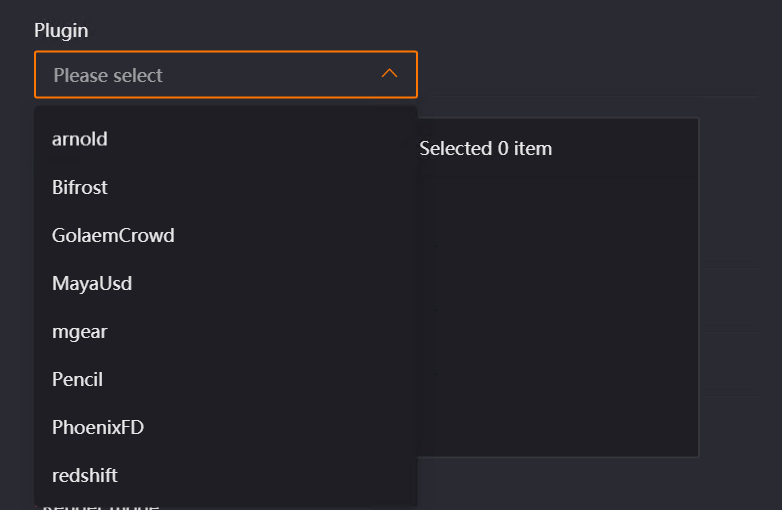
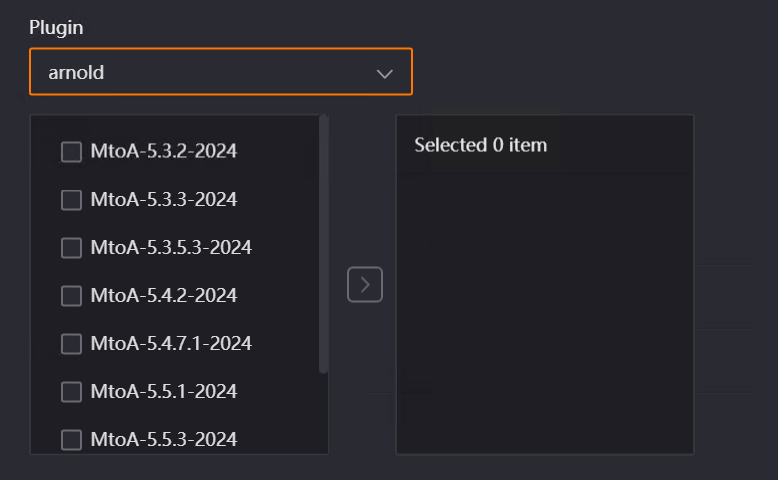
Select Plugin: Selects required plugins and versions (e.g., Arnold MtoA-4.2.1-2022) to match your scene. (Not applicable for Clarisse, Katana, or Unreal Engine.)
-
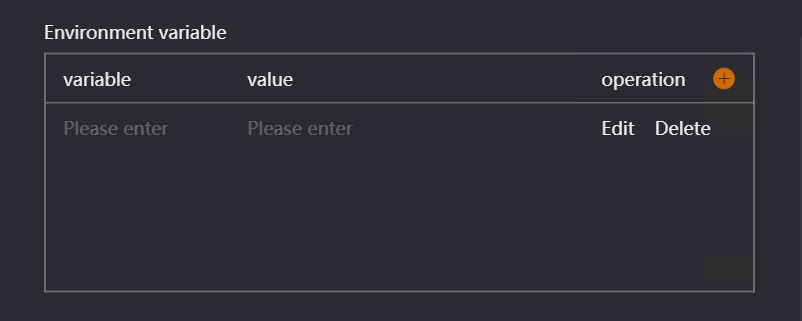
Environment Variables: Injects plugin/asset paths via scripts for local Maya environments.
-
Submission is not permitted due to insufficient assets: Controls submission when assets are absent. (Not applicable for Houdini/Unreal Engine.)

-
Checked: Blocks submission with an "Analysis Complete (Error)" status.
-
Unchecked: Allows submission but displays a warning.
9.2.3 Maya-Specific Render Preset Functions
-
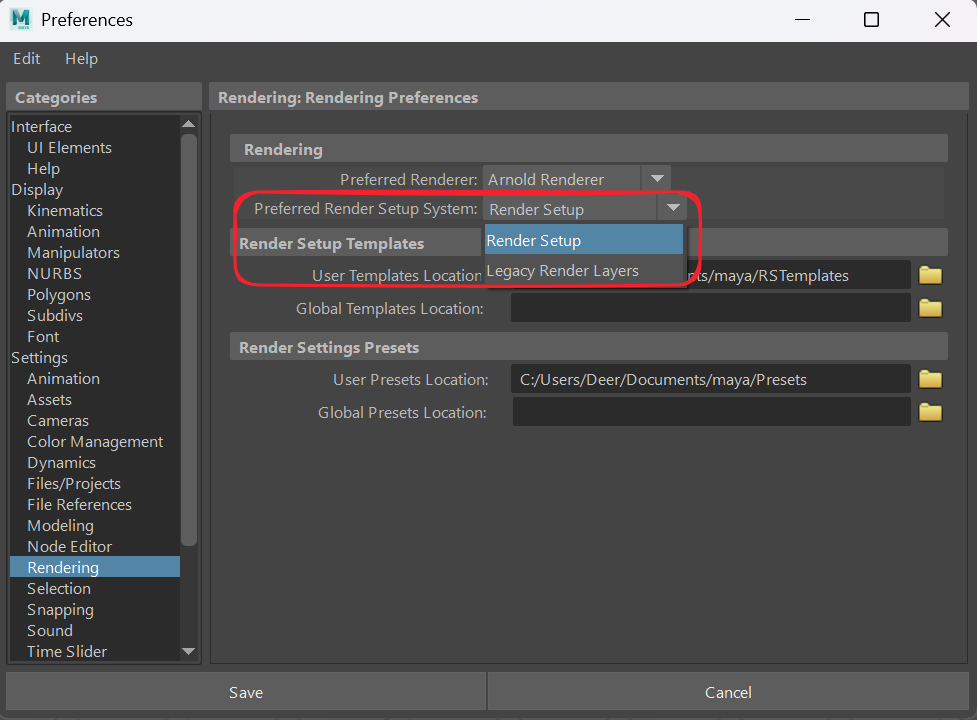
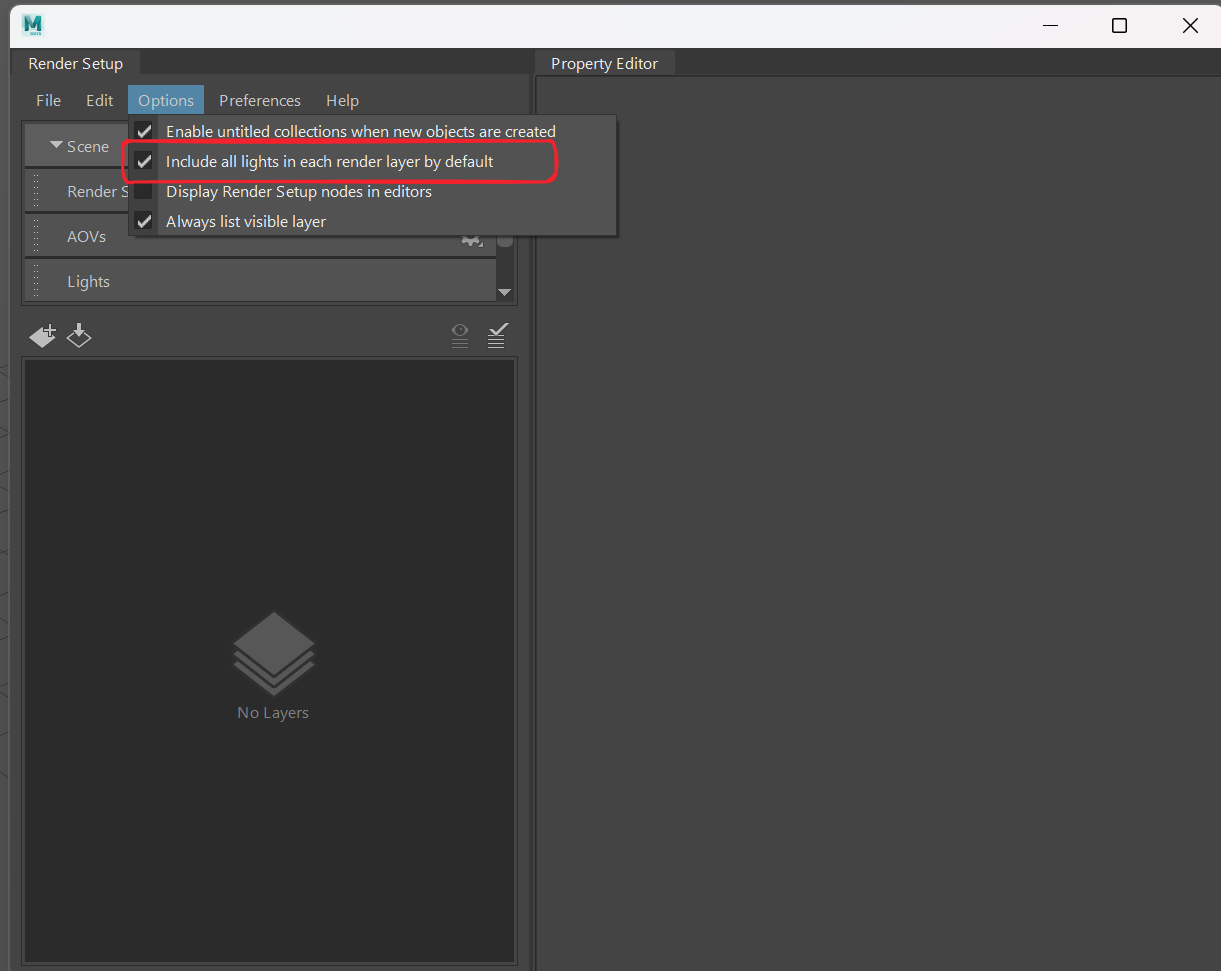
Render Mode: Must match the project’s layer setup (Render Setup for 2017+, Legacy Render Layers for all).
-
Rendering Method: Defines light linking rules (applies only to Render Setup mode).
-
Project Directory: Specifies the project path to resolve relative texture paths.

-
Prohibit the automatic generation of XGen cache: Checked prevents the cloud from auto-generating missing Xgen pre-jobs.
9.2.4 Houdini-Specific Render Preset Functions
-
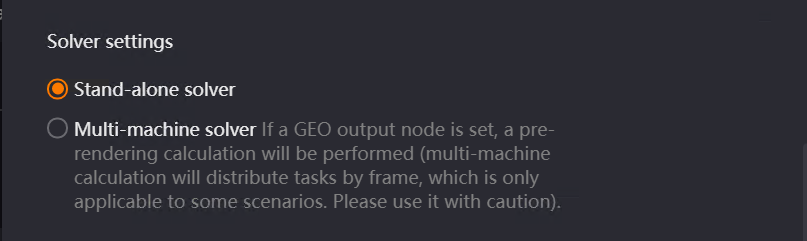
Solver: Defaults to [Single-Machine Solver]. [Multi-Machine Solver] can be used for caches/terrain, but fluid/smoke simulations requiring previous frames must use single-machine.
9.2.5 Clarisse-Specific Render Preset Functions
-
Keep Output Directory Suffix Level: Appends subfolders to the output path based on the scene’s original path hierarchy (Level 1–10).


9.3 Job Analysis Interface Functions (General)
This page mainly introduces the core functions and operating logic of the job analysis interface after a scene file is dragged and dropped for submission. It focuses on explaining related functions such as render preset selection, content display and editing, and drag-and-drop upload pop-up window control. This interface is common to Maya, Clarisse, Houdini, Katana, and Unreal Engine.
9.3.1 Overview
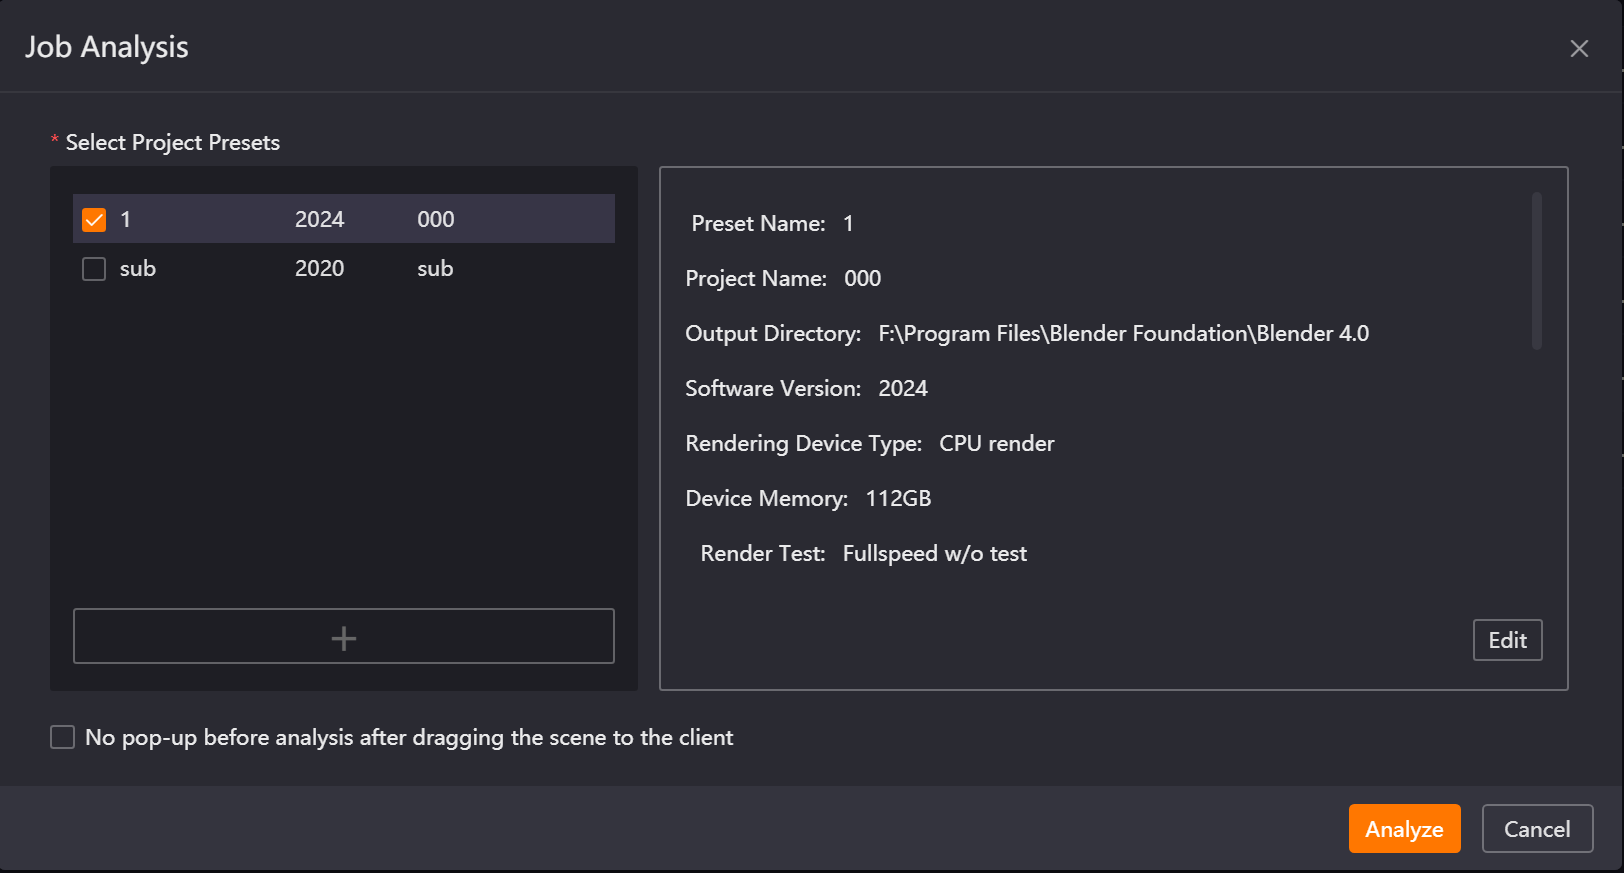
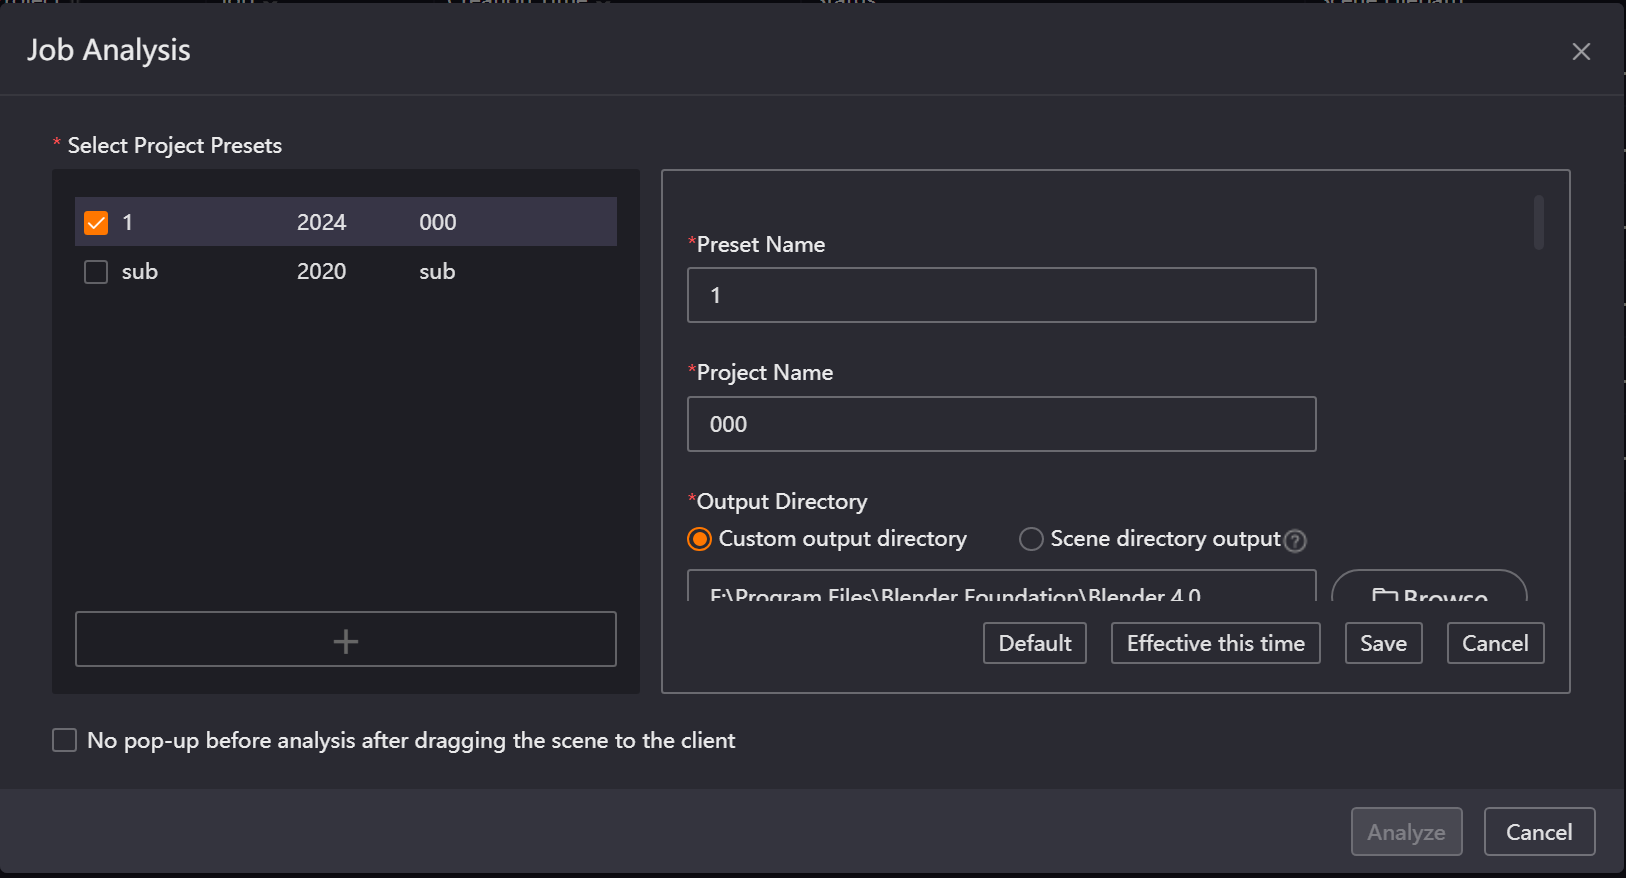
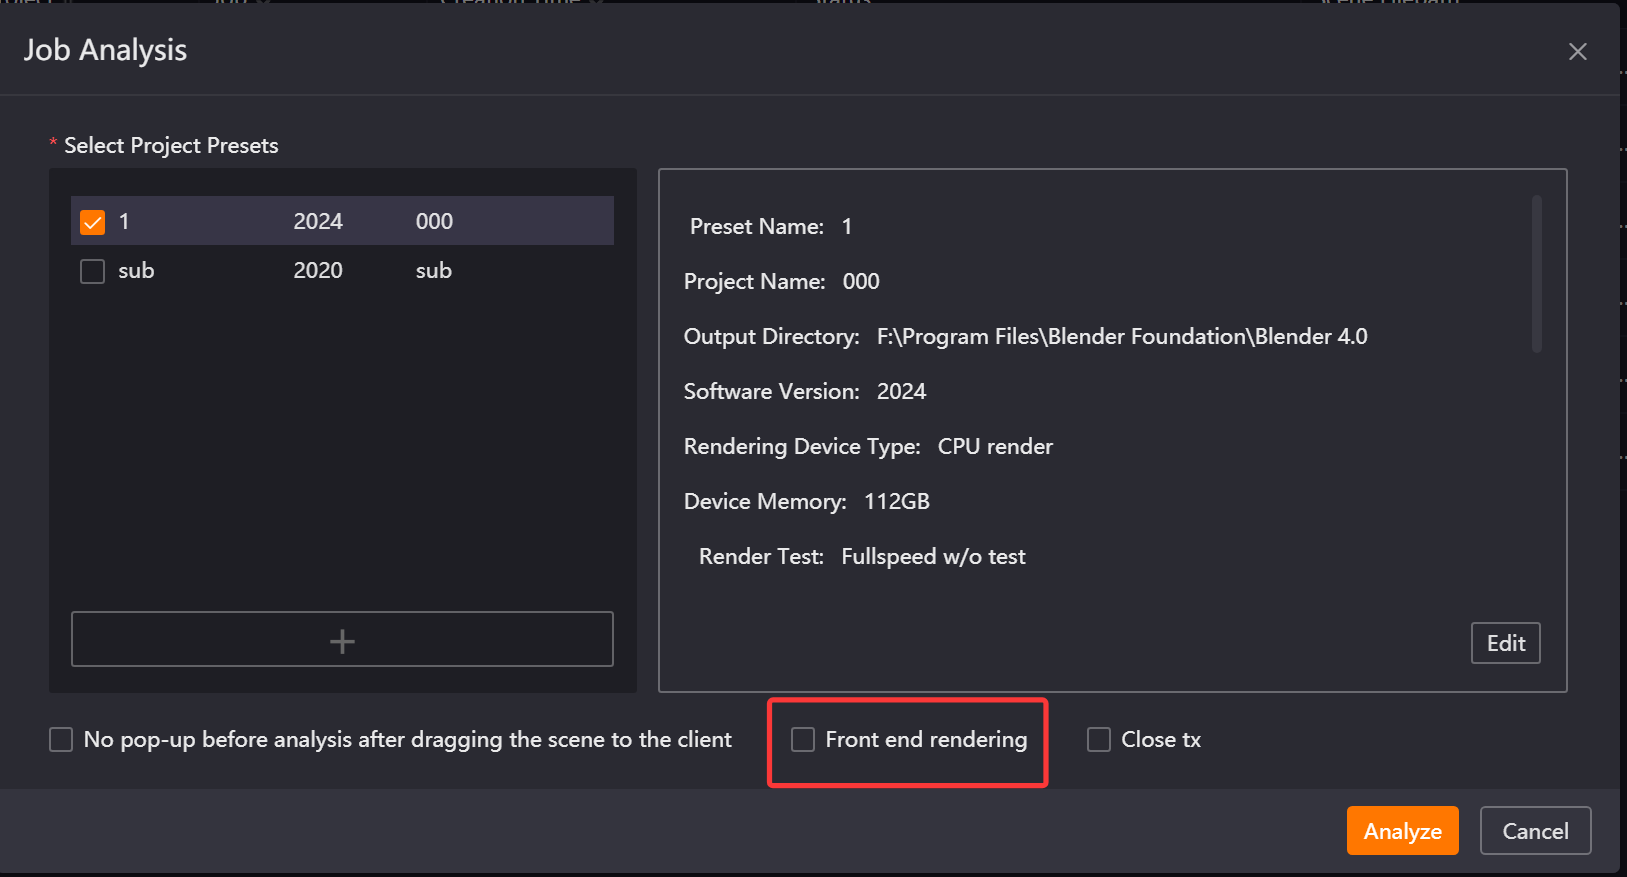
Dragging a scene file into the client will automatically pop up the [Job Analysis] window. This window is mainly used for managing Render Preset and viewing specific parameters before job submission. It supports operations such as creating, selecting, and editing presets. At the same time, it can control whether this analysis window automatically pops up during drag-and-drop uploading to improve job submission efficiency. The following content uses Maya as an example.
9.3.2 Introduction to Job Analysis Functions
-
Select Render Preset
-
Created Render Preset are displayed in the selection box. Only one render preset can be selected; multiple selections are not supported.
-
When selecting different presets, the content display box on the right will update the detailed parameters of the corresponding preset in real time.
-
Create New Render Preset
-
Click the [+] button in the window to pop up the render preset creation window. When creating a preset, parameters such as configuration name, output directory, software version, render category, selected memory, and render test mode need to be configured (for specific content, refer to the related instruction link for "Create Render Preset").
-
Preset Editing Function
-
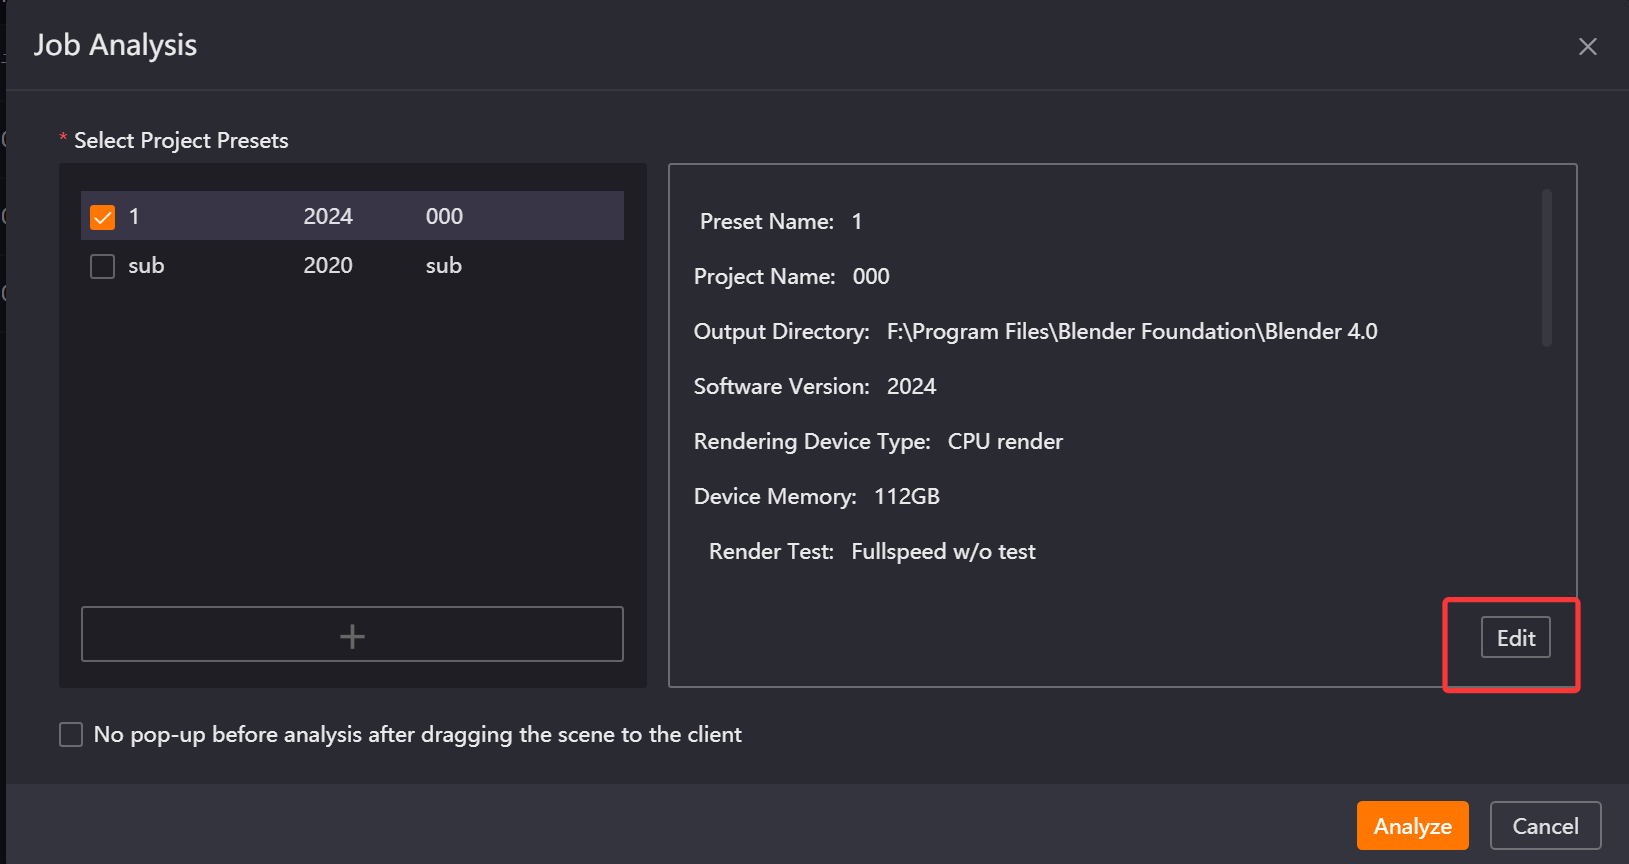
If you want to readjust the currently selected render preset, click the [Edit] button in the window. The content display box will switch to edit mode, showing all adjustable preset parameters, and four operation buttons will appear: [Default], [Effective This Time], [Save], and [Cancel].
Button Function Descriptions:
-
Default: After editing parameters, click this button to immediately restore the preset information to the initial configuration; all modifications will not take effect.
-
Effective This Time: After editing parameters, click this button to apply the modifications only to the current job. After closing the [Job Analysis] window, the preset will revert to its original settings, and this modification will not be saved.
-
Save: After editing parameters, click this button to permanently save the modifications to the preset. When the window is opened again after being closed, the modified parameters will still be displayed.
-
Cancel: After editing parameters, click this button to discard all modifications. The preset information will remain in its pre-edit state, and modifications will not be saved.
-
No pop-up before analysis after dragging the scene to the client
-
After checking this option and clicking [Analyze], dragging a scene file to submit a job again will no longer pop up the [Job Analysis] window. The job will directly enter the analysis process using the currently selected preset as the default. This operation is automatically synchronized to the "Do not pop up analysis window on scene file drag and drop" option in the [Settings] - [Submission Settings] - [Maya] page, and the default preset remains consistent with the currently selected preset.
Special Cases
-
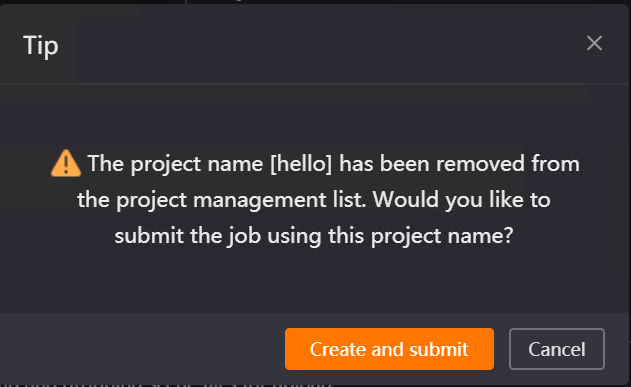
If the project name of the selected preset has been deleted or modified in [Settings] - [Basic Settings] - [Project Management], a prompt window will pop up to inform the user of the abnormal project name status. Clicking the [X] or [Cancel] button in the upper right corner of the prompt window will close the window and the job will not be submitted using this preset. Clicking the [Create and Submit] button will submit the job using this preset and automatically recreate the corresponding project name.
-
If you click [Analyze] directly without selecting a preset, the system will pop up a "Please select a render preset" prompt, preventing job submission.
9.4 Job Submission Interface Functions
This page mainly introduces the core functions and operational logic of the job submission interface that appears after clicking the [Submit] button once the scene file analysis is complete.
9.4.1 Overview
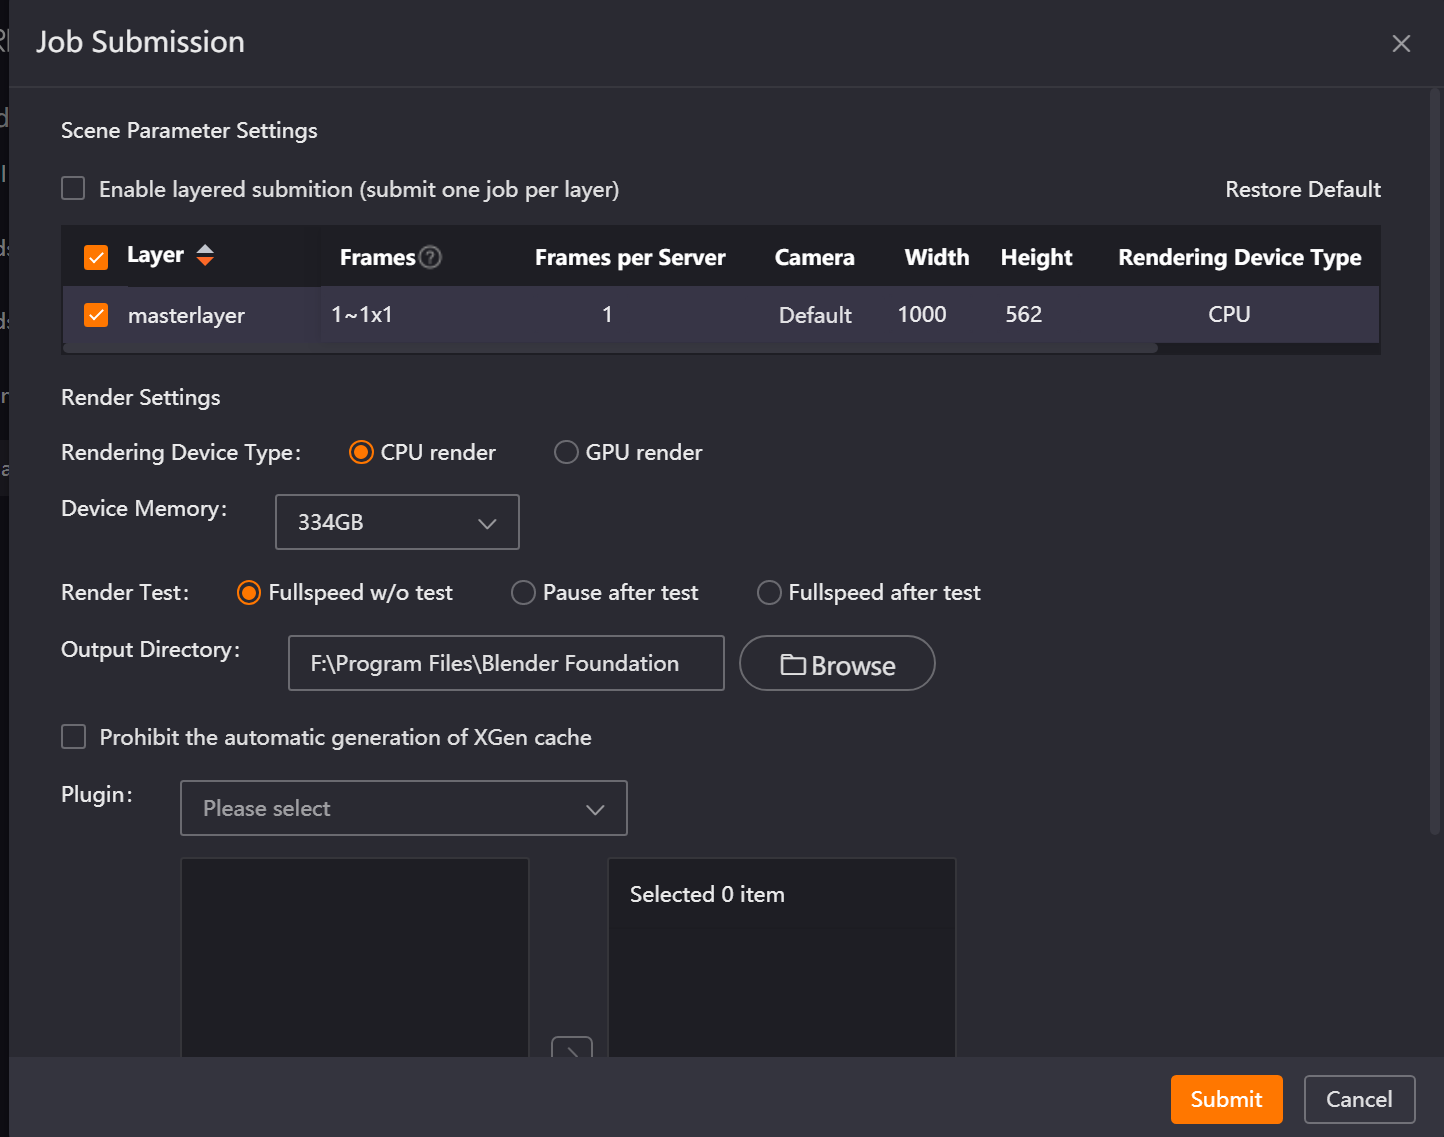
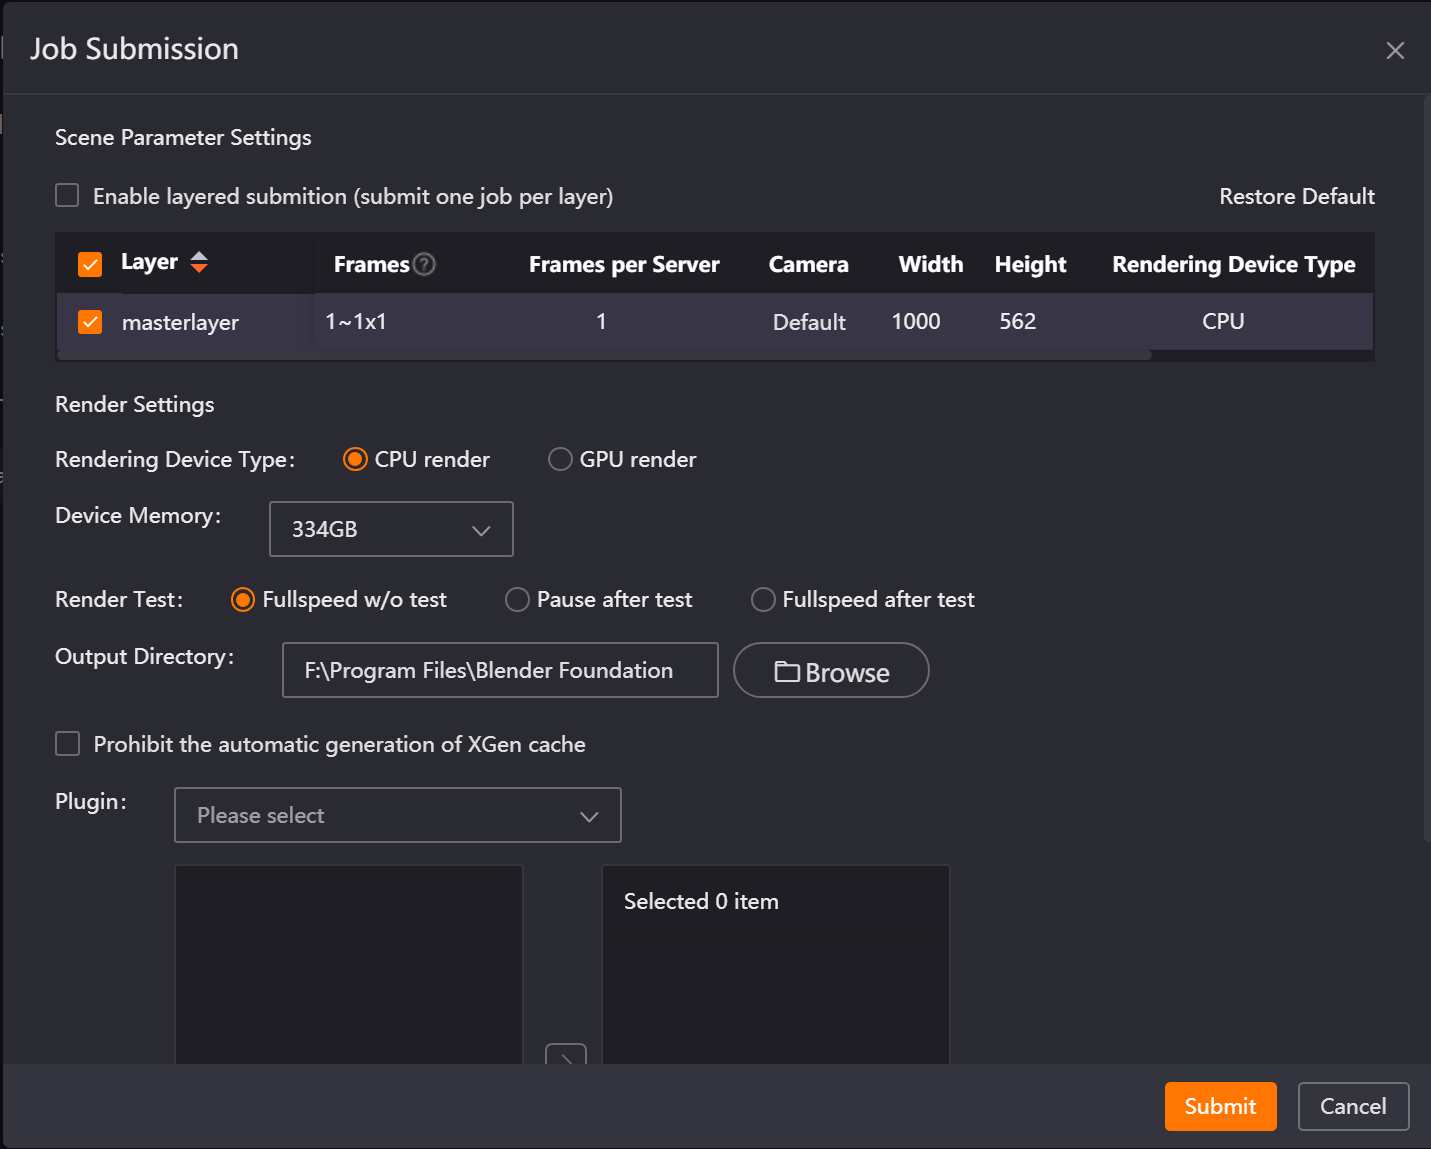
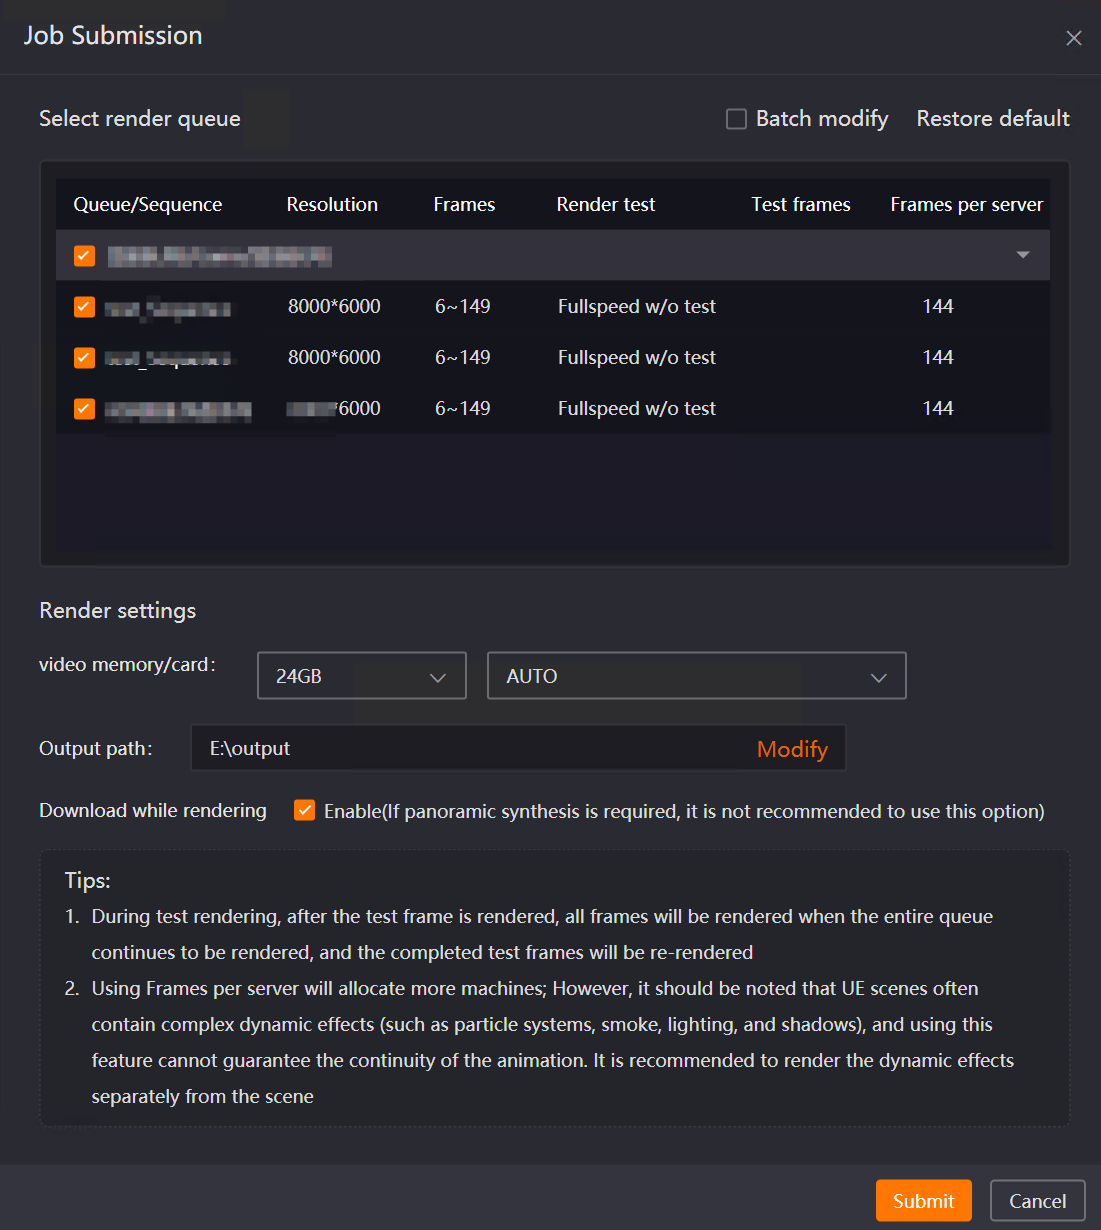
After the scene file analysis is completed, clicking the [Submit] button will pop up the [Job Submission] window. This window supports setting corresponding rendering parameters.
9.4.2 Introduction to General Job Submission Functions
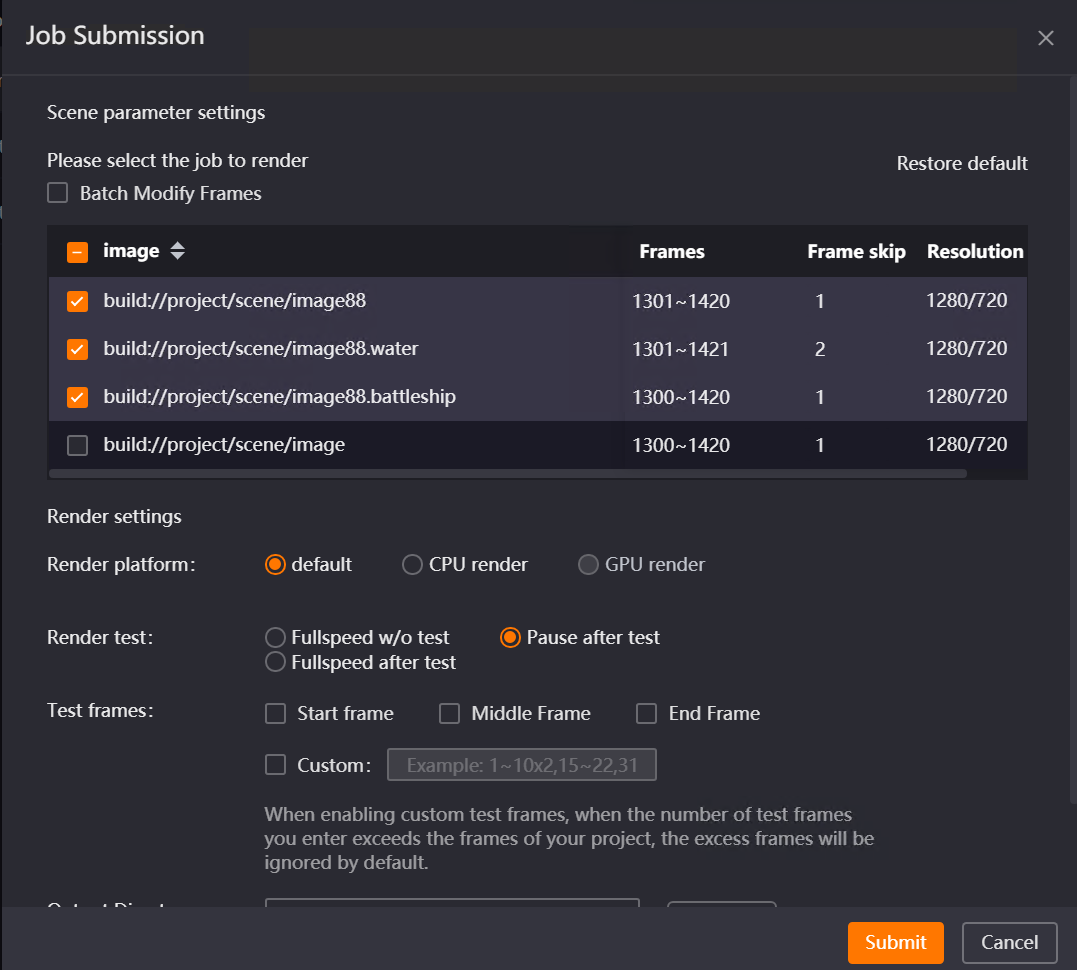
Scene Parameter Settings

-
Batch Modify Frame Range: Used for multi-render layer (node) scenes to batch and uniformly set the render frame range for all layers (nodes), improving parameter configuration efficiency.
Note:
-
Unreal Engine uses the "Batch modify" function, which is slightly different from this. Please refer to the Unreal Engine specific functions for details.
-
In Maya, this function needs to be used in conjunction with "Enable Layered Submission", and is unchecked by default.
-
Restore Default : Used to quickly reset to the scene’s initial values after modifying various parameters in the scene parameter settings, such as render layers (nodes), frame range, camera, width/height, skip frames, etc.
-
Render Layer (Node) Selection: Automatically identifies all submittable layers (nodes) in the scene. Supports selecting single layers (nodes), multiple layers (nodes), and selecting all layers (nodes) to be rendered.
Special Cases:
-
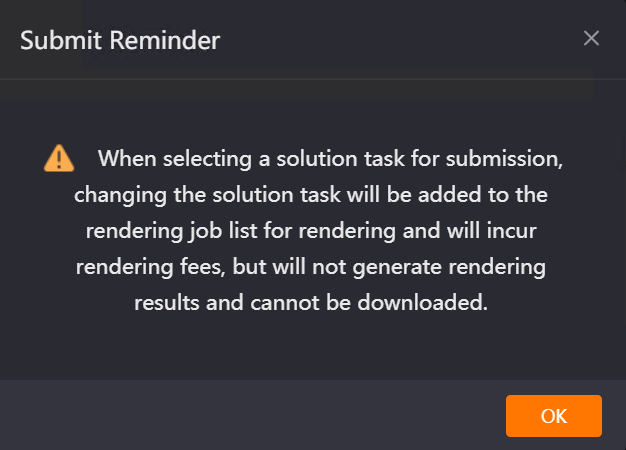
In Houdini, when selecting a node, if a node with a frame type of "solver" is selected, a prompt will appear; please select carefully.
Frame Range Settings
-
Used to set the frame sequence range for the rendering job, controlling the start frame, end frame, and skip frame interval. It defaults to the frame range set in the scene. Maya supports segmented settings and skip frame intervals in the following format: 1~10x2, 15~22, 31, 52. Clarisse, Houdini, Katana, and Unreal Engine only support single frames or a single continuous frame range. Format: 1~1 or 1~10.
-
When batch modification of frame range is not enabled, modifying the frame range of each layer individually will not affect the others.
-
When batch modification of frame range is enabled, modifying the frame range of one layer will synchronously change all layers.
-
Frames Skip : Used to set the skip frame interval for rendering, with a default value of 1. Maya’s "Frame Range" setting supports segmented settings and skip frame intervals, so it does not have this specific function separately. Unreal Engine cannot set skip frames and thus lacks this function. Checking "Batch Modify Frame Range" has no effect on the skip frame settings; this function is set independently for each node.
-
Frames per Server: Used to set the number of frames rendered simultaneously by a single server. This function can only be modified by render layer (node) in Maya and Unreal Engine, defaulting to the value set in the render preset. Other software cannot modify this value and relies on the value set in the render preset.
-
When the value is 1, during cloud rendering, the number of frames per render block will be automatically optimized based on the rendering time of a single frame. If Maya requires strictly one frame per machine rendering, you can click the contact customer service button at the top of the client to jump to the QQ customer service page.
-
When the value is greater than 1, the cloud will allocate the rendering job frame count for a single machine according to the set number and automatically enable full-speed rendering.
-
If test frames are set, they will be rendered independently first. After the test frames are completed, the remaining frames will be rendered according to the multi-frame per machine value.
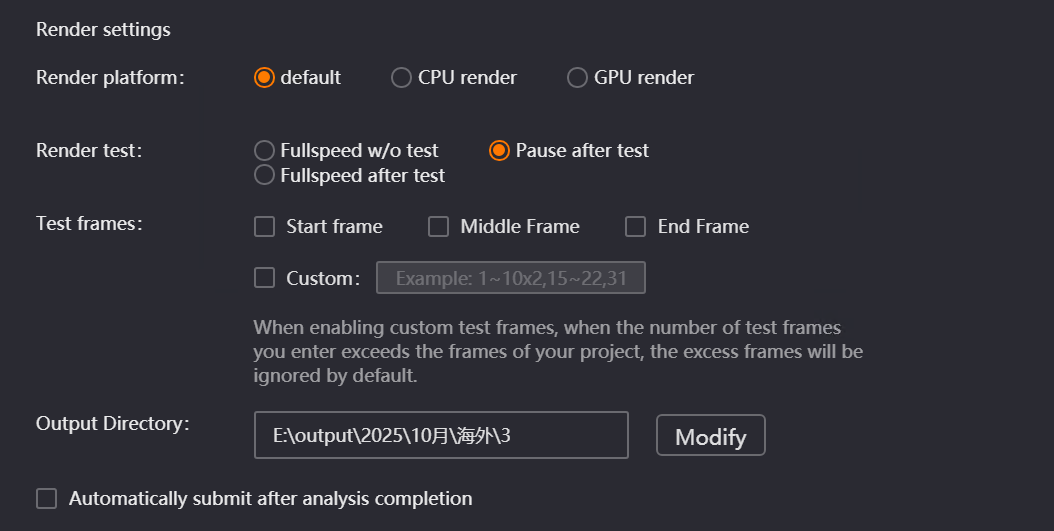
Render Settings
-
Render Platform: Used to switch the rendering mode to CPU rendering or GPU rendering: for CPU rendering, memory configuration can be selected; for GPU rendering, VRAM and graphics card configurations can be selected. It defaults to the render category chosen in the preset. Clarisse, Houdini, and Katana have a "Default" option. Clarisse’s "GPU Render" option is grayed out and cannot be selected. Unreal Engine only has GPU rendering, so it only displays VRAM and graphics card configurations.
Special Cases:
-
Regardless of whether the render category for Maya is selected as CPU or GPU at this time, when submitting a job, it must be judged in combination with whether the checked layers above are GPU layers or CPU layers. The specific submission situations are as follows:
-
Scenario 1: CPU rendering is selected for the render category, but a GPU layer is checked → The job cannot be submitted, and a prompt will say "The current rendering classification is CPU rendering, and layers rendered using GPU cannot be submitted. Please check and resubmit!." The render category must be changed to GPU rendering.

-
Scenario 2: GPU rendering is selected for the render category, but a CPU layer is checked → When submitting the job, a prompt will pop up saying "The selected layers can be rendered using CPU. Do you want to continue using GPU rendering?". Clicking "OK" will submit normally, and the cloud will use GPU machines to render the job (costs will increase accordingly). Clicking "Cancel" will not submit the job, allowing you to modify the checked render layers again.

-
Render Test: Used to set whether to perform a test render before full rendering and the rendering rules after the test. It defaults to the option recognized in the render preset. Optional modes are as follows:
-
Fullspeed w/o test: Renders at full speed immediately.
-
Pause After Test: Pauses after test frames finish; requires manual resumption.
-
Full-Speed After Test: Automatically switches to full-speed rendering after test frames finish.
-
Special Case: Unreal Engine can configure this option individually per node.
-
Note: Prioritize rendering designated test frames to quickly troubleshoot issues with scene settings, material textures, etc., and reduce resource waste from full-frame rendering.
-
-
Test Frames: Used to set the specific range of test frames, defaulting to the option recognized in the render preset. However, when "Pause Rendering After Test" or "Full-Speed Rendering After Test" is selected for Render Test, you can not only select the first frame, middle frame, and last frame as test frames, but also manually set custom frame numbers on this page. Special Case: Unreal Engine can configure this option individually per node.
-
Custom Test Frames: Used to manually set a custom frame sequence as test frames, unchecked by default. After checking, the first frame, middle frame, and last frame options will be automatically grayed out (cannot be selected simultaneously), and the input box is empty by default.
-
Supports three input formats: continuous frames (1~10), step frames (1~10x2, where the number after x is the step), and discrete frames (1,5,8). Multiple formats can be combined (e.g., 15,715x3,20).
-
Error Prompts: If Chinese, English, special characters, or incorrect formats (such as 1~10*2) are entered, clicking the "Submit" button will prompt "Custom test frame format error, the correct format is as follows: 1~10x2, 15~22, 31, 52". If the start frame > end frame, clicking "Submit" will prompt "The start frame of the custom test frame cannot be greater than the end frame". If non-existent frames (out of frame range) or duplicate frames are entered, Renderwow automatically ignores the invalid frames and only renders the valid test frames.
-


-
Output Directory: Used to specify the save location of image files after rendering is completed. The default path is consistent with the render preset template. Click the [Browse] button to pop up the output path settings box and specify a specific path. The path modified in the submission interface only takes effect for the current job and does not affect the path in the rendering preset. After multiple modifications, the last setting prevails.
-
Automatically Submit Job After Analysis Completion: Used to set whether the job is automatically submitted to the cloud after analysis is complete. After checking and clicking submit, the next time a job is submitted, it will automatically submit after analysis without manual triggering, which can improve the efficiency of multi-job submission. It is unchecked by default. Unreal Engine does not have this configuration. Note: After checking to submit a job, the general setting under [Settings] - [Submission Settings] - [Software Tab] will also be checked synchronously.
9.4.3 Introduction to Maya Exclusive Job Submission Functions
Scene Parameter Settings
-
Enable Layered Submission (submit one job per layer): Used to control the submission method of render layers, achieving independent splitting and submission of multiple render layers to facilitate separate management of the progress and parameters of each layer’s render job. Once checked, each job is named in the format: Scene Name-Layer Name. Note: If the selected render layers are all CPU render layers, the submission interface will forcibly check "Enable Layered Submission", and it cannot be unchecked.
-
Split Rendering Jobs by Camera: Used to split rendering jobs of different cameras by layer, achieving independent split rendering jobs for multiple cameras in a single layer. It is suitable for synchronous rendering scenes with multiple perspectives. Once checked, each job is named in the format: Scene Name-Layer Name-Camera Name. Note: This function needs to be used in conjunction with "Enable Layered Submission", and is unchecked by default.
-
Camera Selection: Used to select the corresponding camera perspective to be rendered for the current render layer. Clicking the camera option will pop up a drop-down box displaying all available cameras in the scene, supporting switching and selecting among multiple cameras. It defaults to "Default Camera," which is the "renderable camera" configured in the scene. Regardless of whether there are one or more renderable cameras in the scene, it automatically matches the scene configuration for rendering. If switched to another camera, it only renders that specific camera perspective.
-
Width and Height Settings: Used to set the width and height of the rendered output image, controlling the image resolution. It defaults to being consistent with the resolution set in the scene.
-
Render Platform: It will automatically recognize whether each layer in the scene is a GPU layer or a CPU layer and display it accordingly. The basis for this recognition is independent of the plugins selected in the render preset in the drag-and-drop settings; it solely depends on the renderer type of each layer in the scene, or the internal settings of the renderer itself.
Render Settings
-
Prohibit the automatic generation of XGen cache: Used to control whether the cloud automatically generates Xgen cache files. The default checked state is consistent with the render preset:
-
When checked: Submitting a job missing Xgen cache will not generate an Xgen prerequisite job. You must manually ensure the Xgen cache is complete before submission.
-
When unchecked: Submitting a job missing Xgen cache will prompt the cloud to automatically generate an Xgen prerequisite job to supplement the cache before executing the main render.
-
9.4.4 Introduction to Houdini Exclusive Job Submission Functions
Scene Parameter Settings
-
Frame Type: Automatically recognizes the frame type of the node. It serves only as a display item and cannot be modified. For example, if the node type is "Simulation," no render results will be generated upon submitting the render. Thus, checking it will trigger a prompt.
9.4.5 Introduction to Clarisse Exclusive Job Submission Functions
Scene Parameter Settings
-
Resolution: Used to display the resolution of the rendered output image. It defaults to the resolution set in the scene and cannot be modified.
9.4.6 Introduction to Unreal Engine Exclusive Job Submission Functions
Scene Parameter Settings
-
Render Queue: Used to identify and display the render queues created by the user in the project, as well as the sequence frames contained within the queues. Different render queues support expanding and collapsing for viewing. Note: If the sequence frame animation uses the engine’s default configuration parameters, it cannot be submitted for cloud rendering and will be grayed out in the submission interface. You need to reset the parameters in the scene and save before initiating the job submission process.
-
Batch Modify: Used to batch modify the rendering parameters of queues. It is unchecked by default. After checking, modifying the frame range, render resolution, render test, test frame, or multi-frame per machine parameters of any checked queue will synchronously modify the rest of the checked queues.
-
Render Resolution: Used to set the width and height of the rendered output image in the format of width*height. It defaults to recognizing the parameters in the scene.
-
Render Test: Used to set whether to perform test rendering before full rendering and the rendering rules post-test. It defaults to displaying the overall setting from the render preset. The submission interface supports setting the test type per single queue.
-
Test Frames: Used to set the specific range of test frames. It defaults to displaying the frames from the render preset, and the submission interface supports setting test frames for single queues. If the render test mode is set to "No Test, Full-Speed Rendering," test frames cannot be set. If the render test mode is set to "Full-Speed Rendering After Test" or "Pause Rendering After Test," test frames can be set. It supports two input formats: continuous frames (1~10) and discrete frames (1,5,8). Multiple formats can be combined (e.g., 1~5,20).
Render Settings
-
Download While Rendering: Used to control the download timing of the Unreal Engine job rendering results. It defaults to displaying the setting from the render preset. Download situations after checking:
-
For jobs where multi-frame per machine is unchecked, already completed frames can be downloaded in real time while the job is not yet fully completed.
-
For jobs where multi-frame per machine is checked, already completed frames can be downloaded in real time while the subjob is not yet fully completed.
Note: If a third-party panoramic rendering plugin such as "camera360" is used for panorama rendering, it must be manually unchecked.
9.5 General Settings
9.5.1 Overview
The General Settings interface is an important setting for controlling the job submission process. By checking the corresponding options, you can achieve functions such as job analysis pop-up control, automatic submission, layered submission, camera split rendering, rendering mode, and TX file control.
9.5.2 Introduction to General Functions
-
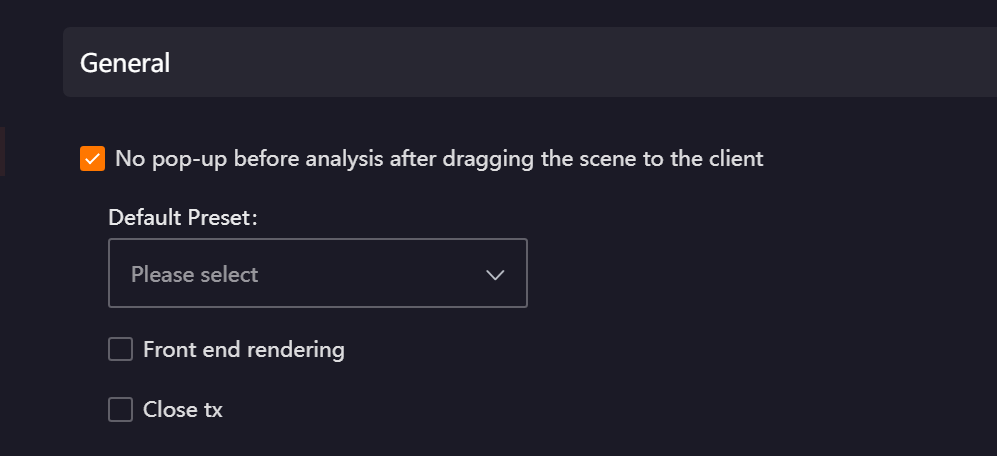
No pop-up before analysis after dragging the scene to the client(Unreal Engine does not have this function)
-
This option is used to control whether the job analysis pop-up window automatically appears when a scene file is dragged and dropped to upload to the client.
-
When checked: Dragging a scene will directly enter the analysis process (without manual trigger) and no analysis pop-up will be displayed. This option needs to be used in conjunction with "Default Preset," which is the render preset template used by default during every scene analysis. If no render preset has been added, a default preset cannot be selected. When dragging a scene to submit, a prompt "Please select a default preset" will pop up, and the drag-and-drop submission function cannot be normally executed.
-
The checked state of this option and the default preset selection will be remembered by the current account.
-
Automatically Submit Job After Analysis Completion (Unreal Engine does not have this function)
-
This option is used to control the submission method after the job analysis is complete:
-
When checked: There is no need to manually click the "Submit" button after the scene analysis is complete; the system will automatically submit the job to the cloud for rendering. The checked state of this option will be remembered by the current account.
-
This option can be used together with "No pop-up before analysis after dragging the scene to the client" to achieve a simplified process of "drag and drop scene file -> automatic analysis -> automatic submission."
-
Abnormal Condition: If the render category of the render preset does not match the actual render layer category of the scene (e.g., the preset is CPU rendering, but the scene contains GPU layers), a prompt will pop up after analysis: "Currently on CPU rendering, GPU layers cannot be submitted. Please check and submit again!". Job submission will be terminated.
9.5.3 Introduction to Maya Exclusive Functions
-
Front End Rendering: Front End Rendering is used to control the display mode during job rendering:
-
When checked: The job will render in the foreground in windowed mode (consistent with local rendering, where the render window is visible).
-
When unchecked: The job will render in background mode (no render window, showing the mayabatch process in Job Manager).
-
This option requires the user to have "Front End Rendering" permission. If lacking permission, the option is not displayed. Contact online customer service if needed.
Display Location:
-
After checking "No pop-up before analysis after dragging the scene to the client" in General Settings, it is displayed in the no pop-up settings area.
-
If "No pop-up before analysis after dragging the scene to the client" is not checked in General Settings, it is displayed in the job analysis pop-up window after dragging the scene.
Note: The checked state of this option will be remembered by the current account, but the checked states in the no pop-up interface and the job analysis pop-up are independent and do not share memory (e.g., if checked in the no pop-up setting, it may still remain unchecked in the analysis pop-up).
-
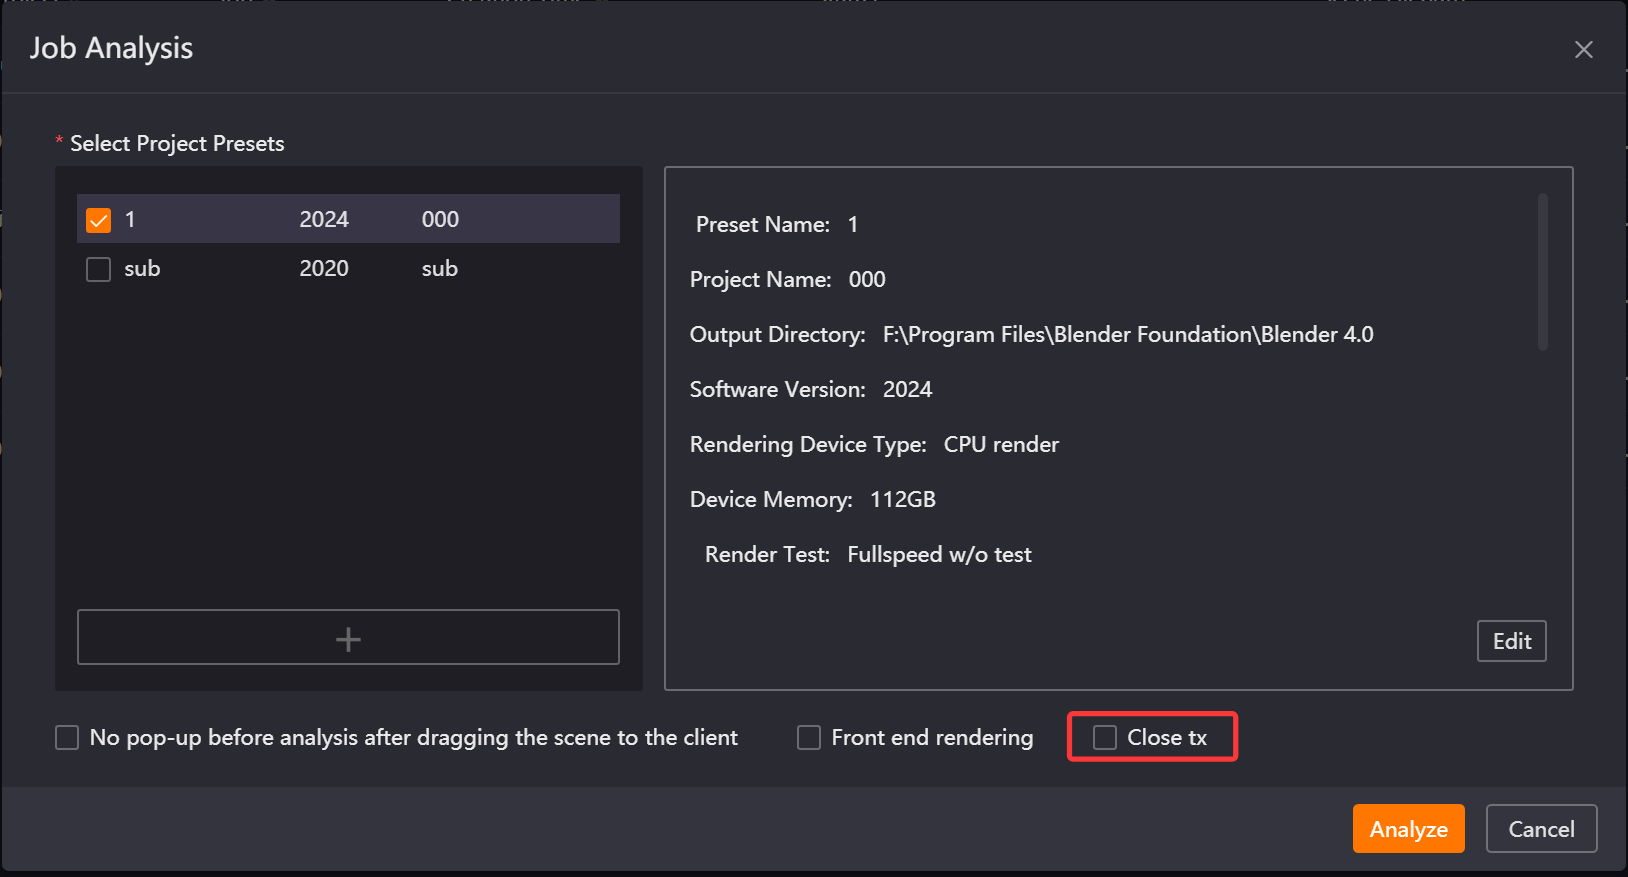
Close TX: The Close TX function is only applicable to Arnold scenes with textures. It is used to control whether to use TX files during cloud rendering:
-
When checked: The cloud will not use TX files for rendering.
-
When unchecked: The cloud will execute rendering according to the "Use TX" option in the scene render settings.
-
This option requires the user to have "Close TX" permission. It is not displayed without permission. Contact online customer service if needed.
Display Location:
-
After checking "No pop-up before analysis after dragging the scene to the client" in General Settings, it is displayed in the no pop-up settings area.
-
If "No pop-up before analysis after dragging the scene to the client" is not checked in General Settings, it is displayed in the job analysis pop-up window after dragging the scene.
Note:
-
The checked state of this option will be remembered by the current account, but the checked states in the no pop-up interface and the job analysis pop-up are independent and do not share memory (e.g., if checked in the no pop-up setting, it may still remain unchecked in the analysis pop-up).
-
Regardless of whether the option is checked, if "Auto-generate TX" is checked in the scene, TX files will not be automatically generated during cloud rendering. If TX files are needed for rendering, you must manually ensure that TX files are not missing in the scene before submission.
-
Enable Layered Submission (submit one job per layer): Used to control the submission method of render layers. When checked, the scene submission will be split by render layer, and each layer will be submitted as an independent job to the cloud. The job name format is "Scene Name-Layer Name". The checked state of this option will be remembered by the current account.
-
Split Render Job by Camera: This is an associated option with "Enable Layered Submission (submit one job per layer)." When both are checked, jobs are split and submitted by "Render Layer + Camera." The number of jobs = number of layers × number of cameras, and the job name is "Scene Name-Layer Name-Camera Name." The checked state of this option will be remembered by the current account.
9.5.4 Introduction to Unreal Engine Exclusive Functions
-
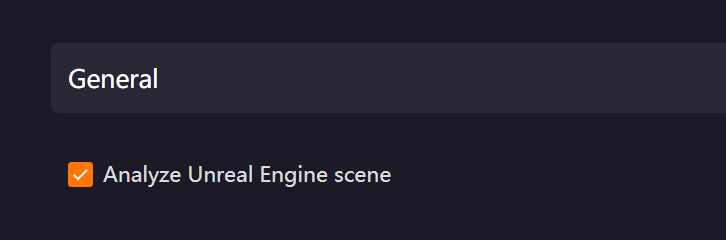
Analyze Unreal Engine scene (Use the new drag-and-drop analyze Unreal Engine workflow): After checking, you can first create a render preset like in Maya and other software, then drag and drop the scene and reference the corresponding preset to submit the job. It is checked by default, and it is generally not recommended to uncheck it. After unchecking, render jobs cannot be submitted.
9.6 Software Installation Path (General)
9.6.1 Overview
This function is used to solve the problem where some users experience a "render software not found" error when dragging and dropping jobs for submission due to non-standard installation of rendering software, which results in no installation path information in the registry. You only need to configure the correct path in the "Software Installation Path" to drag and drop submit jobs normally.
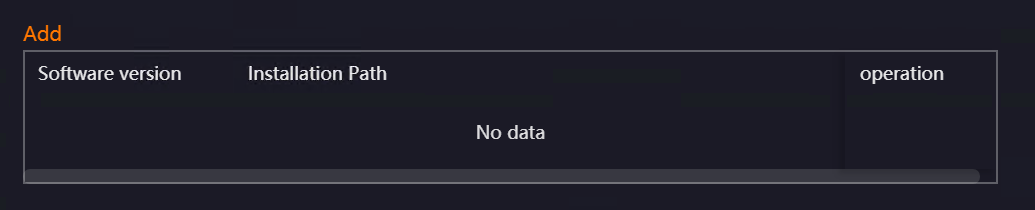
9.6.2 Function Introduction
-
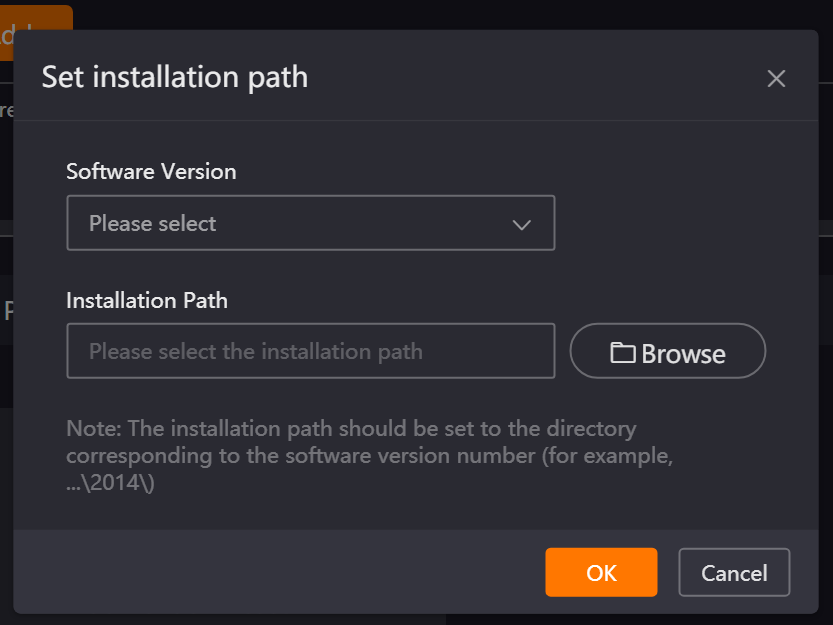
Add Function: Click the [Add] button to pop up the "Set Installation Path" page. You can click the "Software Version" drop-down box to select the corresponding version. Click the "Select" button to open the installation path selection pop-up window and select the correct installation path. After clicking "OK," the interface will synchronously display the version and path information, consistent with what was filled in.

-
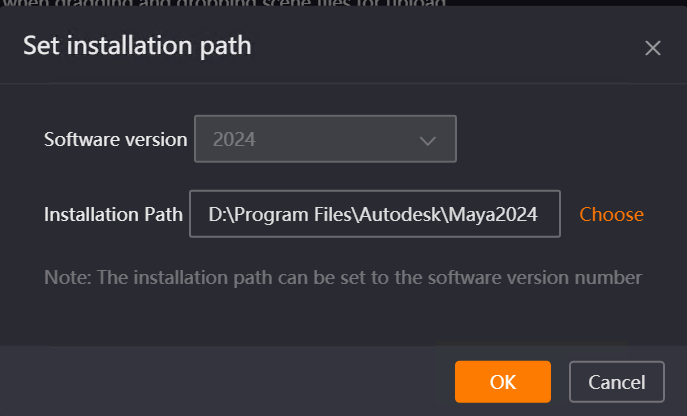
Edit Function: Click the [Edit] button to pop up the "Set Installation Path" page. The software version cannot be modified; only the installation path supports modification. After submitting the modified path and clicking "OK," a prompt will say operation successful, and the interface will synchronously update the path information.
-
Delete Function: After clicking [Delete], an "Operation successful" prompt will appear, and the corresponding version and path will be removed.